Pop Art Photoshop Tutorial
This is a fun Photoshop tutorial that’s going to teach you how to create Pop Art in the style of the famous silk screen prints by Andy Warhol. It’s really good practice and is actually being made in requests I get from school teachers. Every art student in the country wants to create pop art portraits and this is a great way to get that look using Photoshop.
So grab a picture, open it in Photoshop and follow along with the tutorial below.
How to create Pop Art in Photoshop - Instructions
My advice here is open your portrait in Photoshop and follow along with the video above. However, I have also added a step by step guide below should you need it.
Convert to B&W, create white background and increase contrast
Open image in Photoshop
Duplicate layer. Right click on layer > Duplicate layer (Ctrl/Cmd + J) > Name this layer ‘Model’
Select ‘Quick mask mode’ in the toll box > select the Pencil tool > Take the opacity to 100% and have a hard edge pencil
Draw inside the model (try not to go over the edges and you don’t need to be that accurate) > Fill the inside of the model with the pencil tool or the paint bucket tool
Press the letter ‘Q’ to create selection
Go to Edit > FIll > select ‘White’, Blend mode ‘Normal’, Opacity 100% > click OK
Deselect the selection by pressing ‘Ctrl/Cmd + D’
Go to image > adjust > Levels > move the input levels slider to get high contrast.
Change the Layer Blend Mode
Changing the blend mode to Multiply will allow the layers below to blend through and in turn, show the colours we will use later in the tutorial.
9. Select the Model Layer > click on the dropdown menu that states ‘Normal’ > Select ‘Multiply’.

Humphrey Bogart by George Hurrell

Remove the background and increase the contrast
Get access to ALL our online courses - 1000’s of videos, worksheets, critiques of members work, personalised support and much more with our monthly membership.
Add colours using layers
10. Add New Layer by clicking the ‘New Layer’ icon in the layers palette > Name the layer ‘background’ > place it under your model layer
11. Fill this layer with a colour. Go to Edit > Fill > select ‘Colour’ from the drop down list > choose a colour > click OK
12. Add another layer > name the layer a part of the clothing e.g. ‘Coat’
13. Select the Brush tool > Make sure the Opacity and Flow are set to 100%
14. Click ‘Foreground colour’ in the toolbox and choose a different colour
15. Paint over the coat.
Add images - Choose foreground colour - Create new layers in photoshop - Name layers and add colours to sections of the image - Background and coat colours added - use file text as image description and alt text.

Create new layers in photoshop

Choose foreground colour

Name layers and add colours to sections of the image

Background and coat colours added
Continue to add sections via layers
16. Add New Layer by clicking the ‘New Layer’ icon in the layers palette > Name the layer and different part of the image e.g. ‘Hat’
17. Repeat the previous process. Select the Brush tool > click ‘Set foreground colour’ and chose a different colour > Paint over the Hat
18. You can use the ‘Eraser Tool’ to take away sections you may get wrong
19. Do the same on other sections of the image. Remember to do each section in a different layer
20. Your Model layer must always be your Top layer.

Photoshop’s layers panel showing all layers in completed portrait

Finished Pop Art portrait
Save your image
It’s important that you save your image as a Photoshop file. This will allow you to continue to edit the image in the future should you wish to. The you will need to save the image as a Jpeg. Saving jpegs will allow you to save different versions of your pop art.
21. Save your image as a Photoshop file (.psd ). Go to File > ‘Save as’, name your file and from the format drop down list choose ‘Photoshop (*.PSD,*.PDD)’. This should be selected by default. Make sure you know where you save your work
22. Then save the image as a ‘JPEG’ (.JPG ) file. Go to File > ‘Save a Copy’, this time from the dropdown list choose ‘JPEG (*.JPG,*.JPEG,*JPE)’.
Creating different colours
Now you have your image saved as a Photoshop file, it’s really easy to create different versions using Layer Styles
23. Double click one of your coloured layers. The ‘Layer Style’ box will appear
24. Click the word ‘Colour Overlay’ > Click the coloured box > select a different colour > click OK
25. Do the same for the other layers
26. When happy save the file as a Jpeg. Go to File > ‘Save a Copy’ > name it a different name e.g. ‘Pop art 2’ choose ‘JPEG (*.JPG,*.JPEG,*JPE)’ from the drop down menu
27. Do this for at least 4 different versions.

Layer styles in Photoshop allows you to change the colour of your layers easily

Different versions of the same Pop Art portrait
Creating a repeated Pop Art piece
One of the Andy Warhol styles was to create multiple screen prints on one canvas. Here is how to mimic that look in Photoshop
28. Go to File > Scripts > Load Files into Stack > click Browse > find the Jpegs you just saved. Hold down the Ctrl/Cmd button to select several files at once > Click OK
29. In the layers pallet select all the layers. Hold down the Ctrl/Cmd button to select several layers at once
30. Go to Edit > Free Transform (Ctrl/Cmd T) and resize the images to slightly smaller than the fraction of the amount of images. E.g. 4 images, resize to just below ¼ of the page
31. Now select only one layer and move this layer to one corner of the page. Repeat this with the other images
32. Add a Solid Colour adjustment layer > move it to the bottom layer > change the colour to white if needed
33. Save as a Jpeg and or Psd.

Loading files into a stack in Photoshop

Move your different versions to create a repeated Pop Art piece
Other Examples of Pop Art in Photoshop

Pop art version of Lady Ga Ga
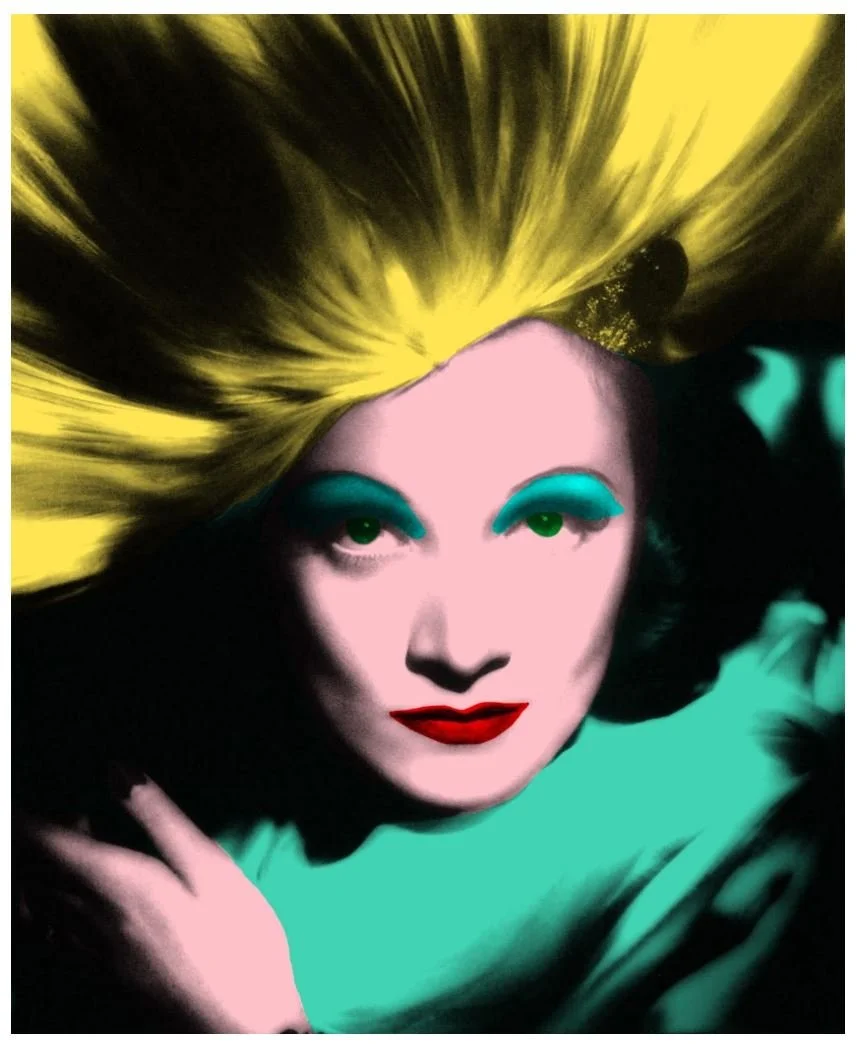
Pop art version of Marlene Dietrich
Like this? - Check out similar tutorials below

I hope you liked this pop art Photoshop tutorial. If you did, please leave us a comment and support us by sharing it with your friends and subscribe to our newsletter at the bottom of this page for more.
We also have an excellent learning community on social media so please join us there as well.
Thanks for watching and remember – Learn more at The School of Photography.
