Photography Light Leak Overlays – 50 Free & How to Use
Learn how to create light leak photography in photoshop with our beginner-friendly guide! Get creative and get a vintage look by adding the light leak effect to your photography! Or use a free light leak overlay from our light leaks pack for a quick fix!
Scroll down this page to get our 50 free Photoshop Light Leak Overlays.
What Is a Light Leak Effect in Photography?
Light leaks have become a nostalgic element in the world of photography, as they create a sense of vintage flair. Originating from the days of film photography, light leaks were initially considered an unwanted flaw, caused by unintentional exposure to light. However, over time, photographers embraced these imperfections, turning them into a distinctive and sought-after aesthetic. Today, light leaks are not just a product of chance; they have become a deliberate and creative tool to enhance digital imagery.
Both Photoshop and Lightroom offer the ability to create a light leak effect for your photography without the use of destructive editing techniques, but the former not only allows you extensive creative control due to the large array of tools, filters and blending modes you can also use layers for maximum experimentation and adaptation of light leak overlays; however, Lightroom can be a simpler process as you can use presets and simple masks to create the effect.
Following on from our Lightroom tutorial, we’re going to show you how to create photoshop light leak overlays. While a little bit more complex in Lightroom, there’s a lot of opportunities for customisation and adaptation in Photoshop. To take some of the complexity away from you, we’ve created 50 free light leak photoshop overlays that you can use to create the light leak effect quickly. Download these via the form below.
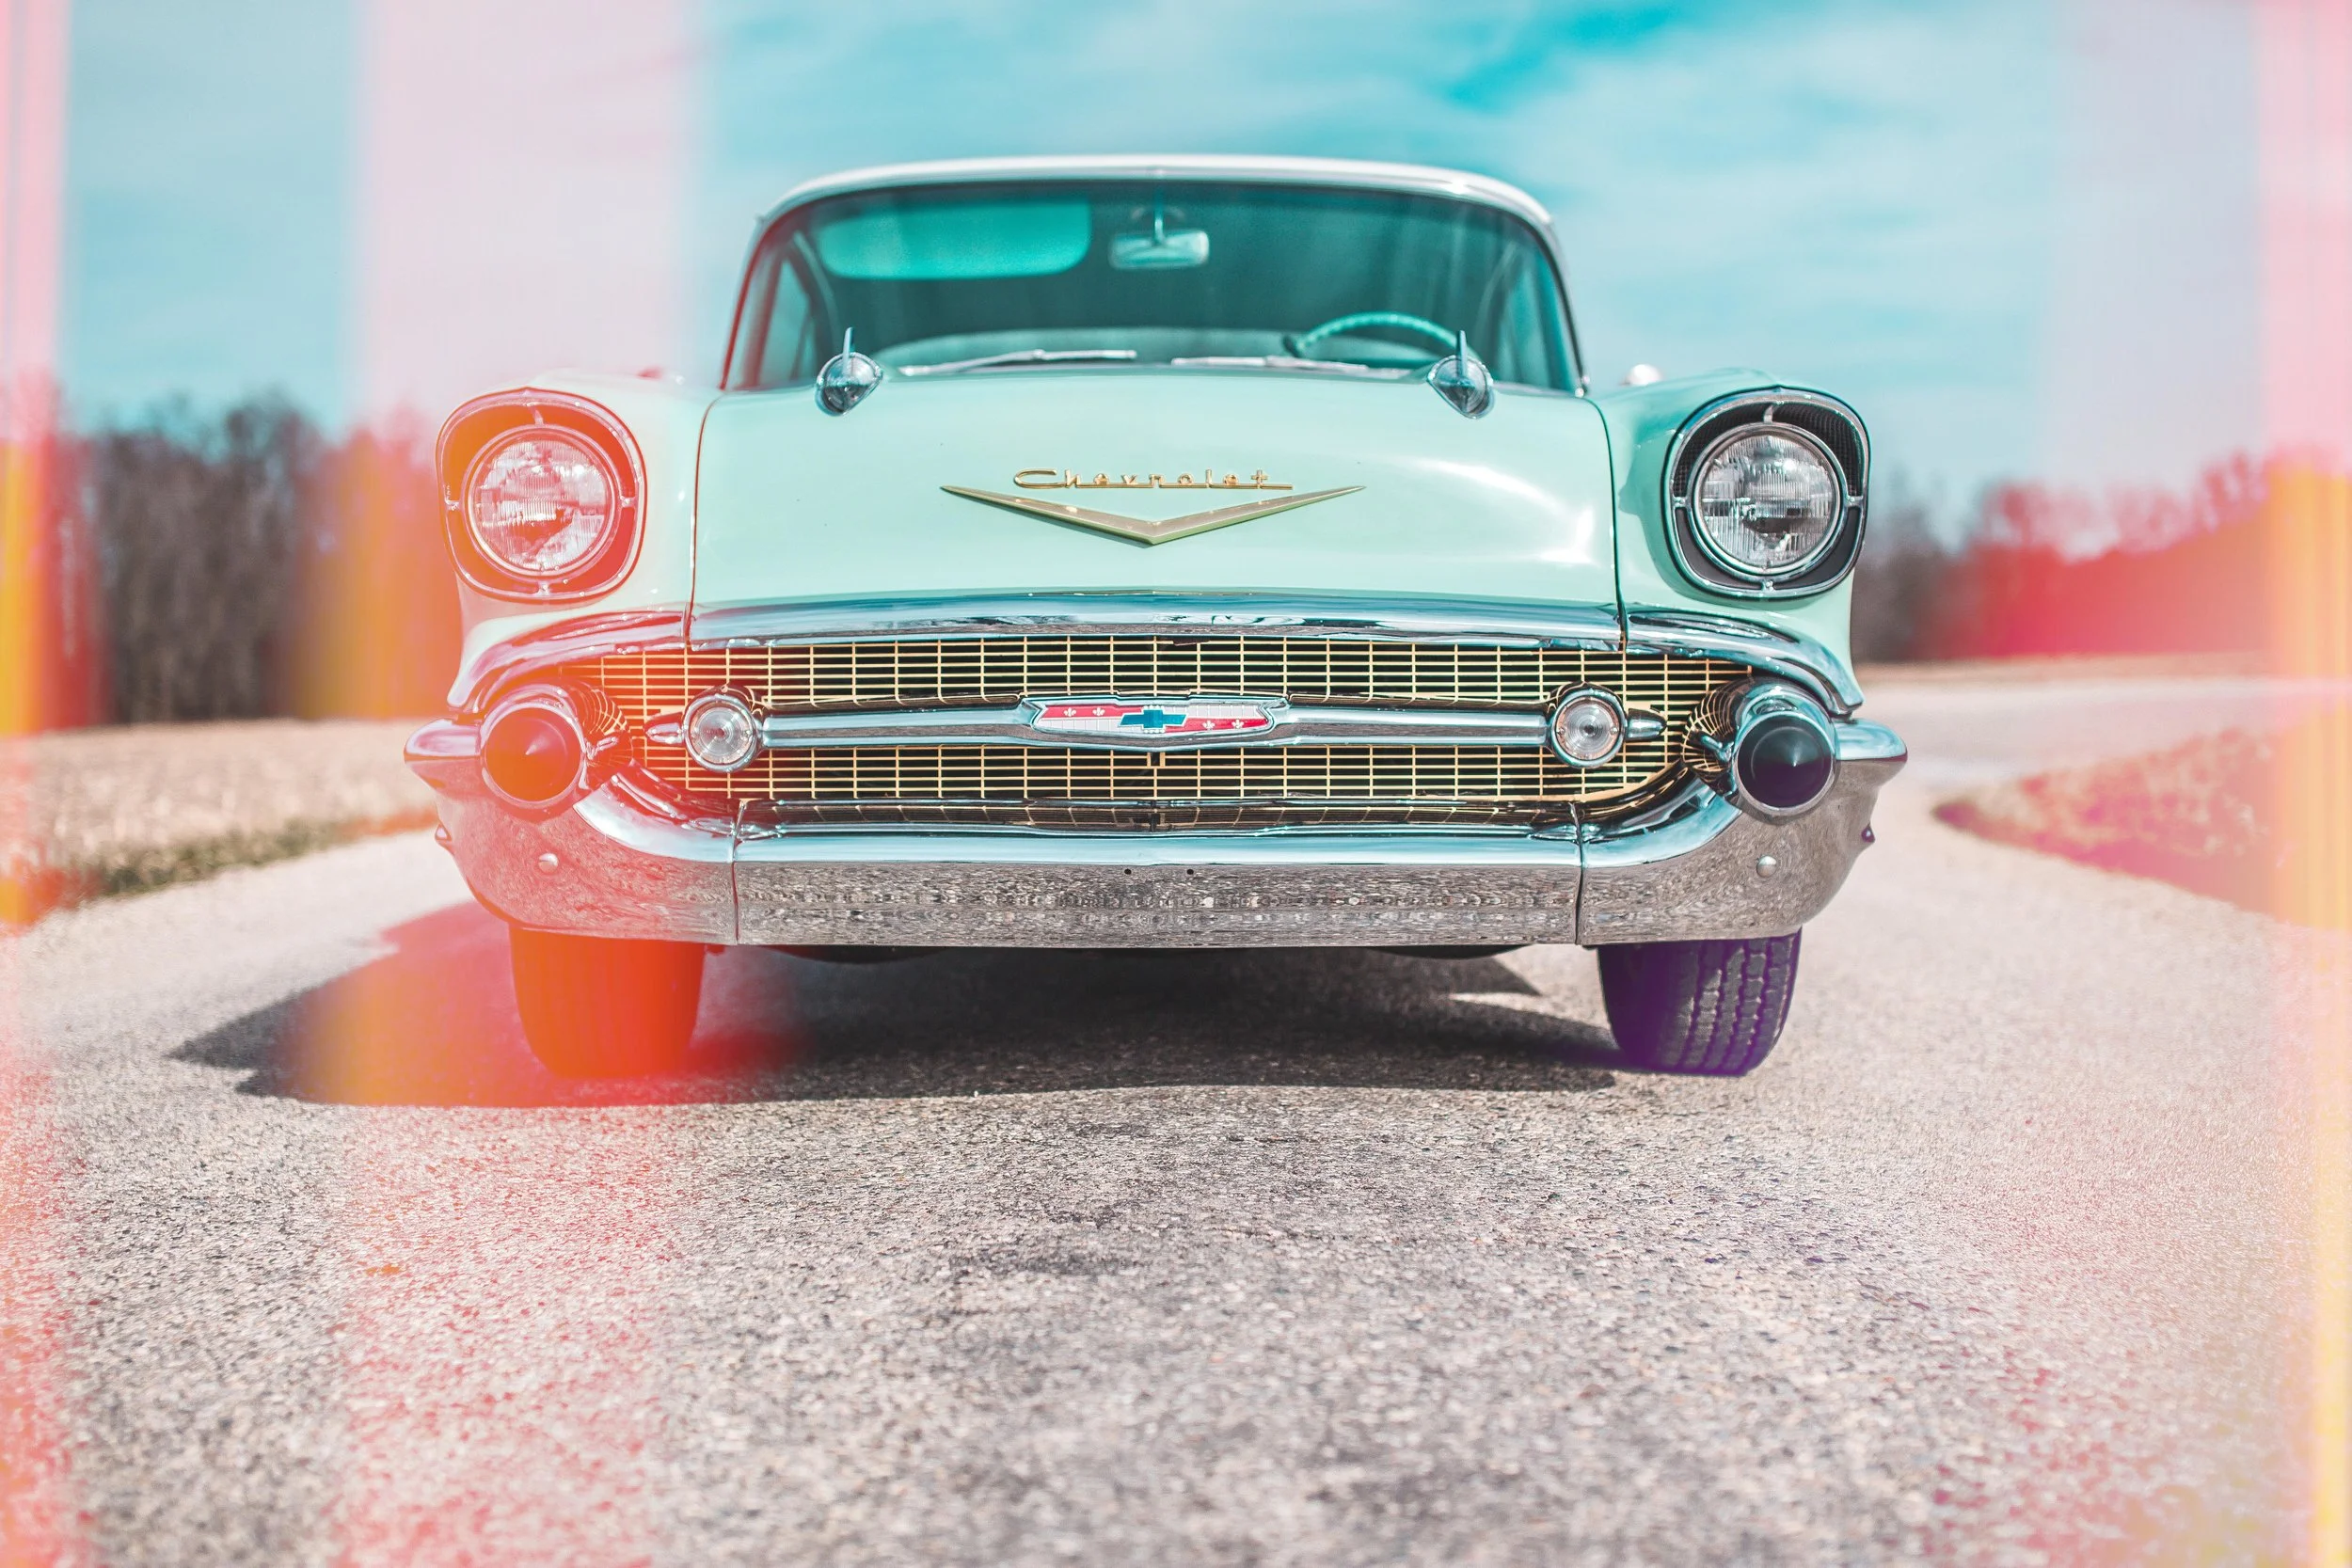
Photo by Courtney Cook on UnSplash using our Multi 10 light leak overlay
Get access to ALL our online courses - 1000’s of videos, worksheets, critiques of students work, personalised support and much more with our monthly membership.
How To Create a Light Leak Effect in Photoshop
There are two different ways that we’re going to show you to make light leak overlays in Photoshop. Both methods use overlays and blending modes to create a light leak effect on your photos. Creating light leak overlays in Photoshop can be a bit of a complicated process, so we’ve created 50 free light leak overlays for you to download and use to save you time! Download these via the form above and below are the instructions to use and create them in Photoshop.
If you’re looking for a one-click solution, why not try our Lightroom tutorial for creating light leaks?

Original image without light leaks. Photo by Reba Spike on UnSplash

After photoshop light leak overlays 4 and 5 applied.
Creating Light Leaks the Easy Way - Use Our Overlay Downloads
Step 1 - Open your image in Photoshop

Open your image. Original image by Amandine Bataille on Unsplash
Launch Photoshop and open the image you wish to work on.
Step 2 - Basic editing
If needed, add any adjustments you may need to your photo, such as adjusting levels, curves and spot removal.
Step 3 - Adding the overlay

Place the light leak overlay on top of your original image.
Open the folder of overlays you got from us. Choose one you like and drag and drop it over your image. It will appear as a separate layer in your ‘Layers’ tab.
Step 4 - Resize the overlay to fit your image.
Make sure your overlay is selected in your Layer Panel then go to Edit > Free Transform (Ctrl/Cmd + T) to access the Free Transform tool. Resize the overlay to fit your image.
Step 4 - Blending modes

Experimenting with blending modes of the light leaks in Photoshop
Again, make sure your overlay is selected in your Layer Panel then adjust the blending modes and opacity slider until you get the desired effect.
Step 6 – Add further overlays (optional).
You can now repeat the process with other overlays for varied effects.

Before: Original image. Photo by Amandine Bataille on Unsplash

After: Image with our Multi 8 light leak overlay applied
Creating A Light Leak Overlay From Scratch in Photoshop
Step 1 - Open your image in Photoshop

Duplicate layer so you don’t edit destructively.
Begin by launching Photoshop and opening the image you intend to work on. Duplicate the background layer (Ctrl + J or Command + J) to keep the original intact and make modifications on a new layer.
Step 2: Basic adjustments in "Base Editing" folder

Keep your base editing separate from your light leak overlay
Perform any basic adjustments as needed to your image, such as spot removal, burn and dodge. You can also use the Camera Raw option for quick sliders to adjust the exposure of your image for a solid base for your light leak effect. This step is adaptable to the needs of your photograph and your own workflow and editing style.
Step 3: Create a grey fill layer

Adding layer colour to the new layer.
Add a new fill layer (Layer > New Fill Layer > Solid Colour) and set the colour to black. Change the blending mode to "Colour" and name the layer "Black Layer" or a similar. This layer will serve as the base for your light leak overlay gradients.
Step 4: Introduce transparent layer
Create a new layer (Shift + Ctrl + N or Shift + Command + N) above the fill layer. This layer will be the canvas for adding light leaks.
Step 5: Apply light leaks using gradient tool

Use gradients to create your light leak overlays.
Toggle the visibility of the black layer to see which parts of the image you want to add the light leak effect to. Select the ‘Gradient Tool‘(G) from the toolbar. Experiment with various gradients, focusing on reds, cyan, yellows, and magentas to achieve the desired vintage effect.
Use the gradient sliders to control the colour distribution and adjust the opacity to create subtle or bold light leaks. For radial gradients, ensure the left-hand side is set to 100% opacity to avoid getting the undesired ‘doughnut’ gradient. Keep in mind that you’ll be adjusting the blending modes later, so if the gradients look a little intense at this point, they will look better later – trust the process!
Step 6: Merge and name the light leak layer
Merge the black fill layer and the light leak layer (Ctrl + E or Command + E), making sure the light leak layer is above to create your light leak overlay layer. Rename the merged layer to "Light Leak" for clarity. At this point, you can save a jpeg copy of the light leak overlay to use in later projects, just make sure you have the visibility of any other effects turned off first.
Step 7: Blend modes and opacity adjustment

Each blend mode will have a different effect on the light leak overlay, experiment to see which one suits your photo the best.
Experiment with blending modes on the light leak overlay such as ‘Lighten,’ ‘Screen,’ ‘Colour Dodge,’ and ‘Linear Dodge.’ Adjust the opacity of the ‘Light Leak’ layer to fine-tune the strength of the light leaks on your image. This step is crucial for achieving the desired bleached effect as it will make it look like the exposure of the image has been changed where the light leaks are on the overlay.
If you feel like the effect is a little intense in certain areas, you can change the opacity in specific areas of the overlay, by using a mask. Click the mask icon and the brush tool – make sure the colour of the brush is black. Change the opacity of the brush to around 25% and the feathering to full. Whilst the mask is selected on the layer, use the brush tool to decrease the opacity of the mask in any specific areas you’d like to decrease.
Step 8: Specific adjustments with adjustment layers
Refine the light leak layer using adjustment layers. Introduce Hue/Saturation, Colour Balance, or Curves adjustments to tailor the hues, tones, and curves within the light leak. To practice good layer organisation, group these adjustments with the light leak layer (Ctrl + G or Command + G) and name the group "Light Leak".
Step 9: Add grain and vignettes

Toggle the layer’s visibility to see if vingette and grain work with your photo.
To enhance the vintage feel, add grain and vignettes. Create a new layer and apply a grain filter (Filter > Noise > Add Noise). Experiment with different levels for a subtle or pronounced grain effect. For a vignette, create a new levels layer and use the Elliptical Marquee Tool (M) to select the centre of the image, invert the selection (Ctrl + Shift + I or Command + Shift + I), and apply a feathered mask.

Original photo by Roman Akhermov on Unsplash

Add colour casts simply with our light leak overlays - Multi 9 applied

Experimenting with more than one of our overlays - Multi 7 and Multi 6 applied

Create vintage feel to photographs with our light leak overlays - Multi 11 applied
The Light Leak Effect - Conclusion
Congratulations! You've successfully transformed your image by incorporating light leaks and imparting a vintage vibe in Photoshop. This comprehensive guide provides detailed steps to help you navigate each stage of the creative process. Feel free to customize the steps, experiment with additional adjustments, and let your creativity flourish as you continue to develop your unique style in digital image editing.
Happy creating!
Frequently Ask Questions
What is the easiest way to create a light leak effect in Photoshop?
The easiest way is to use a light leak overlay. If you have one of these, simply drag and drop it onto your image, as instructed in this blog.
Can I use light leak overlays for commercial photography projects?
Yes, of course. In fact, it's becoming quite popular now to create retro‑looking images, and light‑leak overlays are a great way of getting that retro look.
What colours work best for a realistic light leak effect?
The best colours to use for a light leak effect are the natural colours found in old negative film: cyan, magenta and yellow. Thankfully for you, all of our downloadable light leak overlays in this blog use those colours specifically.
Why do photographers use light leak overlays?
You can use Light Leak overlays in programmes such as Photoshop or other post‑processing applications that support layers. Then, quite simply, you drag and drop them onto the images you want the effect applied to. This is all explained in the blog, and the downloadable overlays are available for free.
Like this? - Check out more free tutorials below


I hope you liked this tutorial on light leak photography. If you did, please leave us a comment and support us by sharing it with your friends and subscribe to our newsletter at the bottom of this page for more.
We also have an excellent learning community on social media so please join us there as well.
Thanks for watching and remember – Learn more at The School of Photography.