Grey Day Photography
How to Create a Stunning Photography from a Grey Day
So, you’ve planned a photography outing… and the weather lets you down. A flat, grey sky. No drama. No contrast. Just dull light. It’s tempting to stay indoors—but that would be a mistake.
Because with the right approach (both in-camera and in editing), you can turn a “boring” grey day into a powerful, moody image.
In this guide, we’ll walk through exactly how to do that—based on a real edit workflow in Lightroom.
Why Grey Days Aren’t the Problem
Flat light often gets a bad reputation. But here’s the truth:
It’s soft and even (great for detail)
It removes harsh shadows
It creates a perfect base for black and white photography
The key isn’t avoiding grey days—it’s knowing how to use them creatively.
Start with a Strong Subject
In this example, the focal point is simple but effective:
👉 A lone tree.
Why it works:
Clear subject
Strong silhouette
Emotional, minimal feel
Add in a bit of luck—like animals positioned near your subject—and you’ve got a compelling scene.
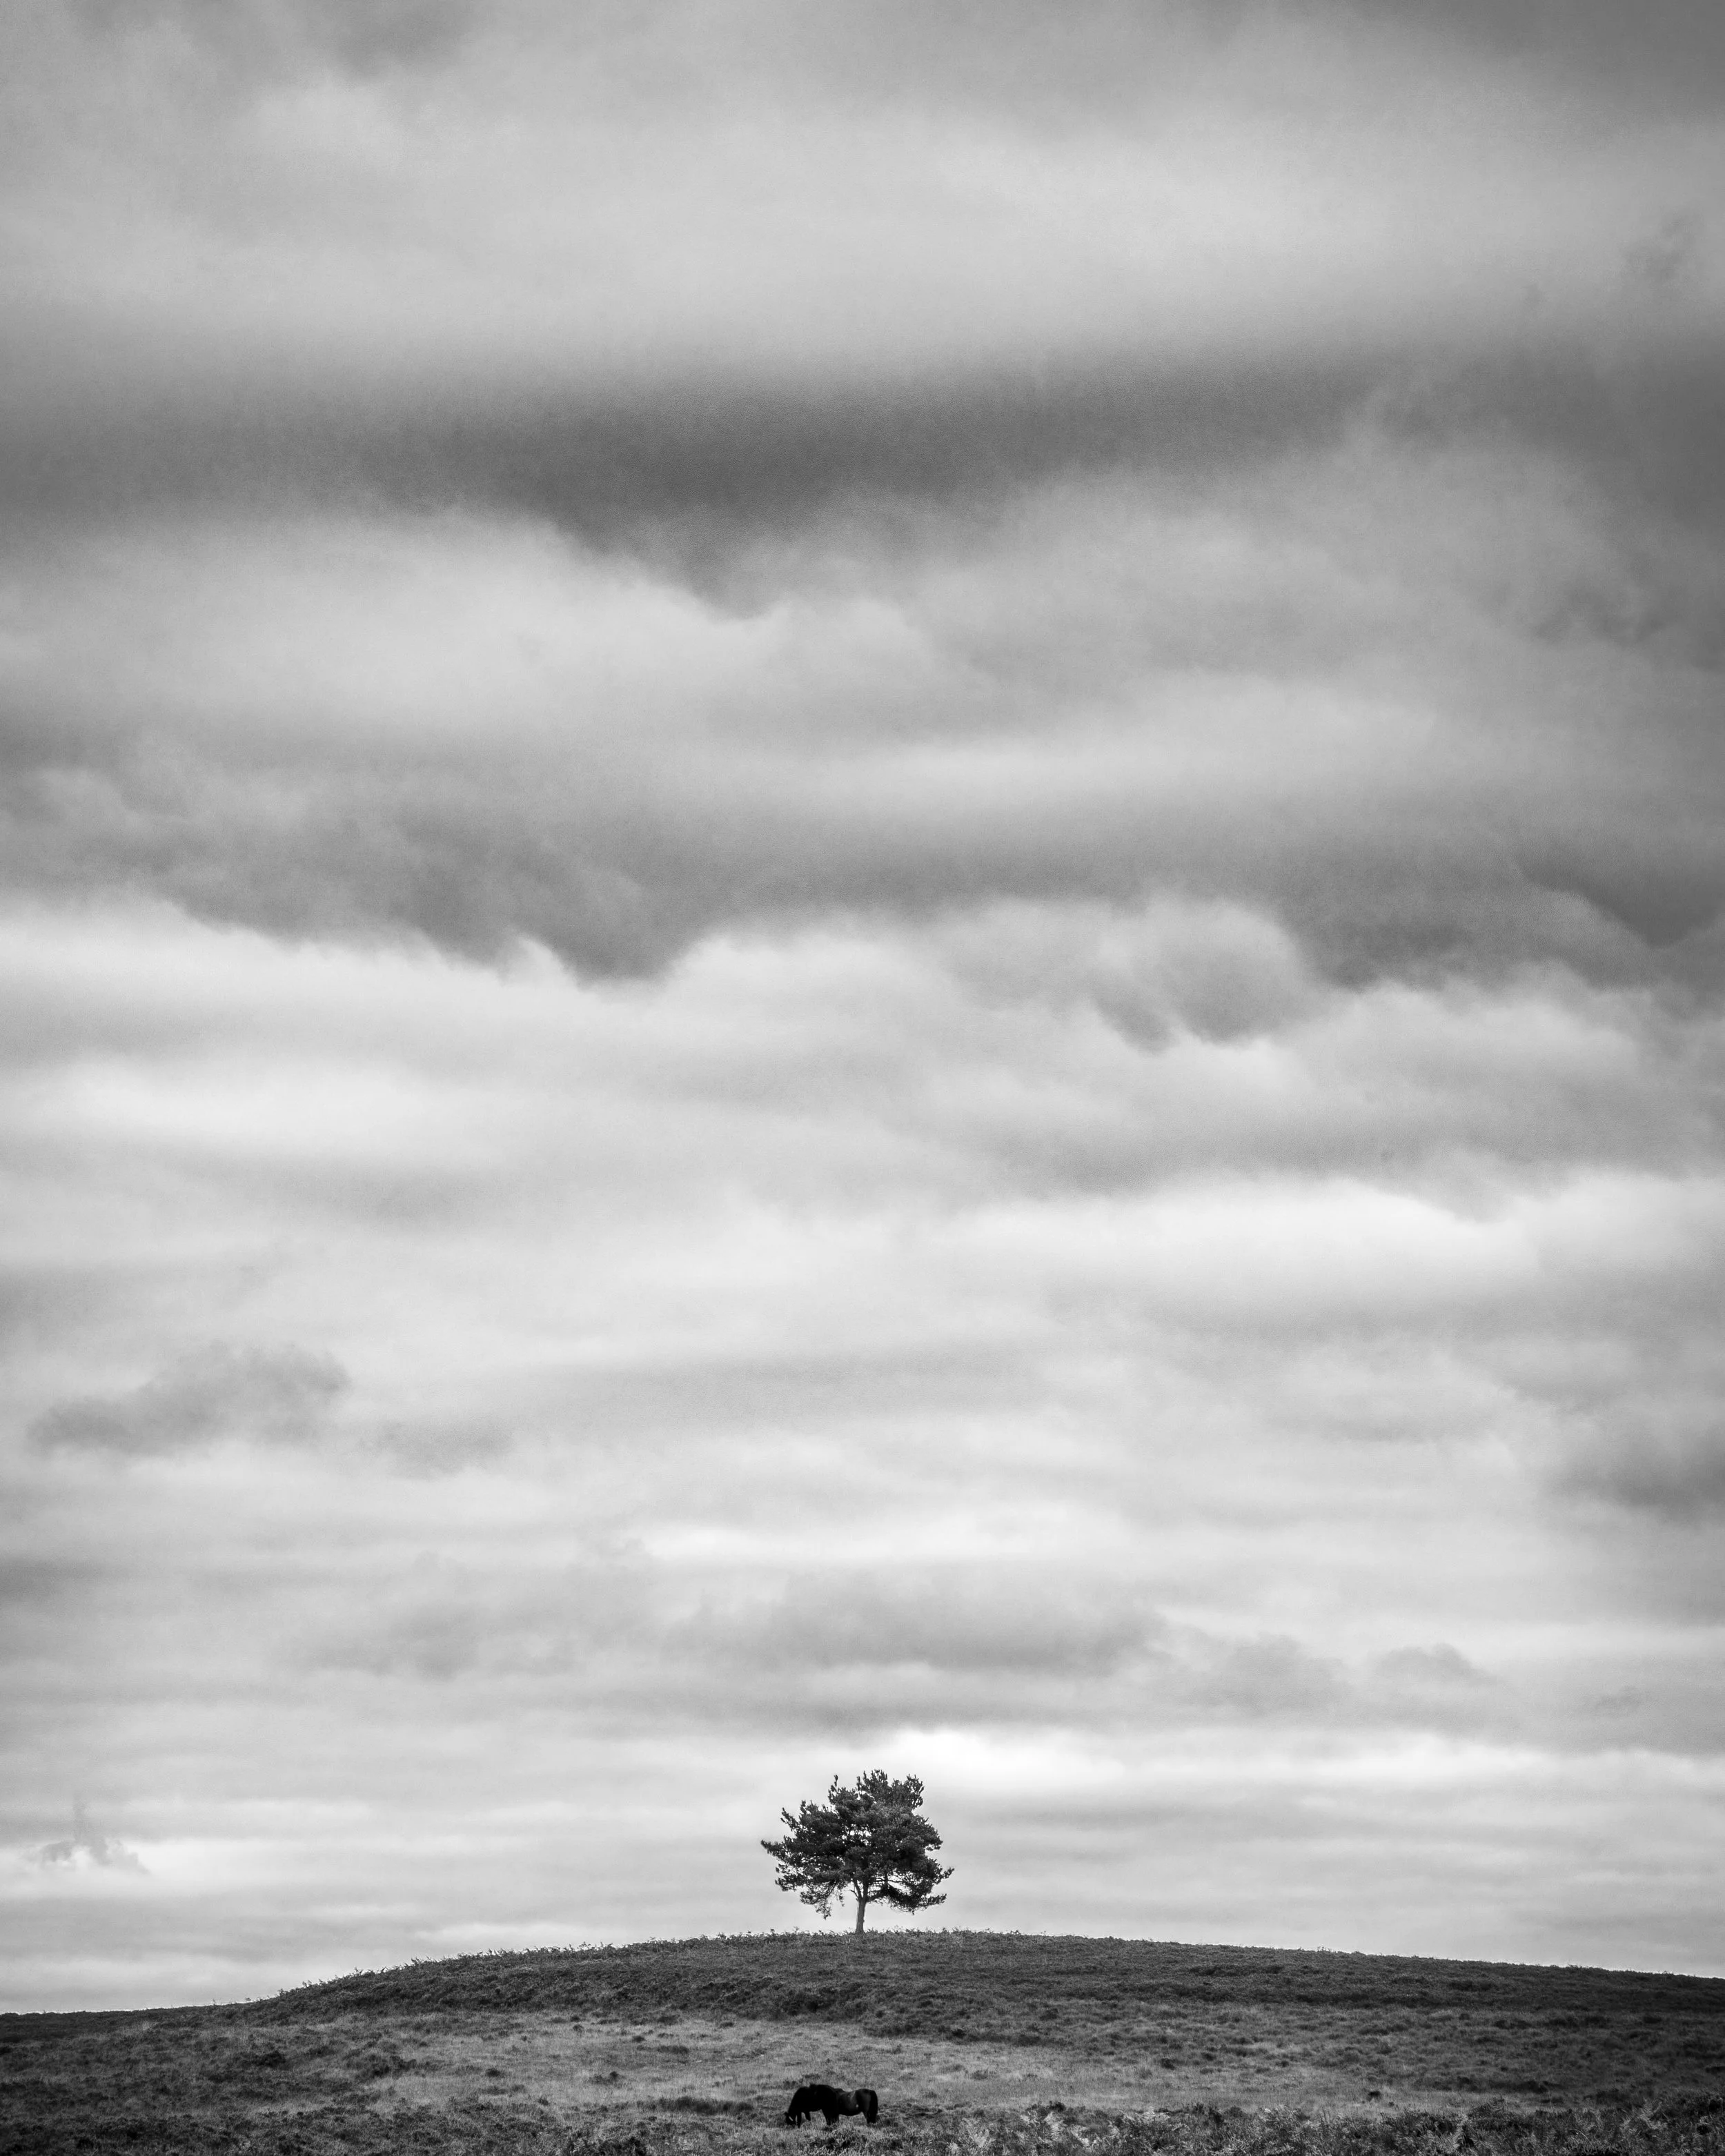
Lone Tree on a grey day
Capture More Detail with Bracketing
Grey skies may look flat, but they often contain hidden texture.
To bring that out, shoot multiple exposures:
One brighter image
One darker image
This allows you to capture:
Foreground detail
Sky texture
Full tonal range
This is a photographic technique that is called bracketing. Learn about bracketing your photography here - Exposure bracketing in Photography – Beginners Guide
These images are then merged using HDR in Lightroom to create a single, balanced file. Learn more about creating HDR images here - HDR with Lightroom – Explained; Camera Settings to Edit!
Convert to Black & White
When colour isn’t adding anything, remove it.
Black and white helps:
Emphasise contrast
Highlight texture
Create mood
Start your edit by switching to black and white, then adjust:
Highlights ↓
Shadows ↑
Blacks ↓
Whites ↑
This builds a solid tonal foundation.
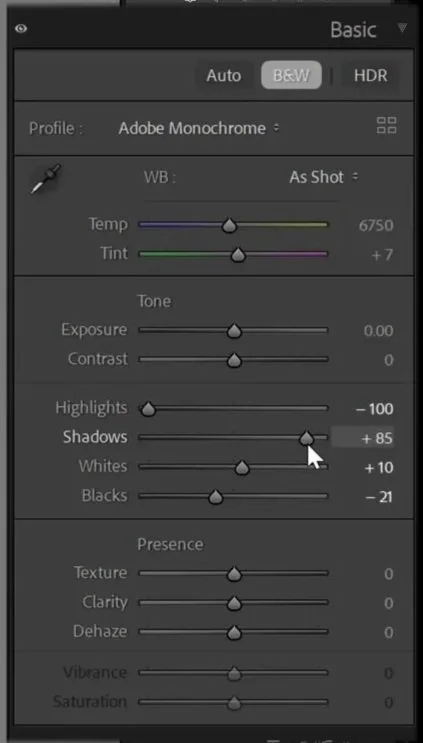
Lightroom screenshot of a basic panel
Use the Black & White Mix for Dramatic Skies
This is where the magic happens. The Black & White Mix panel lets you control how underlying colours appear as tones.
For example:
Darkening blues → makes skies more dramatic
Adjusting specific tones → increases contrast selectively
By targeting darker cloud areas, you can pull out incredible texture—even from a dull sky.
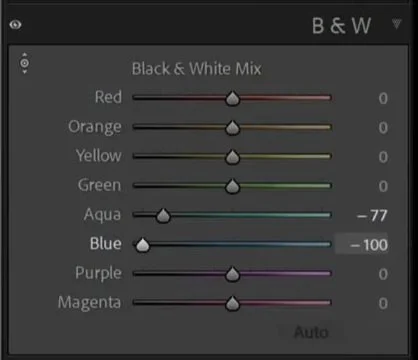
Lightroom’s black and white mix panel
Sharpen and Clean the Image
Next, refine the technical quality:
Apply sharpening (especially important for certain camera systems)
Remove chromatic aberration (those unwanted coloured edges)
These small steps make a big difference in overall polish.
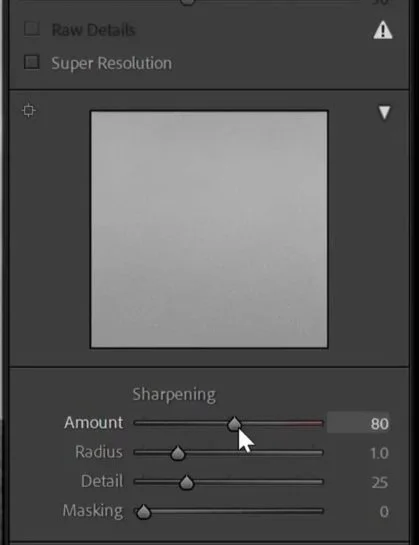
Lightroom screen shot of the detail panel
Fix Distractions
Even a strong composition can be weakened by small distractions.
In this case:
One horse disrupted the balance of the scene
It was removed using Lightroom’s Remove Tool (with AI detection)
The result:
✔ Cleaner composition
✔ Stronger visual flow
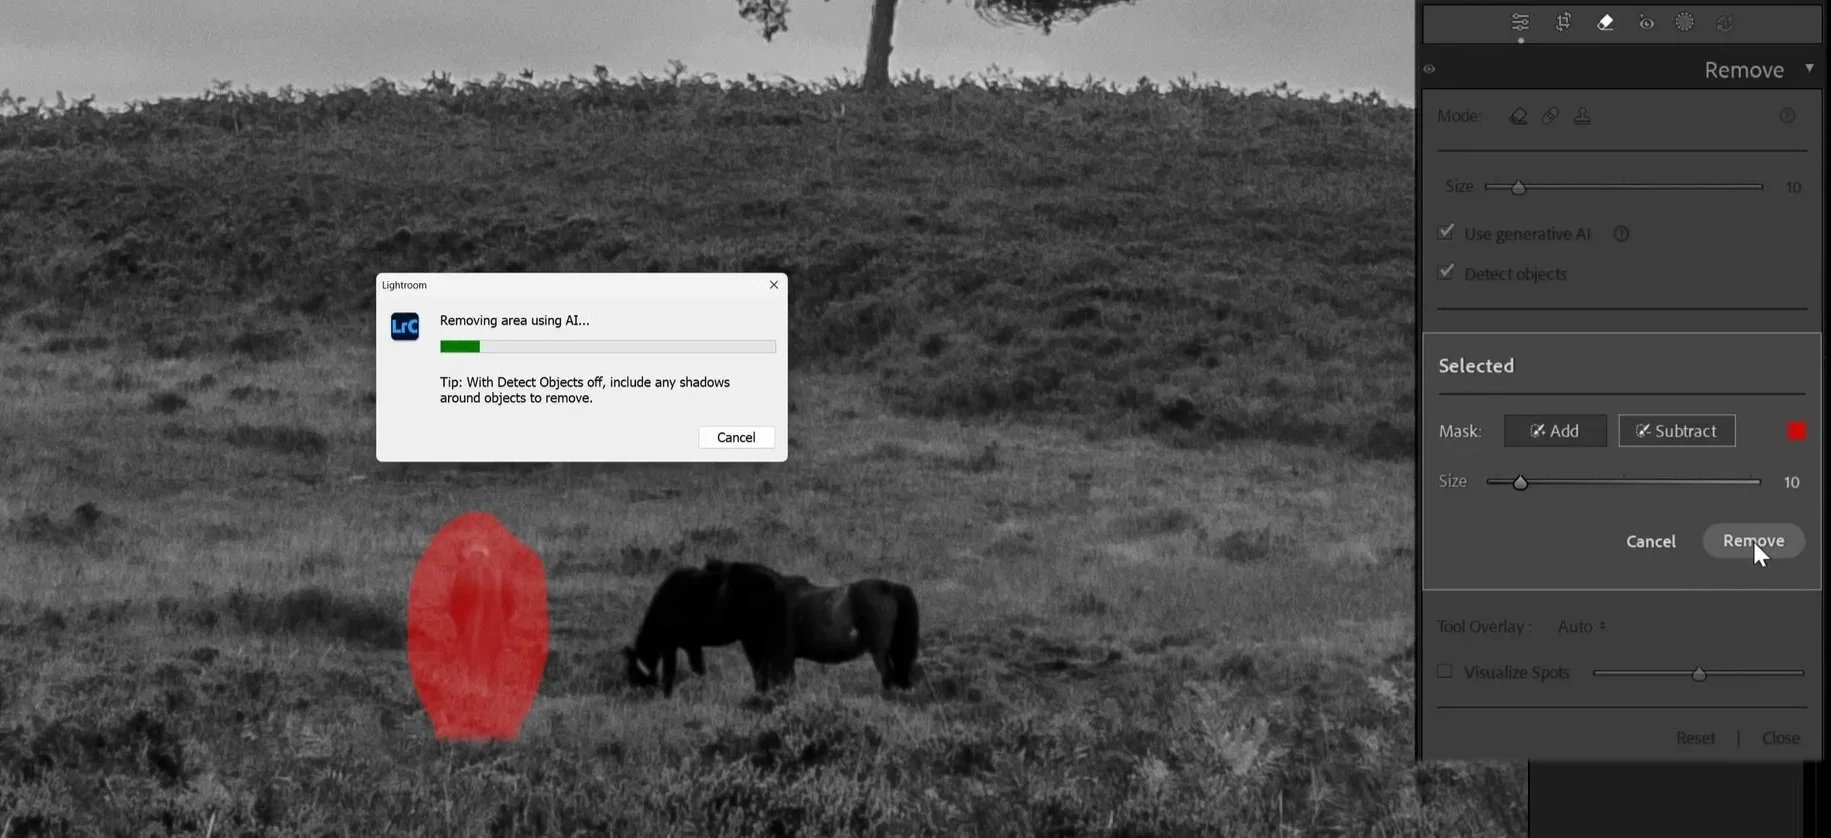
Screen shot of horse being removed
Crop for Impact
Cropping helps refine your composition further.
A 4:5 ratio works well for:
Social media
Strong vertical framing
Emphasising the subject
Small adjustments like straightening can also improve the final look.
Get access to ALL our online courses - 1000’s of videos, worksheets, critiques of students work, personalised support and much more with our monthly membership.
Enhance the Sky with Masking
Masking is essential for adding depth.
Using a linear gradient:
Darken or adjust the sky
Increase contrast
Add mood
This creates separation between sky and foreground, making the image more dynamic.

Screen shot in lightroom using a linear gradient
Add a Custom Vignette (the Right Way)
A standard vignette can sometimes ruin parts of your image.
Instead:
Use a radial gradient mask
Invert it
Darken only the outer areas
Then refine it by:
Subtracting areas (like your subject or foreground)
Keeping important elements untouched
This gives you a controlled, professional vignette.
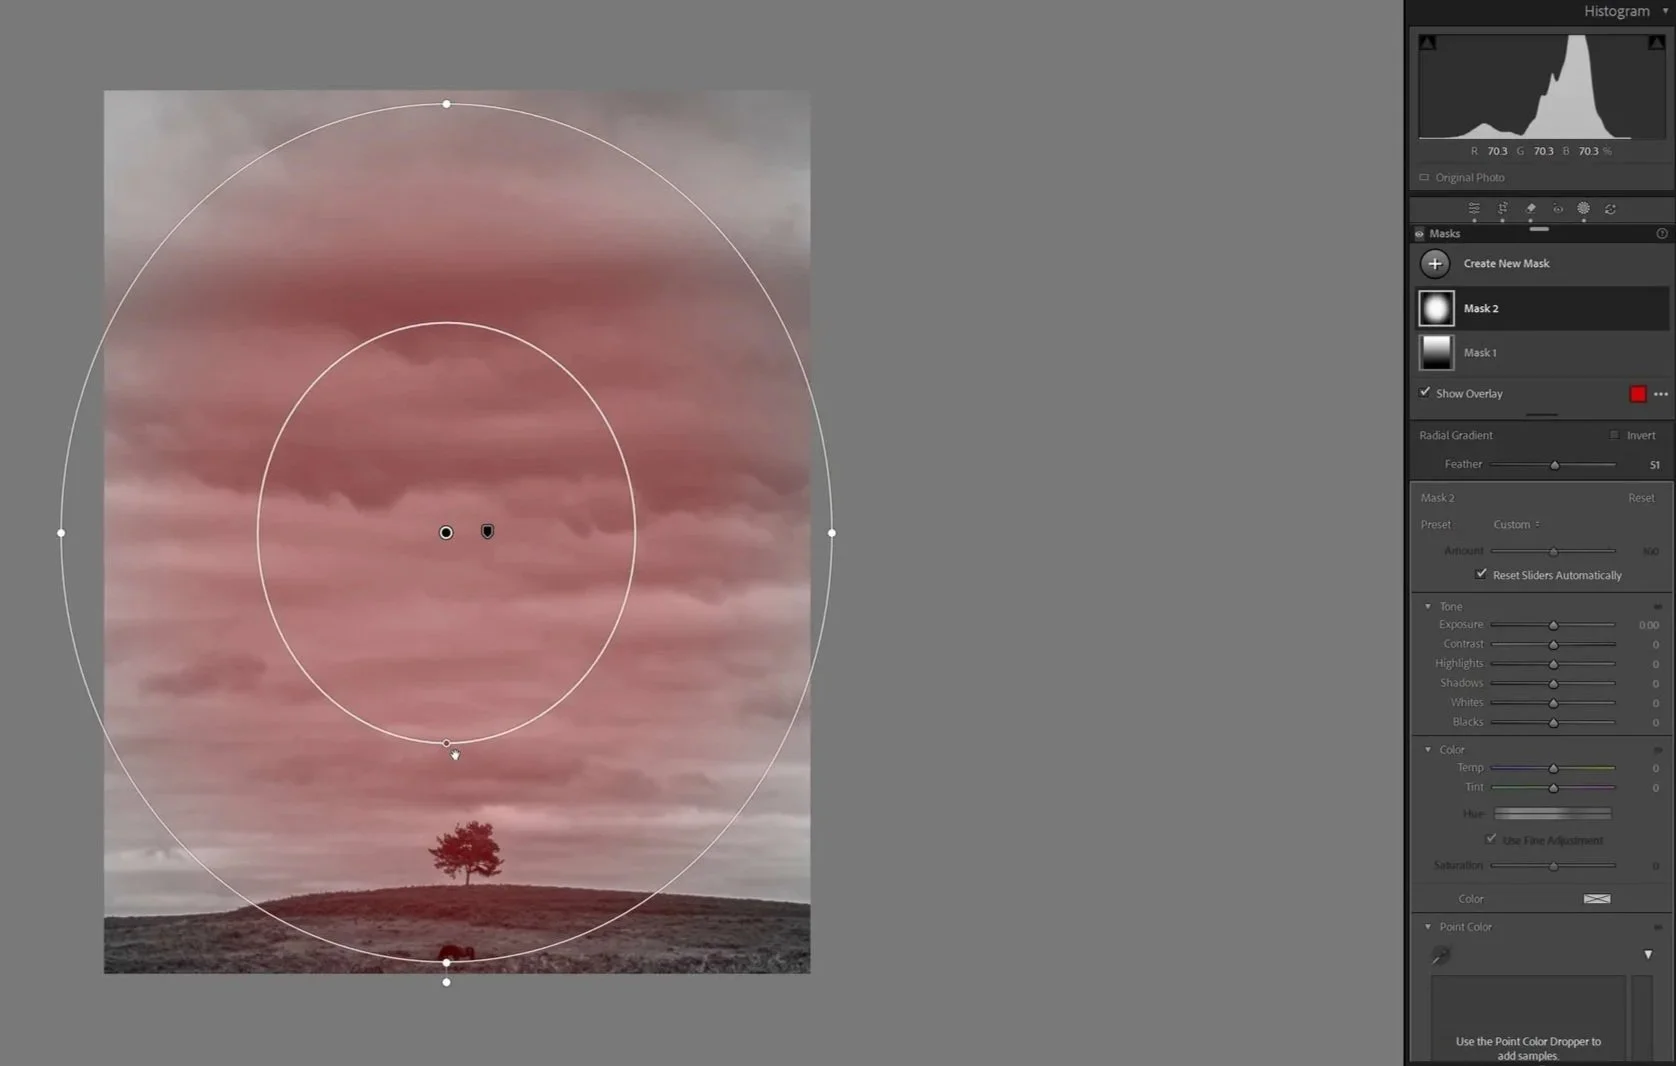
Lightroom screen shot radial gradient mask
The Final Result
What started as a flat, uninspiring scene becomes:
A dramatic black and white image
Rich cloud texture
Strong focal point
Balanced composition
All from a grey day.
The Big Lesson: Just Go Out and Shoot
The most important takeaway?
👉 Don’t let bad weather stop you.
Even on the dullest days:
You can find a subject
You can compose creatively
You can transform the image in editing
With the right skills, you’ll almost always come away with a strong photo.
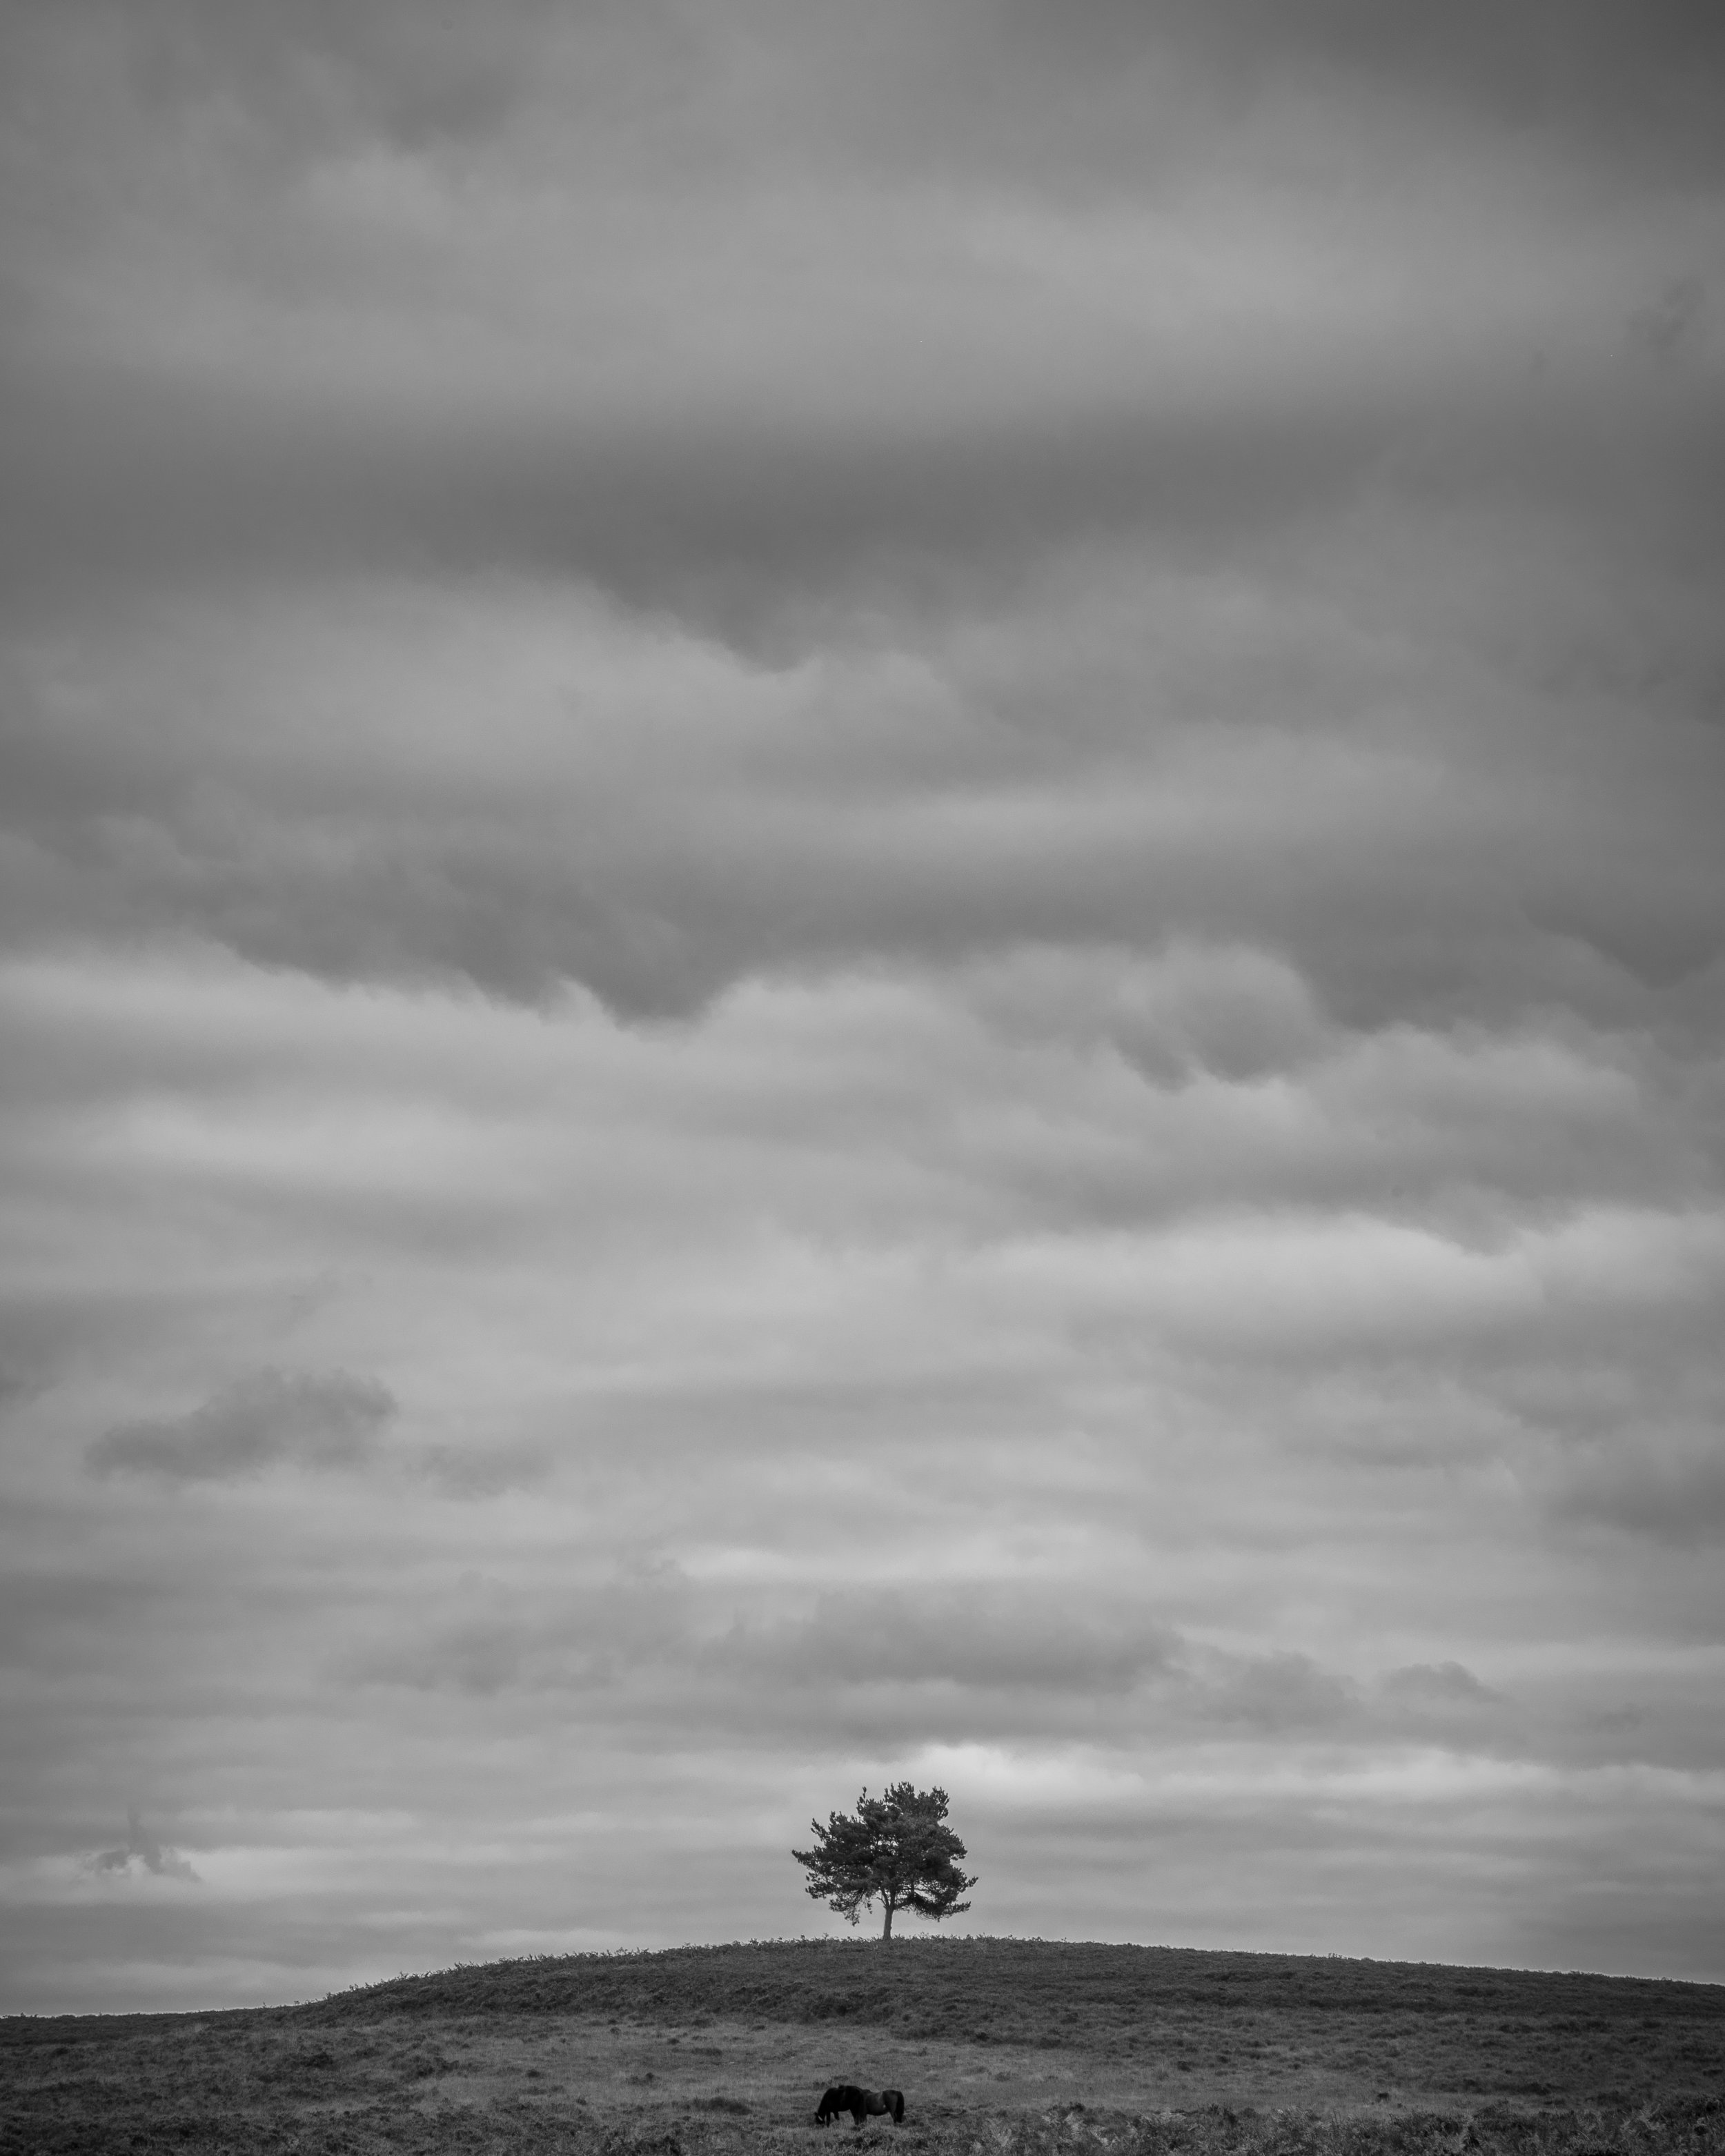
Tree in a Landscape with dramatic sky
Want to Learn More?
Plus a community of photographers learning together.
Like this? - Check out more free tutorials below


I hope you enjoyed this blog on the topic of Grey Day Photography. If you did, please leave us a comment and support us by sharing it with your friends and subscribe to our newsletter at the bottom of this page for more. You may also enjoy this tutorial on
We also have an excellent learning community on social media so please join us there as well.
Thanks for watching and remember – Learn more at The School of Photography.