
So, you're keen to learn this beautiful art of photography, but what can you do to practice those photography skills? You need a challenge, and a focus. In this blog I’m going to give you five ideas to push your skills forward and make your photography great. Within those five ideas, I’m also going to give you three brilliant tips to help you execute them.
Photography Skill One: Street Photography
The reason I’m giving you this idea is because it’s really accessible, and it will speed up your photography taking skills. It will speed up your vision because when you’re out on the street, you’ve got to see interesting things quite instantly. It will speed you up with camera settings and, if you see something good, you’ve got to be quick and be able to get your camera settings right instantly.
It will also help you learn very quickly from your own mistakes because that speed is hard to do for anyone, whether you’re a pro or an amateur. When you get things wrong, like pictures going blurry for instance, you can quickly analyse them and put them right on the spot. So, it’s a really good photography skill to improve your use of camera settings and finding interesting things quickly.
Here are my top tips for street photography:

Stick to minimal kit when you’re out shooting street photography.
Tip 1- Limit Yourself:
Limit yourself to one focal length, one battery, one card—just go out with that. If you’ve got a prime lens, I strongly recommend you use it for street photography. If not, keep your focal length to 35 or 50 mm. That limitation will give you an extra challenge to get things right quickly. If you don’t know what focal lengths or prime lenses are, check out our Beginner’s course!

Find a busy spot so that you blend in more.
Tip 2 – The Busier It Is, The More Invisible You Will Be:
Walking around on the street with a camera is not an easy thing. You feel like everyone’s looking at you. But, if you’re in a busy area, you just sink into the background. If you’re in an area that’s not so busy, you do stand out. So, find a busy area to start practicing your street photography.

Pick a spot and stick to it!
Tip 3 – Don’t Walk the Length of a City:
Instead of walking miles trying to find a good picture, find interesting spaces and just wait for life to appear within it.
Get access to ALL our online courses - 1000’s of videos, worksheets, critiques of students work, personalised support and much more with our monthly membership.
Photography Skill Two: Forest Photography
The reason I’m setting you this one is because it’s extremely difficult to see the forest through the trees. I personally find forest photography really hard. It’s also a great way to improve your compositional skills and the way you frame the world in a photograph.
If you’ve got something as chaotic as a forest and can compose that to make it look good in a square or rectangle, then you’re doing a good job. Forest photography is also excellent for practicing your use of natural light, which isn’t easy I can tell you! Thankfully, in most cases, forest photography is accessible. You just need to walk to a woodland area or drive to a forest.
Here are my top tips:

Try to avoid capturing the sky in your forest photography shots.© Jack Lodge, taken from our Forest Photography Course
Tip 1 - Remove the White:
Focus in the woodland. Any white areas in the sky or above the trees needs to be cropped out.

Overcast days give a soft diffused light. © Jack Lodge, taken from our Forest Photography Course
Tip 2 - Cloudy Days Are Better:
For most photography, you want lovely sunrises and sunsets, but in a forest, that light can be too harsh on the leaves and trees. A cloudy day is a good as it provides a softer even light.

Embrace the chaos of the forest - use odd numbers in your composition. © Jack Lodge, taken from our Forest Photography Course
Tip 3 - Use the Rule of Odds:
Frame your composition using odd numbers—threes, fives, sevens. Odd numbers bring a sense of harmony to the chaotic forest. Even numbers like twos and fours can create a sense of order that doesn’t look right in a forest.
If you’re interested in mastering this genre of photography, we’ve got an in-depth pro course with over seven hours of forest photography content. Check out our Forest Photography Course here.
Photography Skill Three: Still Life Photography
If you can’t go outside for whatever reason, that shouldn’t stop you from taking photos. You can create still life images with whatever you have lying around - flowers, fruit, or even household items.
Still life photography is ideal for practicing camera settings in a controlled environment. It also helps you explore composition and lighting techniques at a slower pace.
Here are my top tips:

You can soften natural light easily with sheer fabrics.
Tip 1 - Soften the Light:
Use a large window for natural light. If the light isn’t soft enough, use chiffon fabric, net curtains, or similar material to diffuse it for a softer effect.

The appropriate background is important for still-life photography.
Tip 2 - Choose an Appropriate Background:
The background should complement the subject without being too distracting. You can use paper, fabric, wallpaper, or even buy specific backgrounds for product or still life photography.
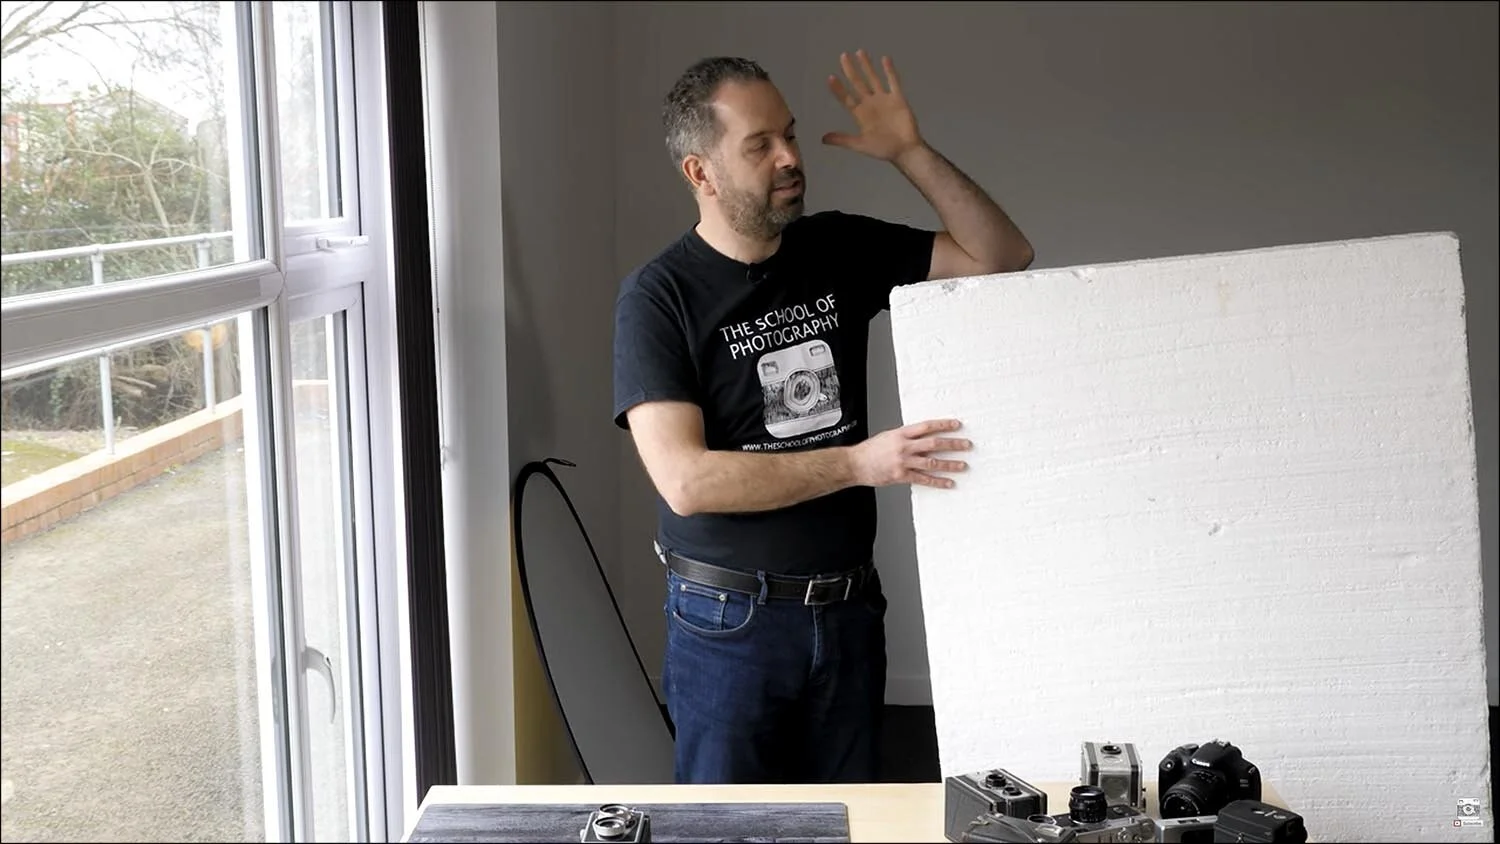
Use a reflector to bounce the light around your set.
Tip 3 - Use a Reflector:
Reflectors bounce light back onto the subject, filling shadows and reducing contrast. You can use materials like polystyrene, white card, or silver foil.
Photography Skill Four: Headshot Photography
Rather than generalizing portraiture, for this photography skill I want you focus on headshots. They are intimate and require you to connect deeply with your subject, which can be intimidating for beginners and therefore will challenge your skills!
Engaging with people builds confidence and teaches you how to bring out someone’s natural expressions. Plus, everyone loves a good headshot for their social media or business profiles.
Here are my top tips:

Try getting your model to have eye contact with the lens.
Tip 1 - Make Eye Contact:
Get your subject to look directly into the lens. Once that’s mastered, experiment with looking away or other directions.

Use a reflector to bounce light back at the model’s face.
Tip 2 - Use a Reflector:
A reflector under the subject can fill shadows and create catchlights in the eyes, enhancing the overall image.
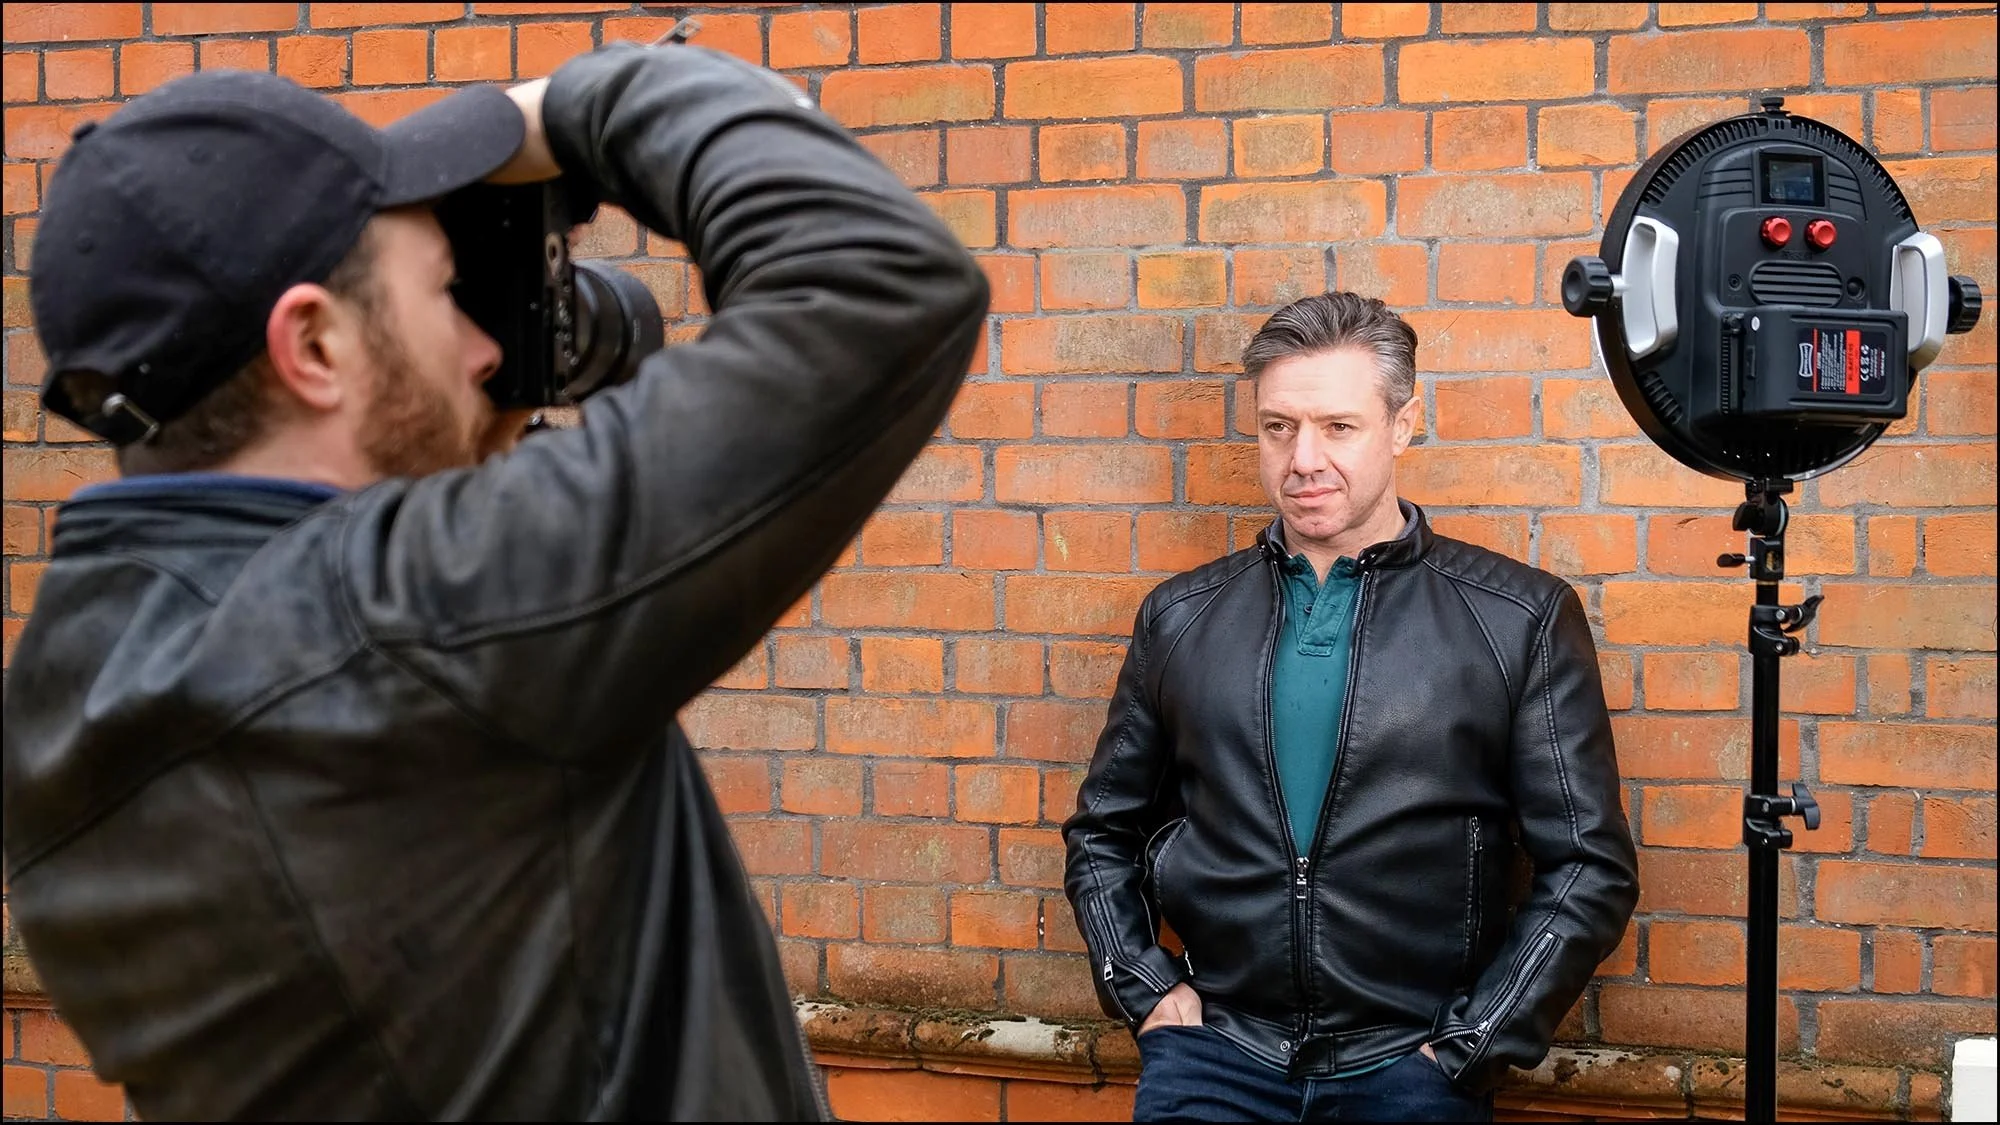
Achieve the shallow depth of field by zooming in.
Tip 3 - Zoom In and Get Close:
Zoom in rather than physically moving closer to compress the background and achieve a shallower depth of field.
Want to learn how to take professional Headshots? Check out our Headshot Photography Course.
Photography Skill Five: Cities at Night
Night photography in cities is very challenging but very rewarding. With bright city lights against the dark sky, you must rely on manual settings and your understanding of exposure. If you want to test your skills in working in manual, then this is genre of photography to try.
Here are my top tips:

A good tripod is key for shooting cities at night.
Tip 1 - Use a Sturdy Tripod:
Long exposures require stability. A strong, durable tripod is essential to avoid blurry images.

Light Trails create interesting visual effects. © Marc Newton, taken from our Photographing Cities at Night Course
Tip 2 - Experiment with Light Trails:
Capture streaks of light from cars or buses to practice controlling shutter speeds. Here’s a tutorial about how to create Light Trail Photography!

Keep taking test shots to get the correct exposure. © Marc Newton, taken from our Photographing Cities at Night Course
Tip 3 - Don’t Rely on the Camera’s Meter or Histogram:
Night photography often tricks these tools. Instead, use test shots to adjust exposure and ensure highlights and shadows are balanced.
Learn how to take stunning night photography in our Photographing Cities at Night Course.
Conclusion
These five photography challenges will not only make your practice more structured but also help you develop key photography skills in observation, composition, lighting, and exposure. Remember, photography is about experimenting, making mistakes, and learning from them—so take on these challenges with an open mind!
Share Your Ideas and Results
Do you have any other photography ideas? Share them in the comments! These five ideas are accessible and challenging, but I’d love to hear what’s worked for you.
When you try these challenges, share your results on social media using the hashtag #TheSchoolOfPhotography, we’ll check it out and engage with your posts.
Frequently Asked Questions About Photography Ideas for Beginners
What are the most important photography skills for beginners?
The most important photography skill for a beginner photographer is to learn the fundamentals of photography. This would include learning about the aperture, shutter speeds, ISO, and focal lengths. A common mistake beginner photographers make is thinking that they need to learn their camera. This is wrong. The beginner needs to learn photography, and that skill is the same on any camera. If you want to learn the fundamentals of photography properly, please check out our beginners photography course.
How can I improve my photography skills?
You can improve your photography skills by learning from a valid source; this would be an official educational establishment or from well-regarded photography books. At the School of Photography, we specialise in improving photography skills, and we have many online courses and books to help you on your journey.
What should a beginner photographer learn first?
The first thing a beginner photographer should learn is the fundamentals of photography and how to control and adapt light for different visual effects. This is achieved via apertures, shutter speeds, ISOs, and focal lengths. The best places to learn these skills are photography schools, such as The School of Photography.
How often should I practise photography?
It’s good to practice photography at least once a week. All the learning in books and courses will be useless if you don’t go out and practice that learning. At The School of Photography, we teach you all of the photography skills you need and encourage you to go out and practise via our competitions, assignments and our fantastic learning community.
What photography exercises can improve your skills?
The best photography exercises you can do to improve your skills is to take assignments and enter competitions. This will give you a focus to practice your newly learnt photography skills. Thankfully, at The School of Photography, our membership includes assignments and competitions where you can engage with other learning photographers and win fantastic prizes.
Do I need to use manual mode to improve my photography?
Yes, it’s a very good idea to learn and use manual mode to improve your photography. If you continue to use auto modes, you will not make mistakes in the exposure of your shots. It’s by correcting those mistakes that you learn how to control photography properly.
How can I improve my photography composition?
To improve your photography composition, you need to first learn the rules of composition. These include rules such as the rule of thirds, leading lines, symmetry, etc. Each of these rules gives a specific feeling to the image. And it’s by mixing these composition rules with the feeling that you want to give to the viewer that makes a good composition. In our beginners photography course, we have a whole in-depth lesson on composition in photography.
Can I improve my photography without buying new equipment?
Yes, you can, and you’re encouraged to do so at TSOP. The most expensive camera in the world will not improve your photography. The only thing that will improve your photography is your knowledge of photography. This is where you should start. Buying new, expensive equipment is only recommended when you have control over the visual effects of photography, and you can get that control using the basics of equipment.
Like this? - Check out more free tutorials below


I hope you liked this blog putting these two kit combinations to the test. If you did, please leave us a comment and support us by sharing it with your friends and subscribe to our newsletter at the bottom of this page for more.
We also have an excellent learning community on social media so please join us there as well.
Thanks for watching and remember – Learn more at The School of Photography.