Settings for Night Photography - Ultimate Guide to Exposures
If you’ve tried night photography before, there’s a good chance your images turned out dark, dull, or lacking detail. Getting the correct settings for night photography is the key to creating sharp, vibrant images after dark.
Fear not, photography friends — this ultimate guide to settings for night photography will show you exactly how to set up your camera so you can achieve correct exposures every time, even in very low light conditions.
Plus, we’re giving you a free downloadable guide to night photography settings that you can take with you on your shoot. Grab it below.
Get access to ALL our online courses – 1000’s of videos, worksheets, critiques of student’s work, personalised support and much more with our monthly membership.
Equipment Needed for Settings for Night Photography
Before we dive into camera settings for night photography, let’s first look at the essential equipment you’ll need.
Camera for Night Photography Settings
You’ll need a camera that can shoot in full manual mode. Manual mode allows you to take full control of the settings for night photography, which is essential when shooting in low light.
Check the top of your camera for a dial marked M (Manual). If your camera has this, it’s suitable for night photography.
A standard zoom lens will work perfectly fine, but if you have access to one, an ultra-wide-angle lens will help you capture expansive cityscapes, bridges, and reflections at night.

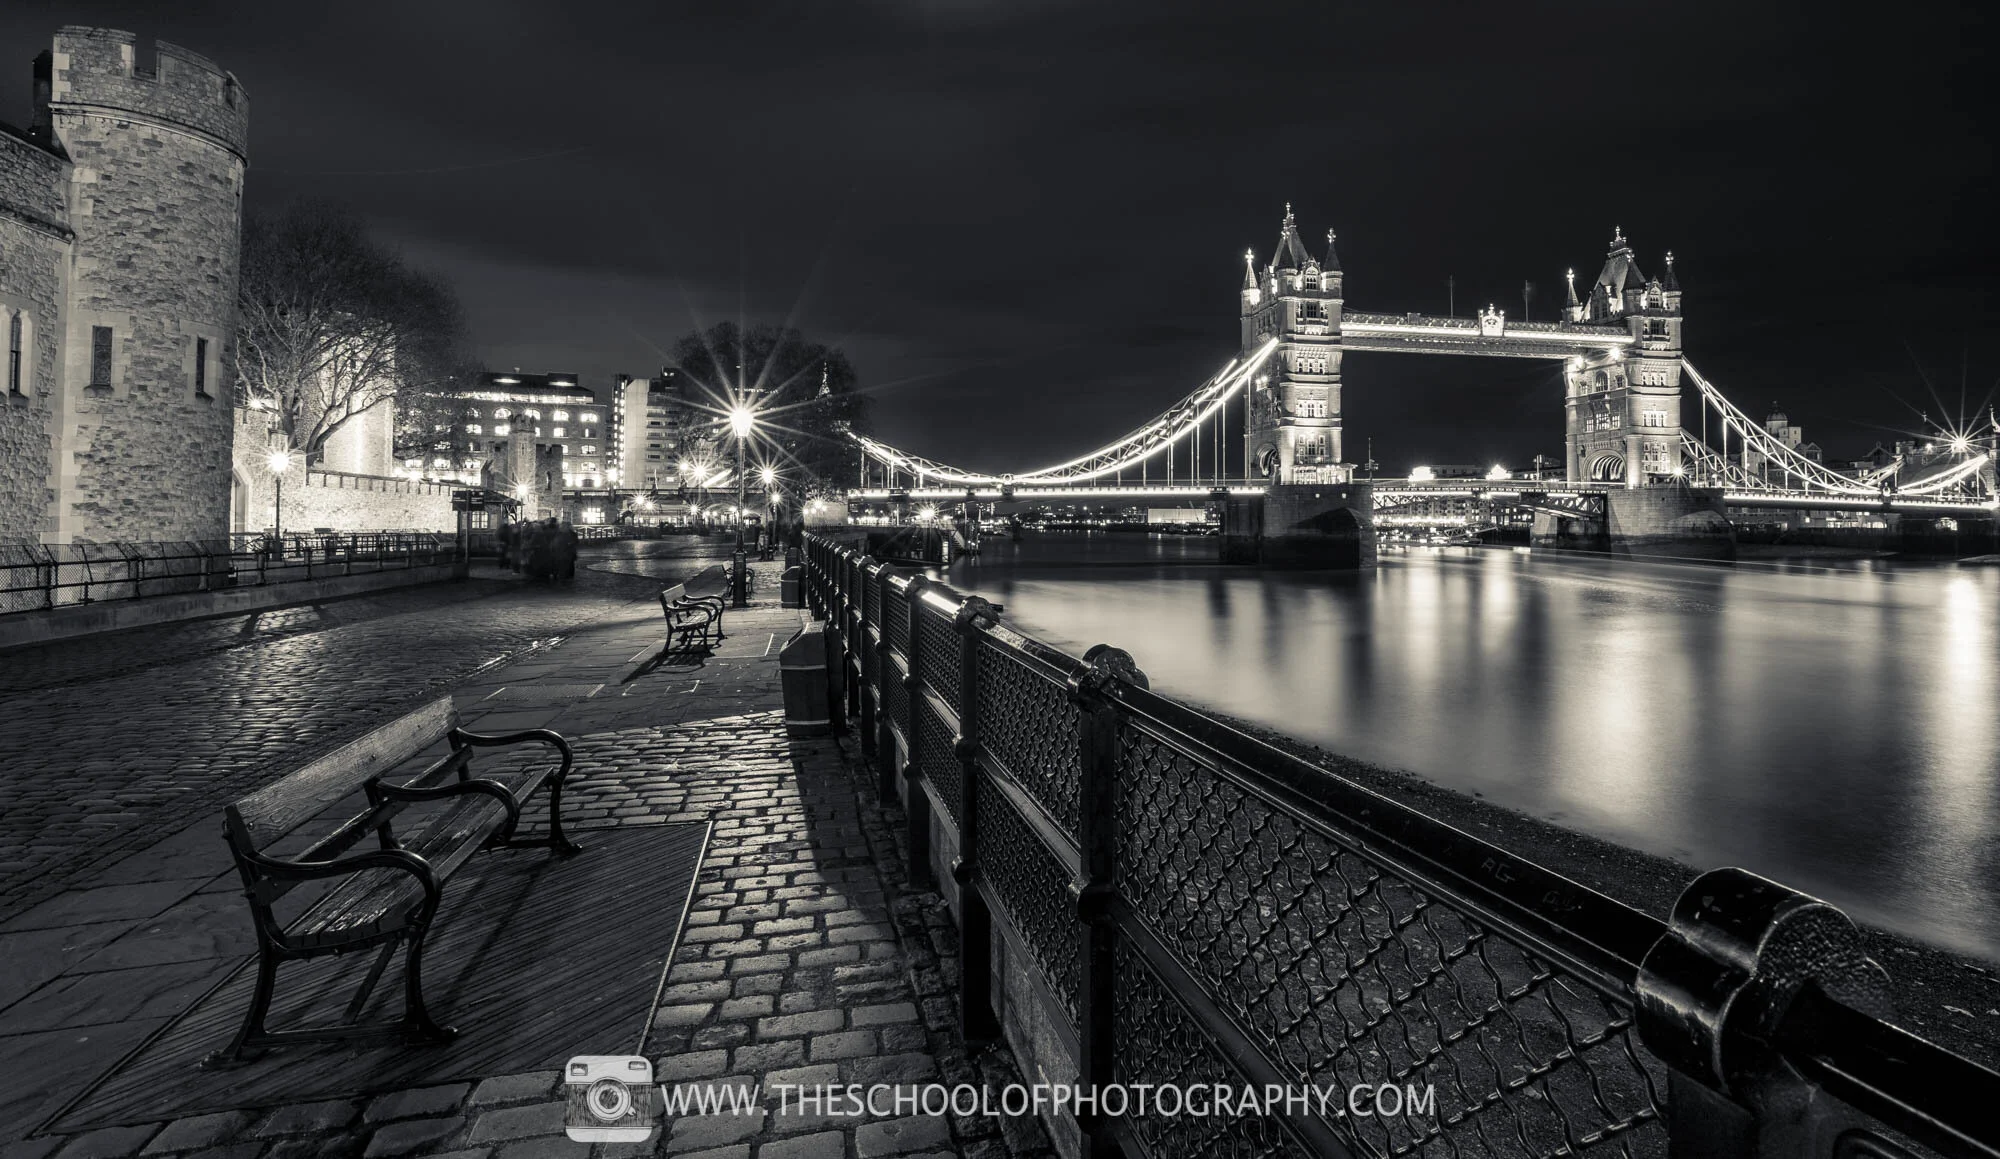
Taken with an ultra-wide angle lens. Camera Settings - f 16 – 30 Seconds - ISO 400 - 16mm focal length, full frame Camera

Camera that goes into full manual mode is essential for getting the right night photography settings.
You’ll need a camera that goes into full manual mode. This will enable you to take full control over the camera settings.

A sturdy tripod is a good investment for night photography.
Tripod for Night Photography Camera Settings
A sturdy tripod is a must when using long exposure settings for night photography.
Because exposure times at night can be 30–60 seconds or more, your camera needs to remain completely still. Avoid cheap, flimsy tripods, as these can cause camera movement from wind or vibration.

Remote trigger and cable release
Remote Trigger or Cable Release
When using long exposure settings for night photography, you must avoid touching the camera during the shot.
A remote trigger or cable release allows you to fire the shutter without physically touching the camera, preventing camera shake and blurred images.

Wide Angle Lens
Wide-Angle Lens for Night Photography
Although not essential, an ultra-wide-angle lens is highly recommended for night photography.
These lenses allow you to capture sweeping city skylines and dramatic perspectives. On a full-frame camera, this is typically around 16mm, while crop-sensor cameras will require slightly shorter focal lengths.
Recommended Settings for Night Photography
Mode: Manual (M)
Shutter Speed: 30–60 seconds
Aperture: f/8, f/11, or f/16
ISO: 100 or 200
White Balance: Auto
Focus: Manual
File Format: RAW
These settings for night photography will give you clean, sharp, and well-exposed images.
Shutter Speed Settings for Night Photography
Because it’s dark, night photography requires long shutter speeds. A shutter speed of 30–60 seconds allows enough light to hit the sensor.
If your image is too dark → increase the shutter time
If your image is too bright → reduce the shutter time
Aperture Settings for Night Photography
Using apertures like f/8, f/11, or f/16 creates a large depth of field, keeping your image sharp from foreground to background.
Start at f/11:
Too bright → move to f/16
Too dark → move to f/8
ISO Settings for Night Photography
Low ISO values such as ISO 100 or 200 are essential for clean night images.
Higher ISO values introduce noise, which appears as grain and dull colours. Using low ISO is one of the most important settings for night photography if you want crisp, colourful results.
White Balance Settings for Night Photography
Night scenes often contain multiple light sources with different colour temperatures.
Using Auto White Balance provides a good neutral starting point, which can be fine-tuned later in post-processing software like Lightroom. Setting white balance to Daylight often results in images that are too orange.
Manual Focus for Night Photography
Autofocus struggles in low light, so manual focus is essential when using night photography settings.
Focus on a well-lit object in the distance, then switch your lens to manual focus to lock it in place before taking the shot.
RAW Format for Night Photography Settings
Shooting in RAW is strongly recommended when using settings for night photography.
RAW files retain more detail, allowing you to lift shadows, recover highlights, and enhance colours during post-processing. This is especially useful in high-contrast night scenes.
If any of these settings are confusing, take a look at our Beginner’s Guide to Photography for a full explanation.
For our full in-depth course on ‘Photographing Cities at Night’, click here.
Download these settings and take them with you at the top of this page.
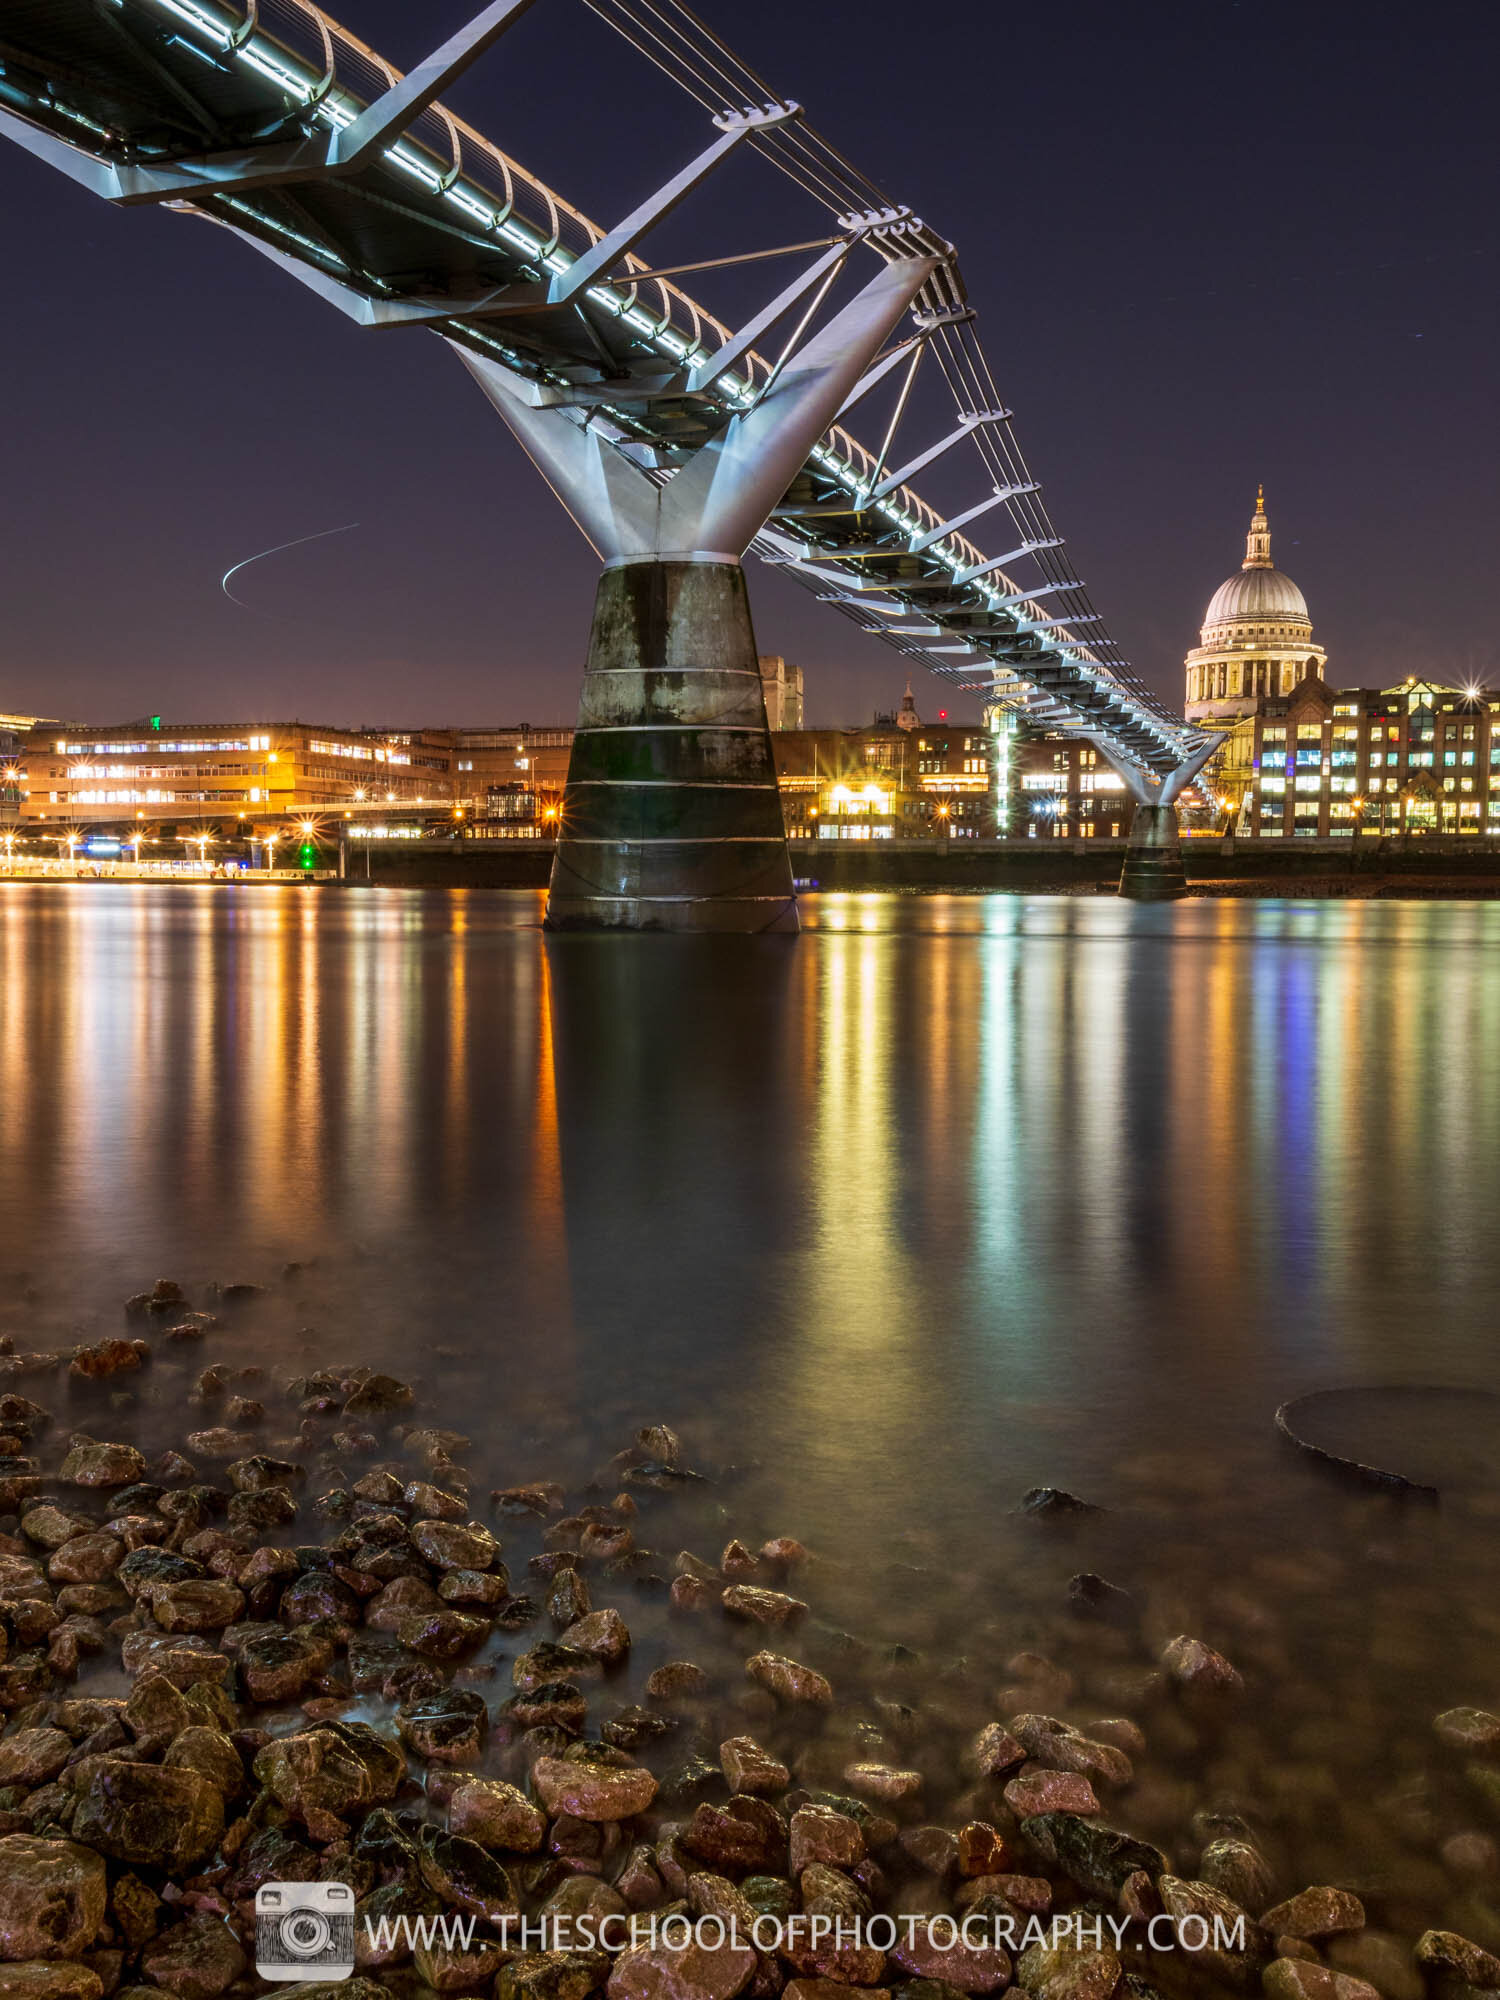
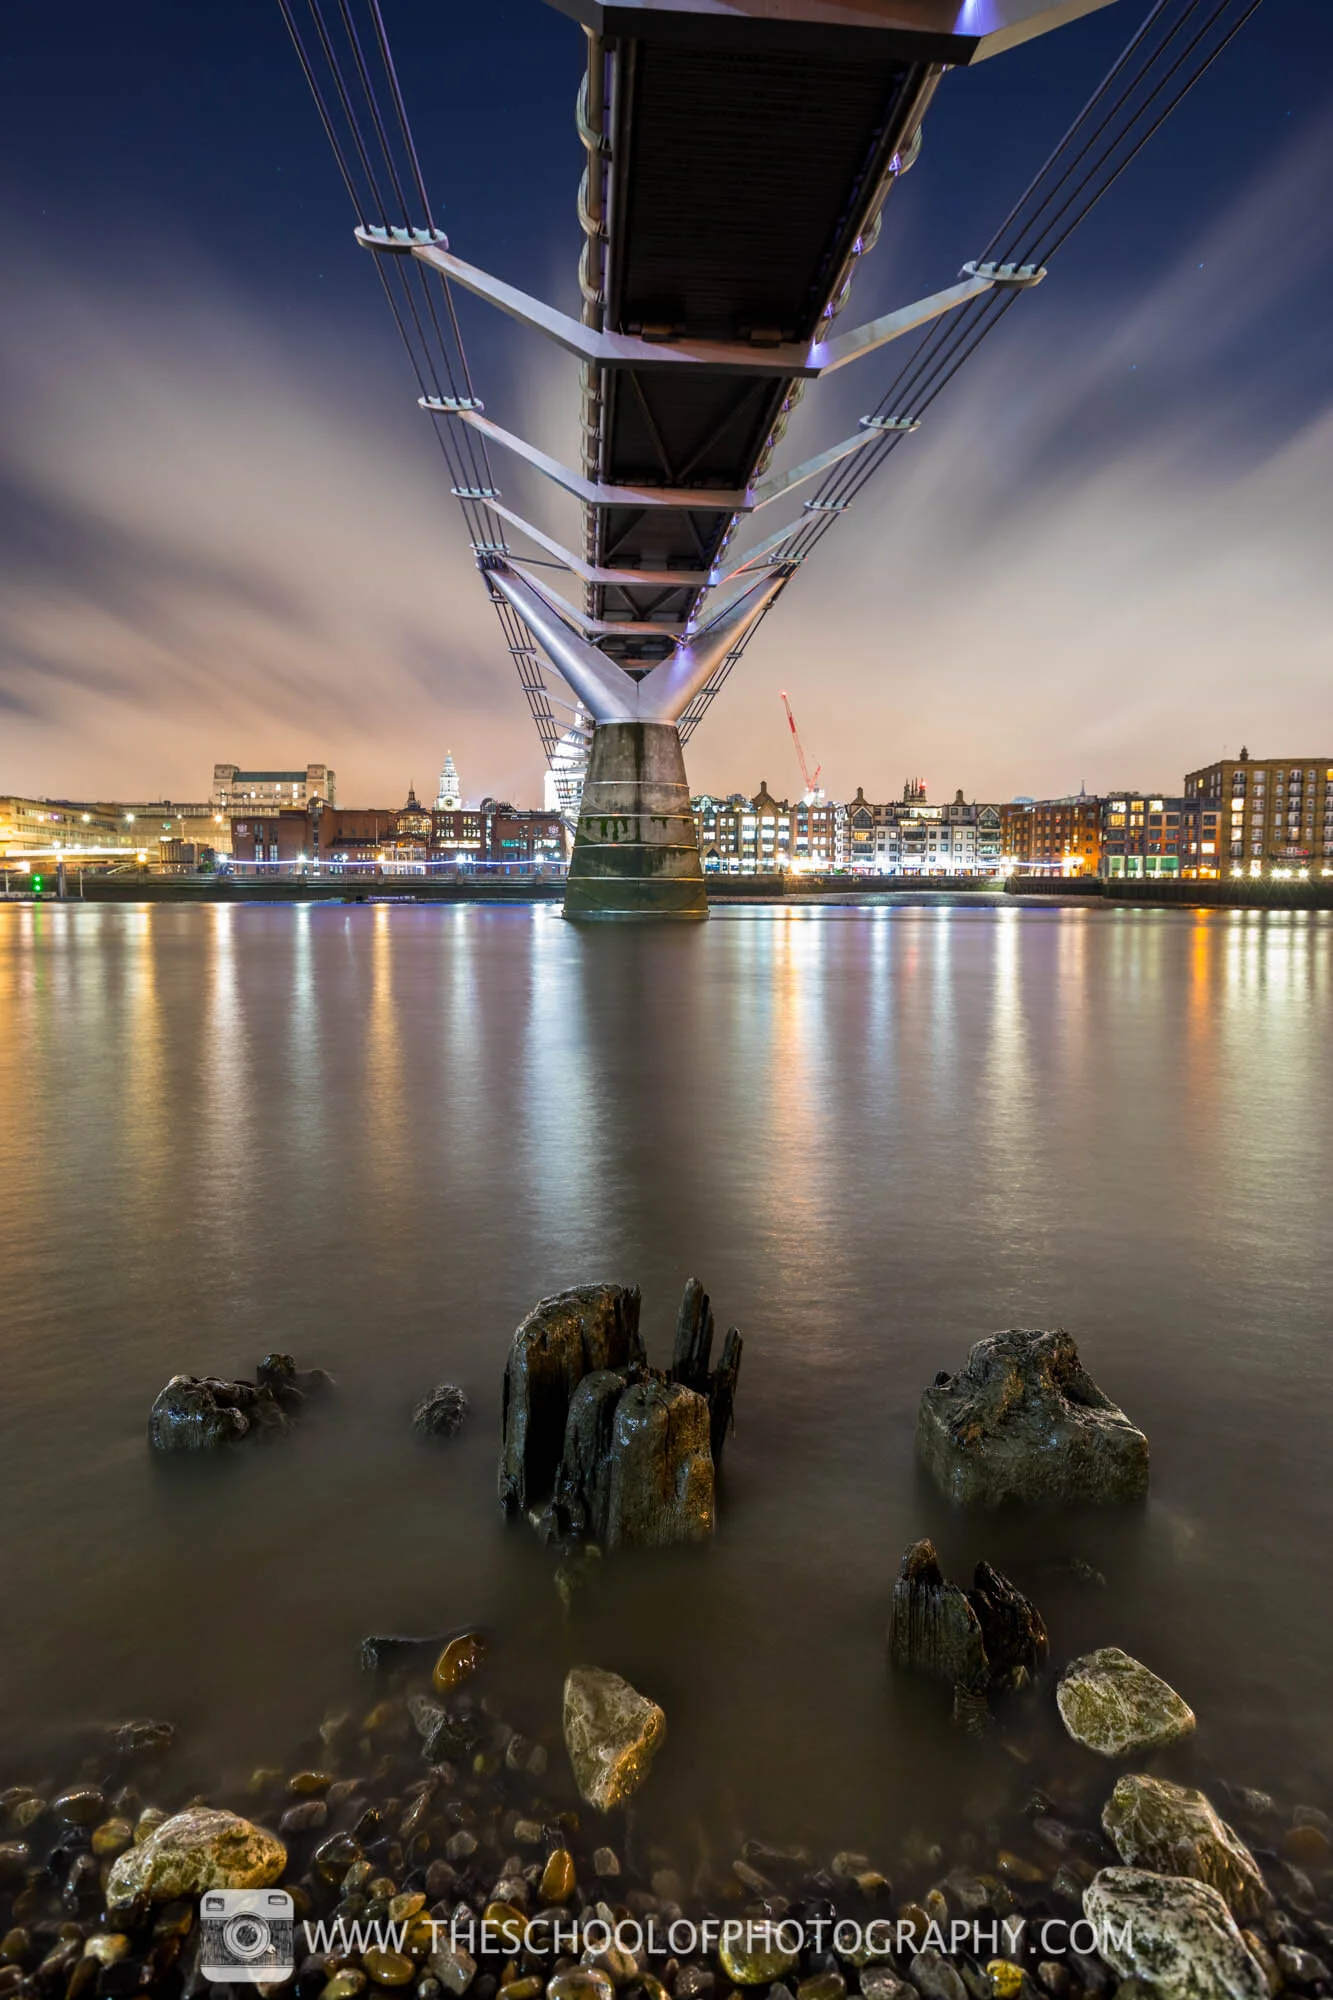
Camera Settings - f 16 - 60 Seconds - ISO 100 - 17mm focal length, full frame Camera
Night Photography Techniques Using These Settings
The camera settings for night photography outlined above create the classic long-exposure city look — glowing lights, smooth water, and enhanced reflections.
Pay close attention to composition. Diagonal lines, especially bridges and rivers, work particularly well in night photography as they guide the viewer’s eye through the frame.
Using an ultra-wide-angle lens enhances the sense of scale and depth, making city skylines feel more dramatic.
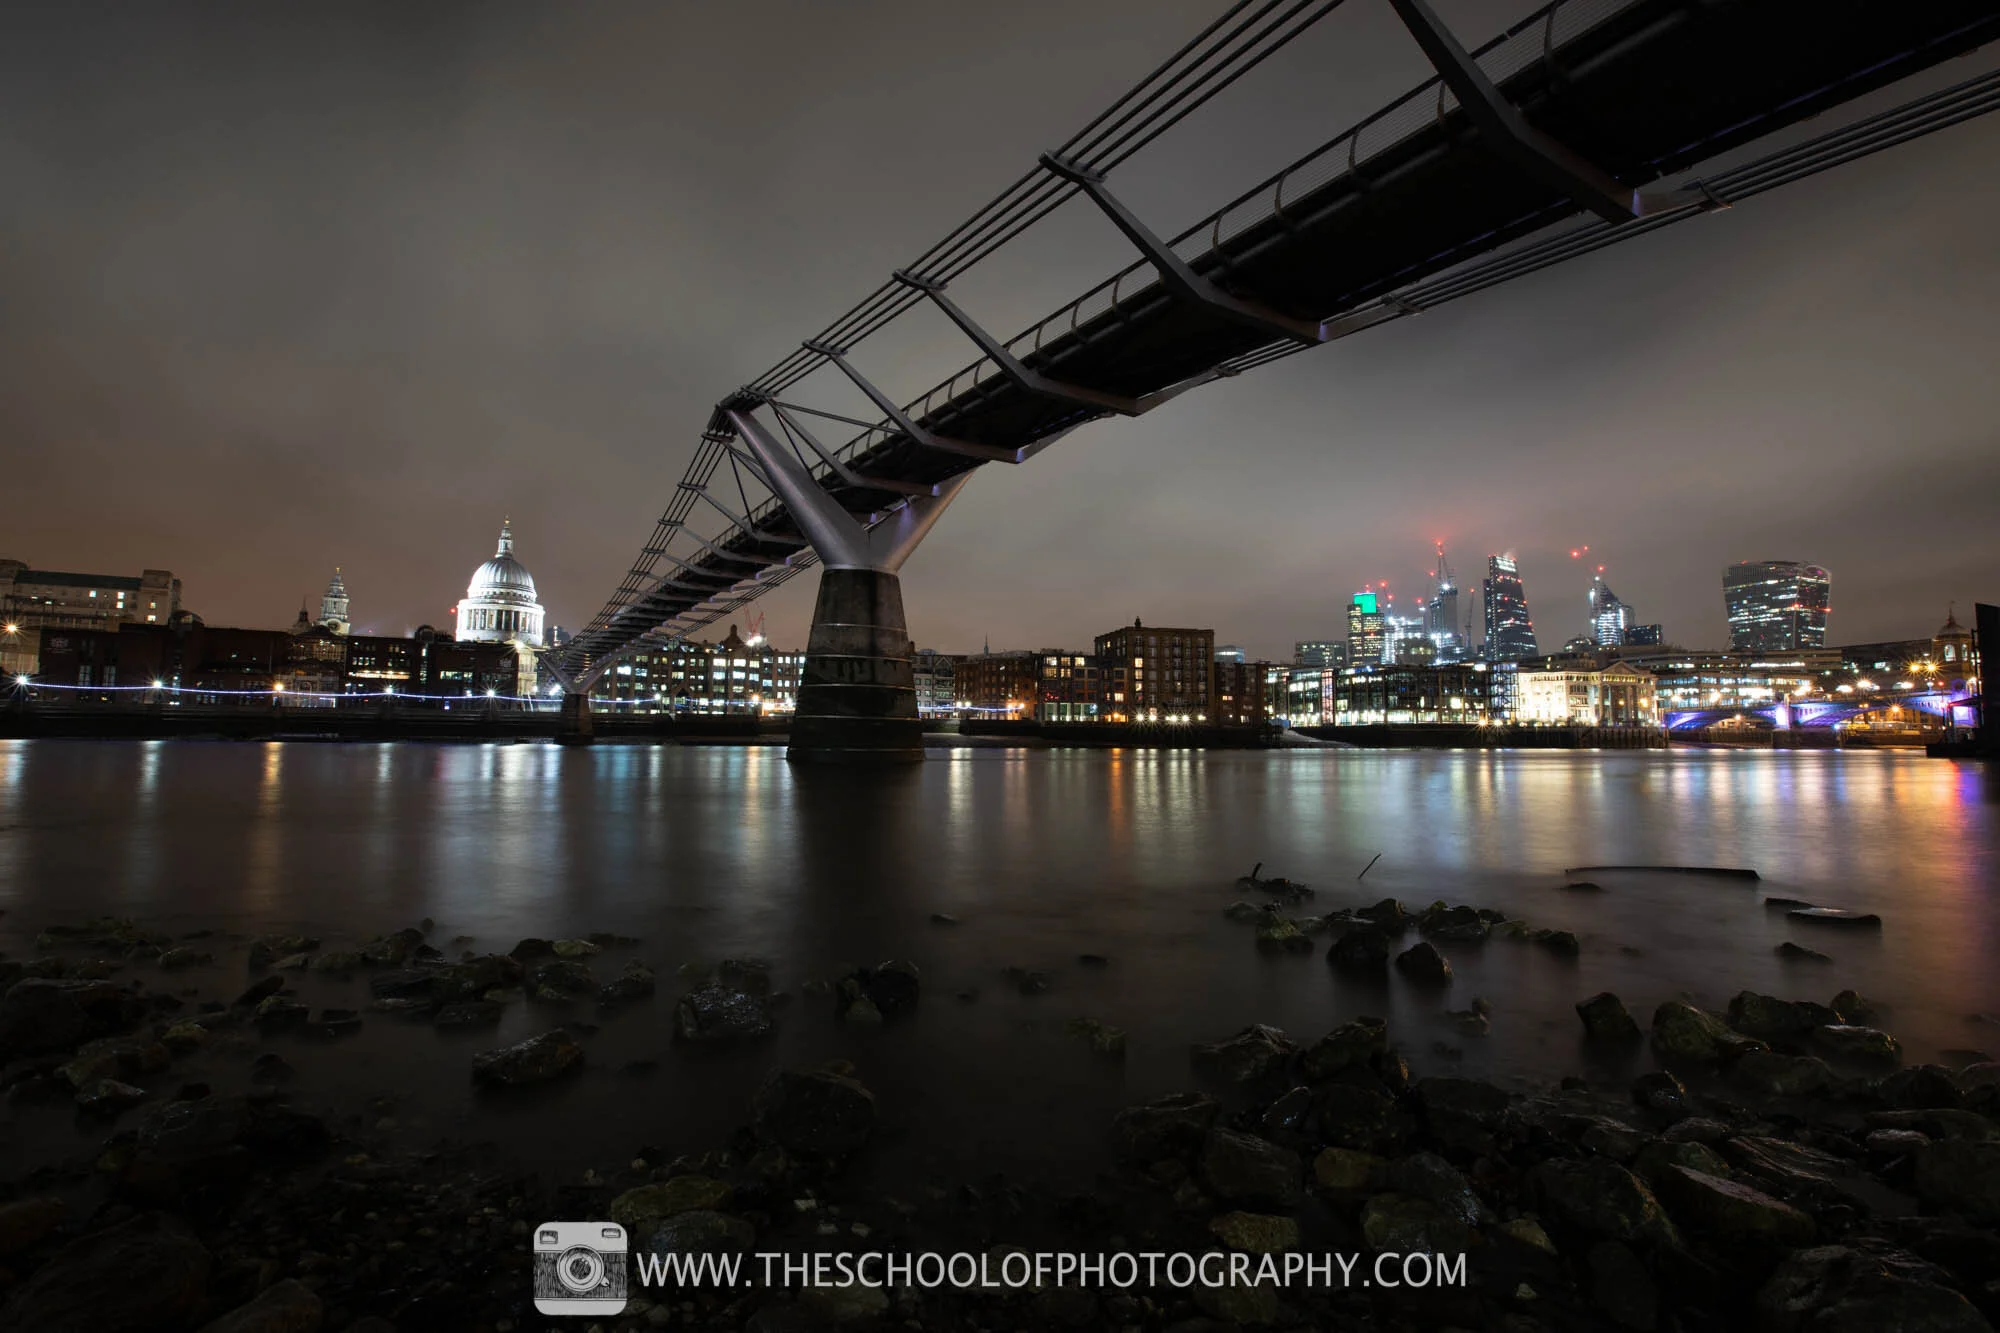
Camera Settings - f 16 - 60 Seconds - ISO 200 - 14mm focal length, micro 4:3 camera
Post-Processing Night Photography Images
Night photography benefits greatly from post-processing. There are many rich colours and strong contrasts that can be enhanced using Lightroom or Photoshop.
Shooting in RAW gives you more flexibility to:
Lift shadow detail
Control highlights
Enhance colour saturation
Balance overall exposure
Without post-processing, night images can appear either too dark or overly bright.
Raw image straight out of camera
Processed shot using Lightroom. Camera Settings - f 16 – 15 Seconds - ISO 200 - 16mm focal length, full frame Camera
Examples of Settings for Night Photography
Across these examples, you’ll notice a consistent use of:
Long shutter speeds
Small apertures
Low ISO values
These combinations are the foundation of effective settings for night photography, regardless of camera type.

Camera Settings - f 11 - 30 Seconds - ISO 200 - 14mm focal length, micro 4:3 camera
Camera Settings - f 11 - 30 Seconds - ISO 200 - 16mm focal length, full frame camera
Learn more about taking picture of cities at night with our ‘Photographing Cities at Night’ course.
Like this? - Check out similar tutorials below


I hope you liked this video, please leave us a comment and support us by sharing it with your friends and subscribe to our newsletter at the bottom of this page for more.
We also have an excellent learning community on social media so please join us there as well.
Thanks for watching and remember – Learn more at The School of Photography.
