Remove Distractions in Lightroom: A Simple How-To Guide
Distractions can ruin an otherwise great photograph. Reflections in glass, people walking through a scene, or unwanted elements pulling the viewer’s eye away from the subject are all common frustrations for photographers.
Thankfully, Lightroom’s Distraction Removal tool makes fixing these issues easier than ever. Powered by AI, it can remove reflections, eliminate people, and intelligently rebuild backgrounds, all without leaving Lightroom.
In this tutorial, you’ll learn how to use distraction removal in Lightroom, where to find it, and how it compares to removing distractions using other popular photo editing software.
Where Is Distraction Removal in Lightroom?
One of the most common questions photographers ask is: where is distraction removal in Lightroom?
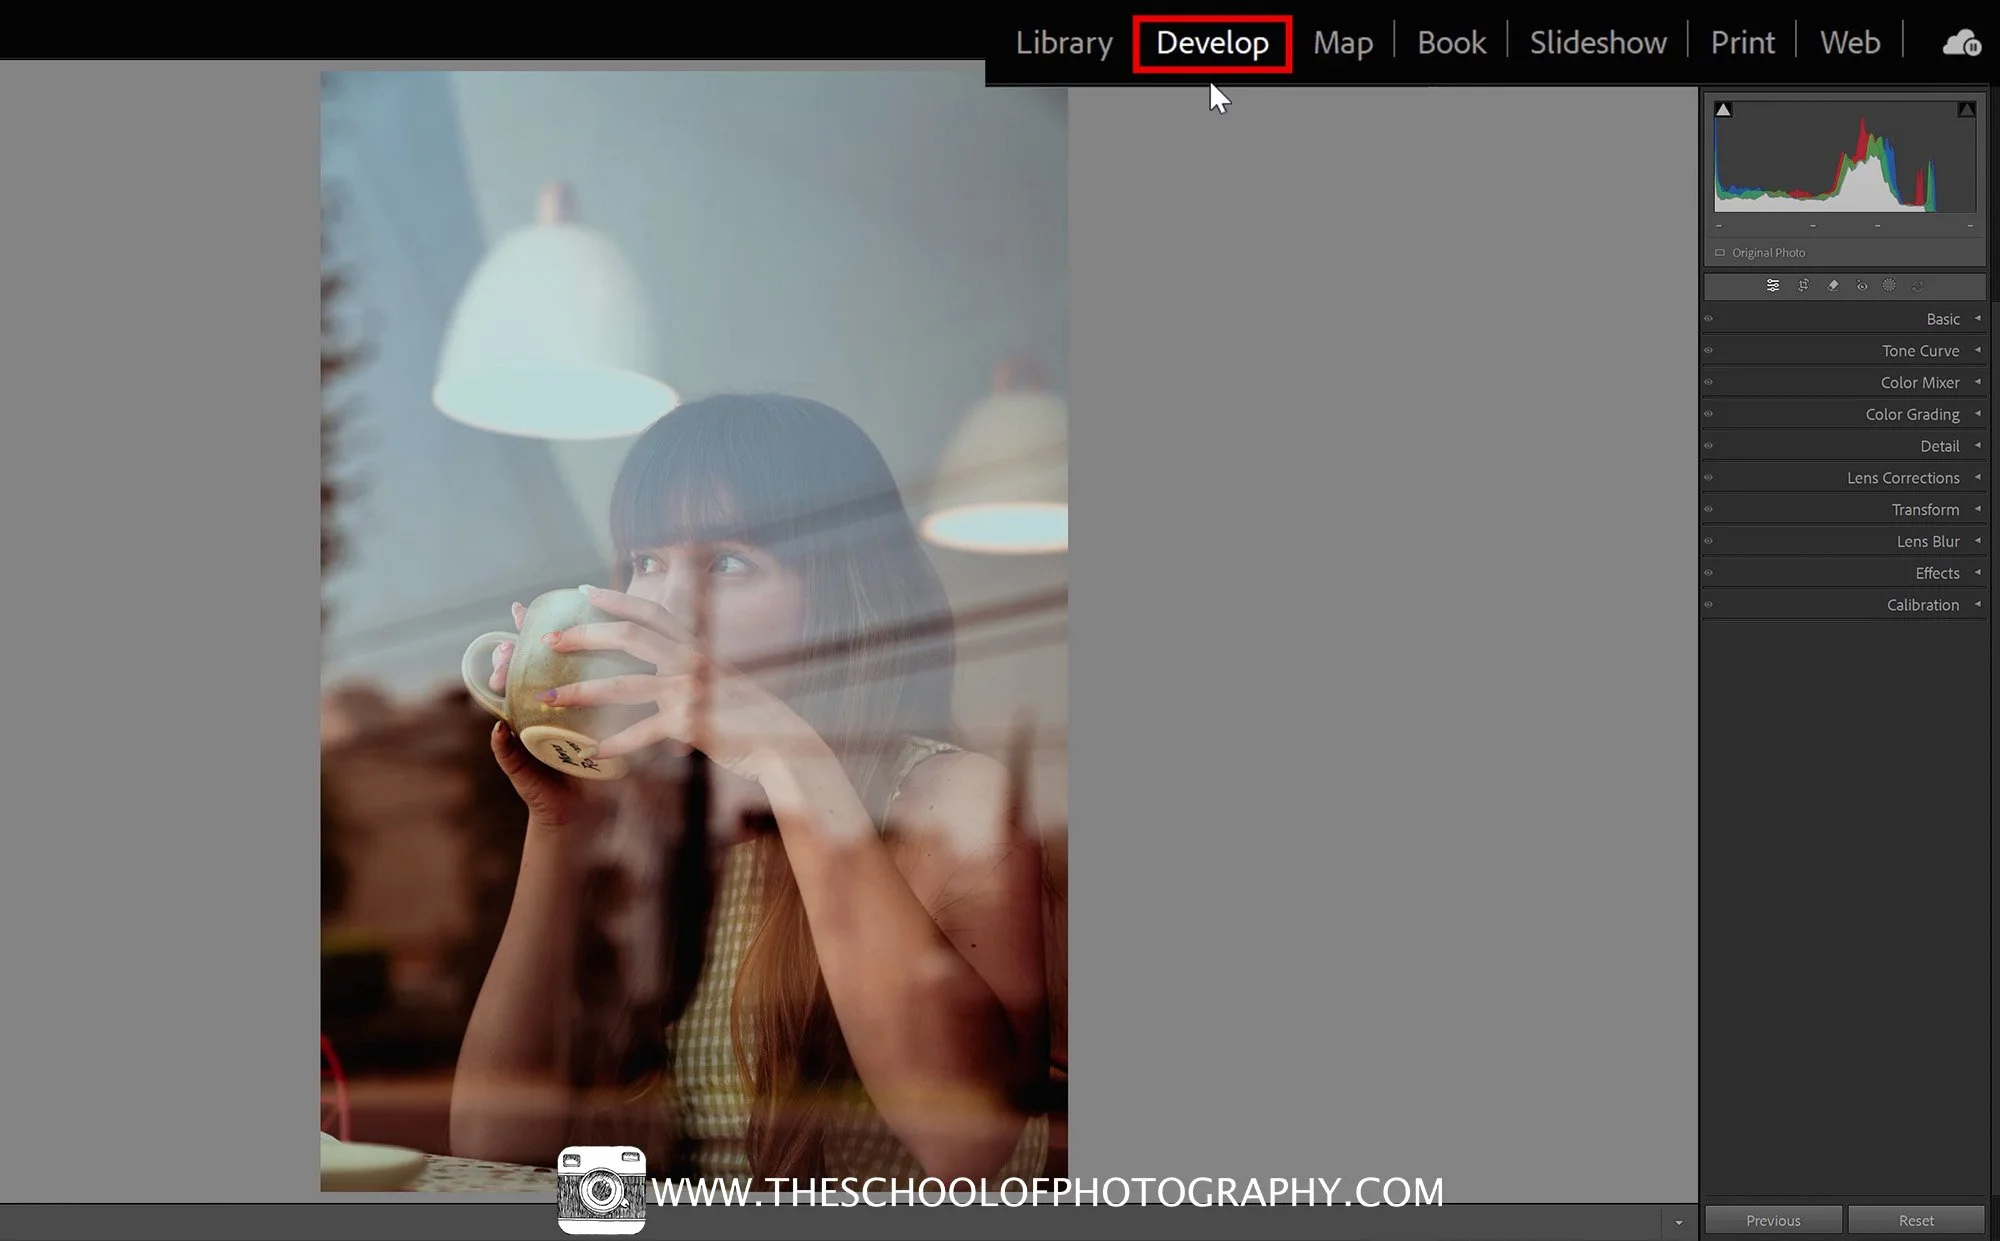
You’ll find it in the Develop module:
1. Open your image in the Develop module.
2. Select the Remove tool (the bandage-style icon).
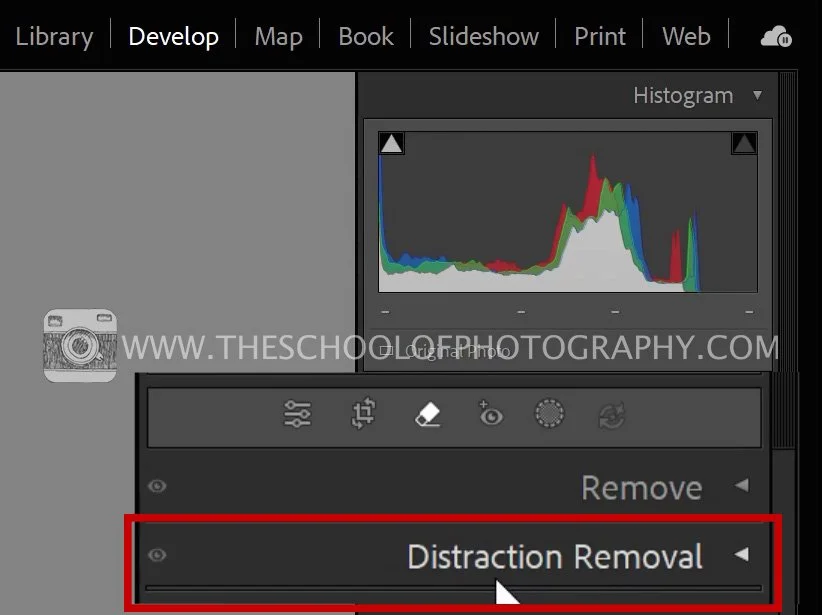
3. Under the Remove tool, click the Distraction Removal dropdown.
Open image in the develop module
Select remove tool
Distraction Removal dropdown
From here, Lightroom gives you some powerful options:
· Reflections
· People
· Dust
Both are AI-driven and designed to solve very specific real-world problems quickly.
Get access to ALL our online courses - 1000’s of videos, worksheets, critiques of students work, personalised support and much more with our monthly membership.
How to Use Distraction Removal in Lightroom for Reflections
Reflections — especially in windows and glass — can be difficult to remove convincingly. This is where Lightroom’s reflection removal really shines.
Step-by-step:
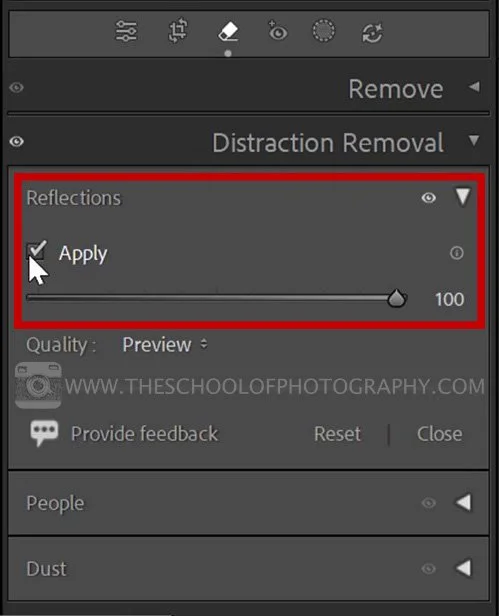
1. Open the Reflections panel under Distraction Removal.
2. Click Apply and let Lightroom analyse the image.
3. Lightroom automatically removes the reflection.

Before reflection removal

After reflection removal
You can then use the slider to control the result:
· Drag left to see only the reflection.
· Drag right to fully remove it.
This makes it easy to preview how effective the tool will be before committing.
Distraction removal slider
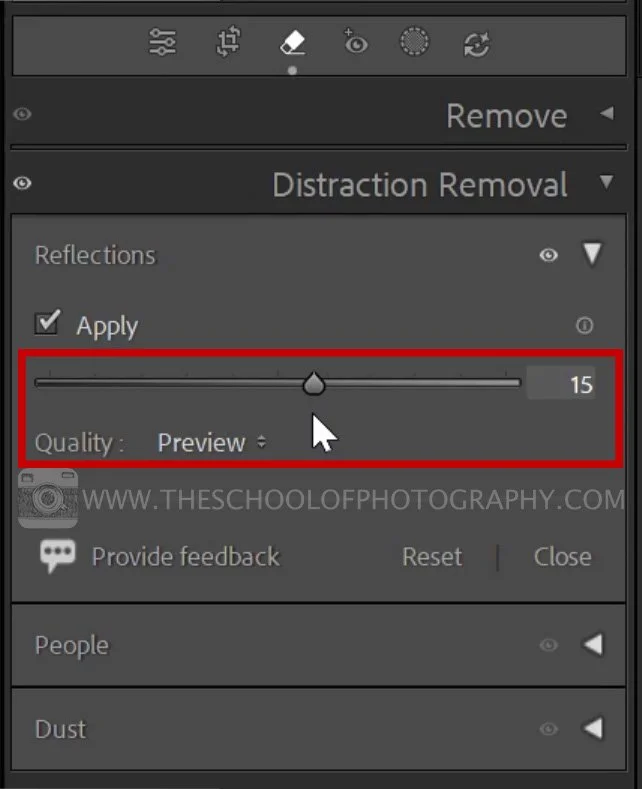
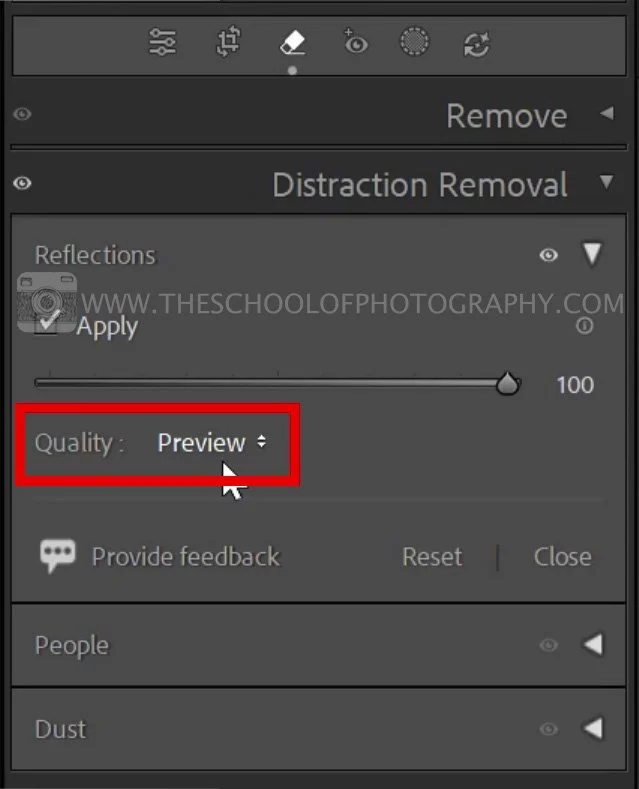
Preview vs Best Quality
When testing the effect, leave Quality set to Preview.
Once you’re happy and ready to export, switch it to Best — this tells Lightroom to fully process the image at maximum quality.
Tip: Reflection removal won’t work on every image, but when the reflection is clear and well-defined, the results can be remarkably convincing.
Preview
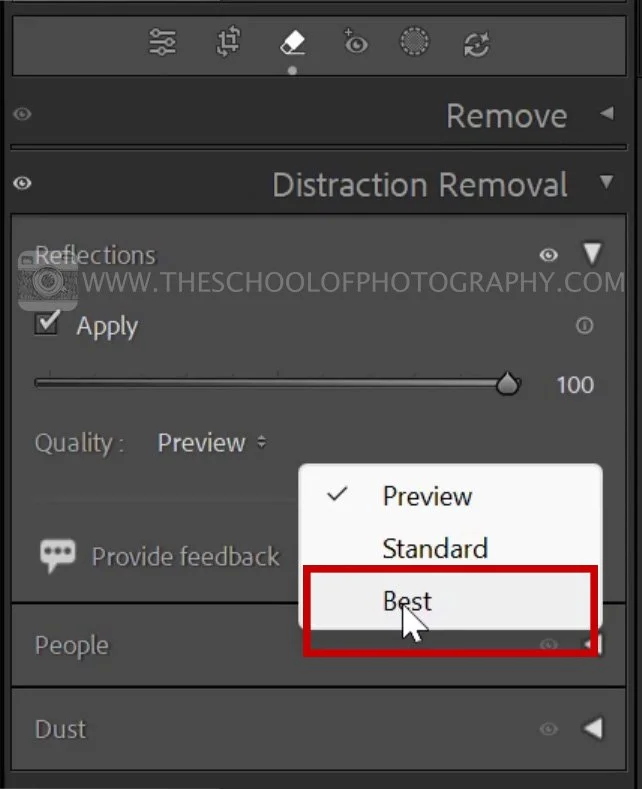
Best option
How to Remove People from Photos in Lightroom
In Lightroom, removing people is now built directly into the same Distraction Removal tool.
Step-by-step:
1. Open the People panel under Distraction Removal.
2. Lightroom automatically detects people in the image.
3. A mask overlay appears showing the detected subjects.
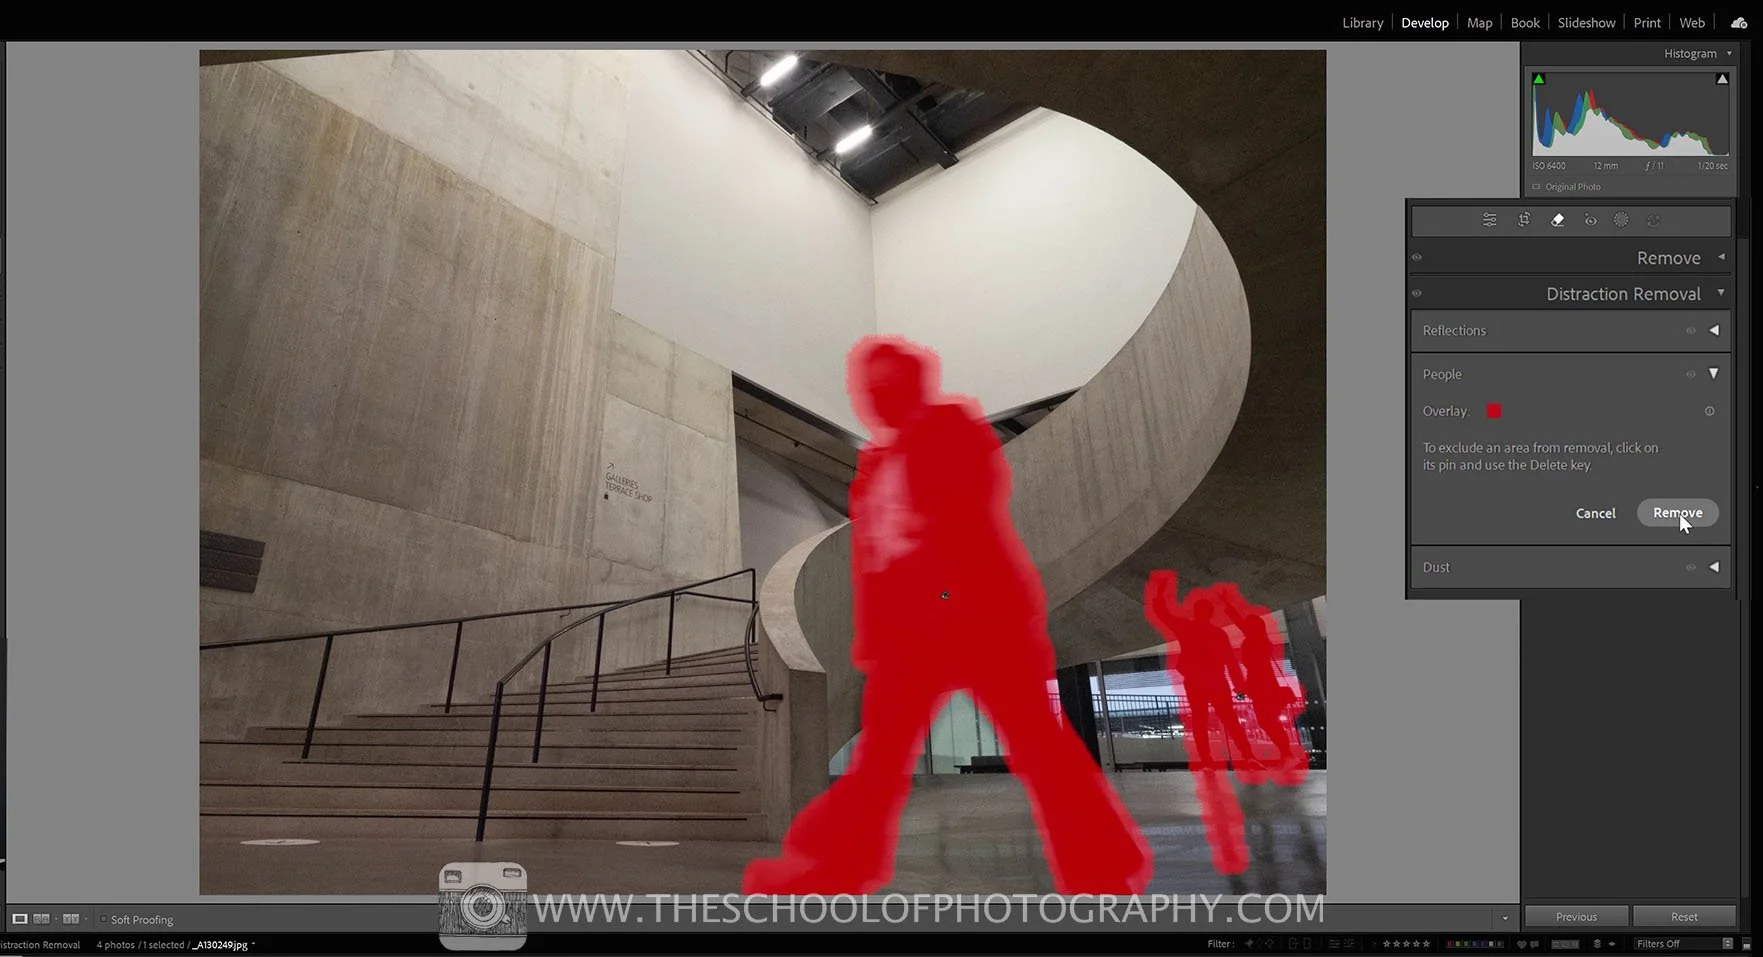
Removing people - Mask overlay
4. Click Remove
Lightroom fills in the background intelligently, often producing a clean, natural-looking result in seconds.
Removing people - Before
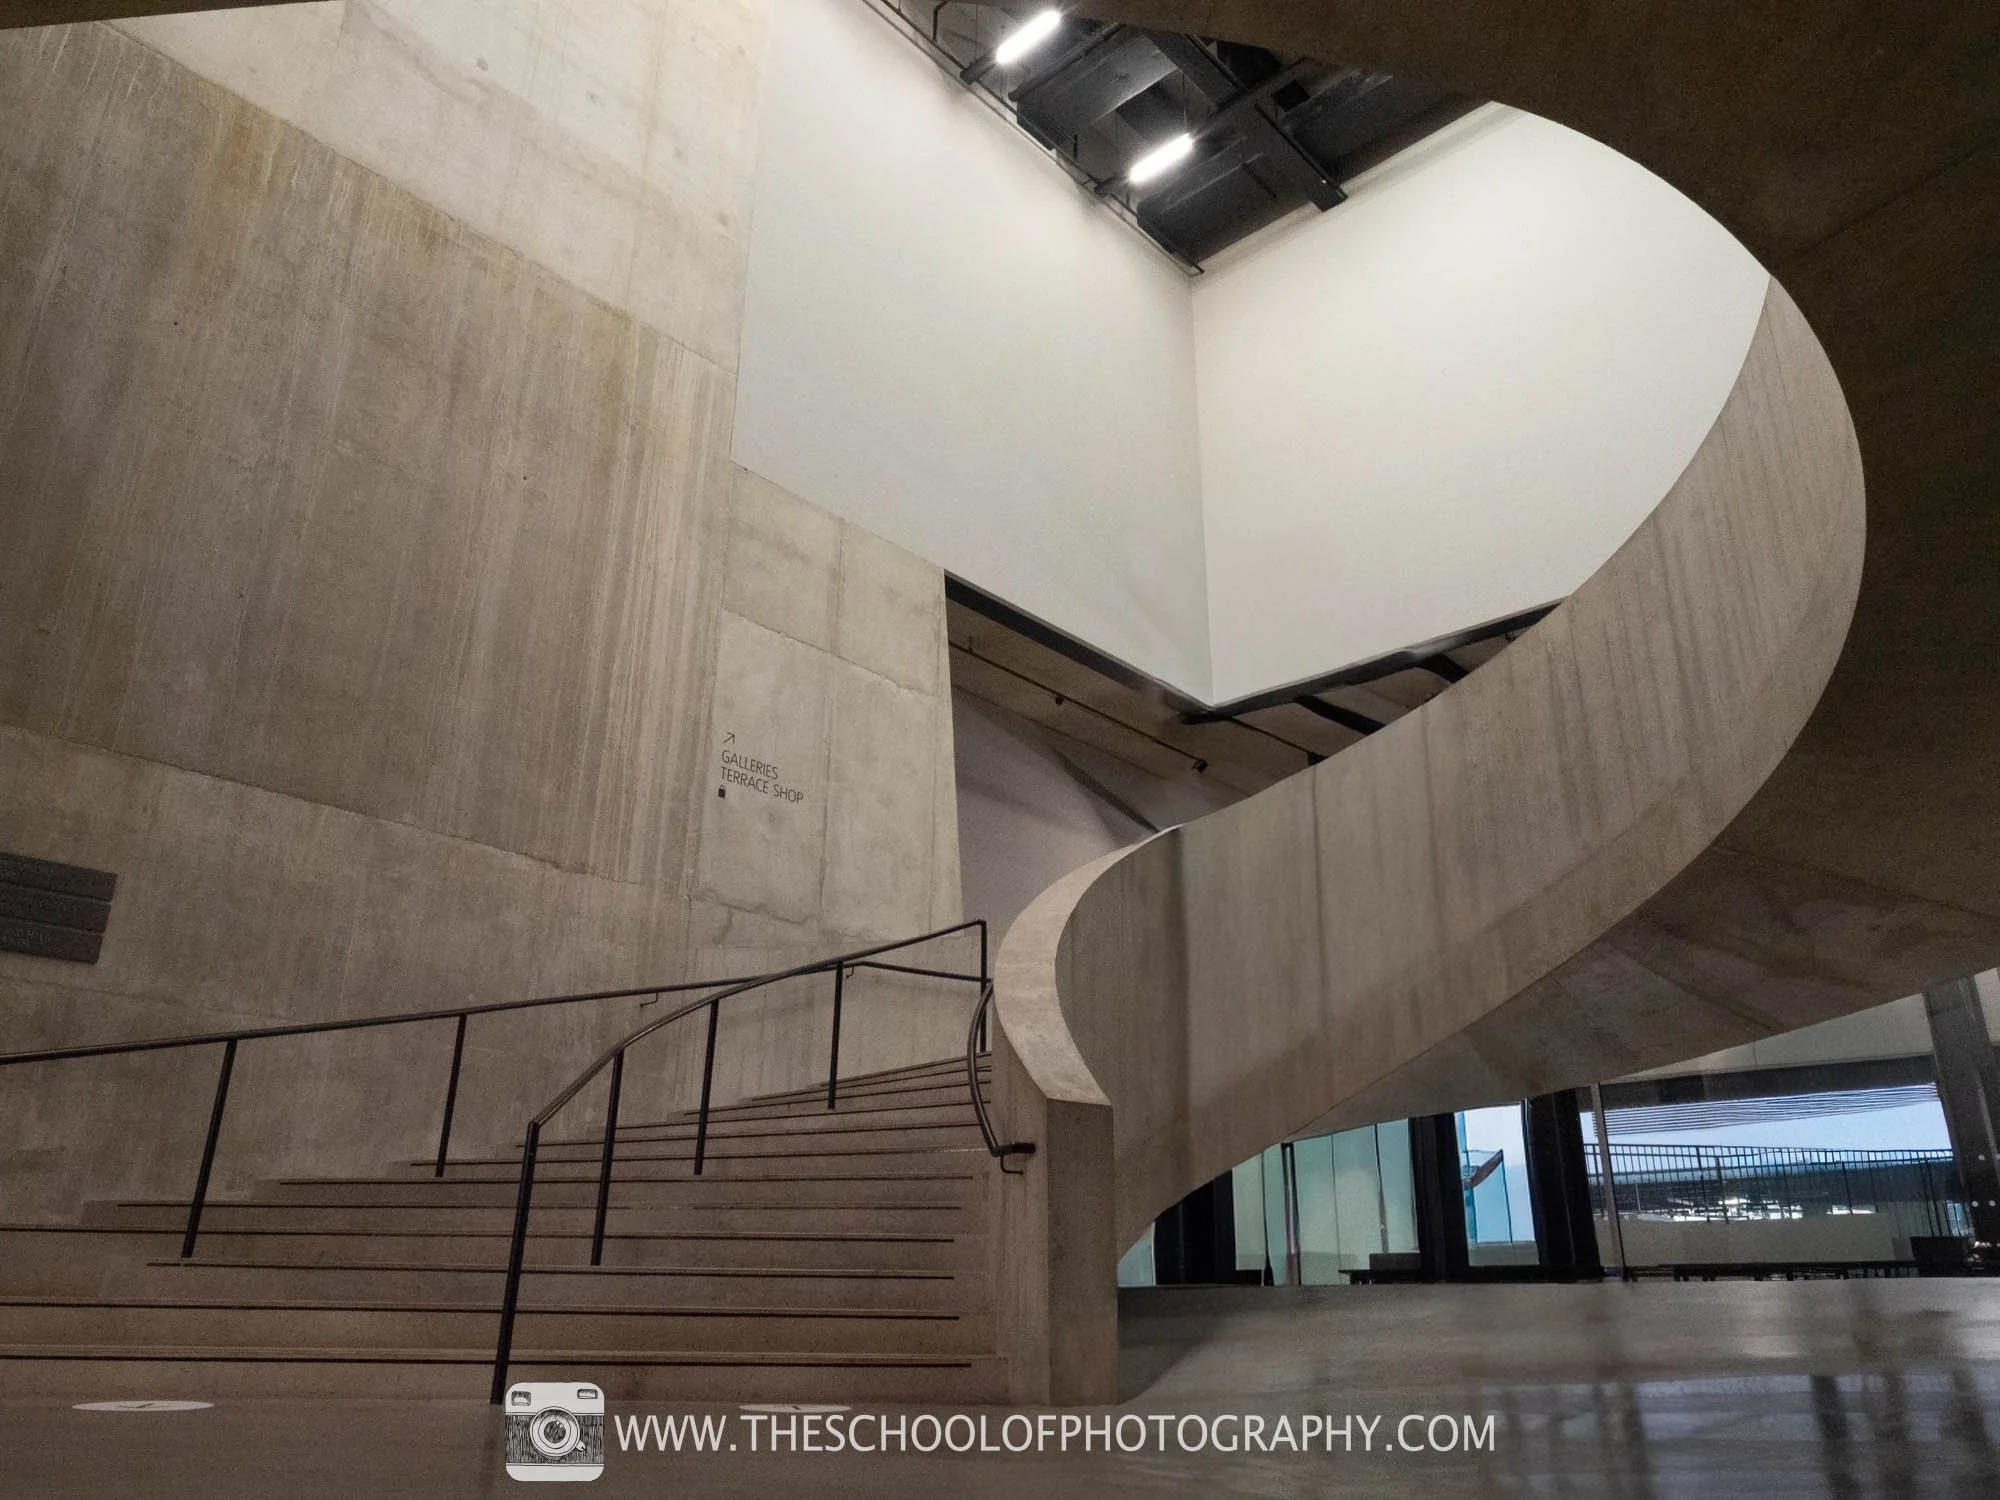
Removing people - After
Learn more about removing objects in our Lightroom Course
Fine-Tuning the Removal Results
AI doesn’t always get it perfect on the first attempt and Lightroom gives you control when that happens.
Choosing Variations:
If you don’t like the result:
1. Click on one of the pins (the small black markers).
2. Select Variations.
3. Click through the options to choose the best-looking result.
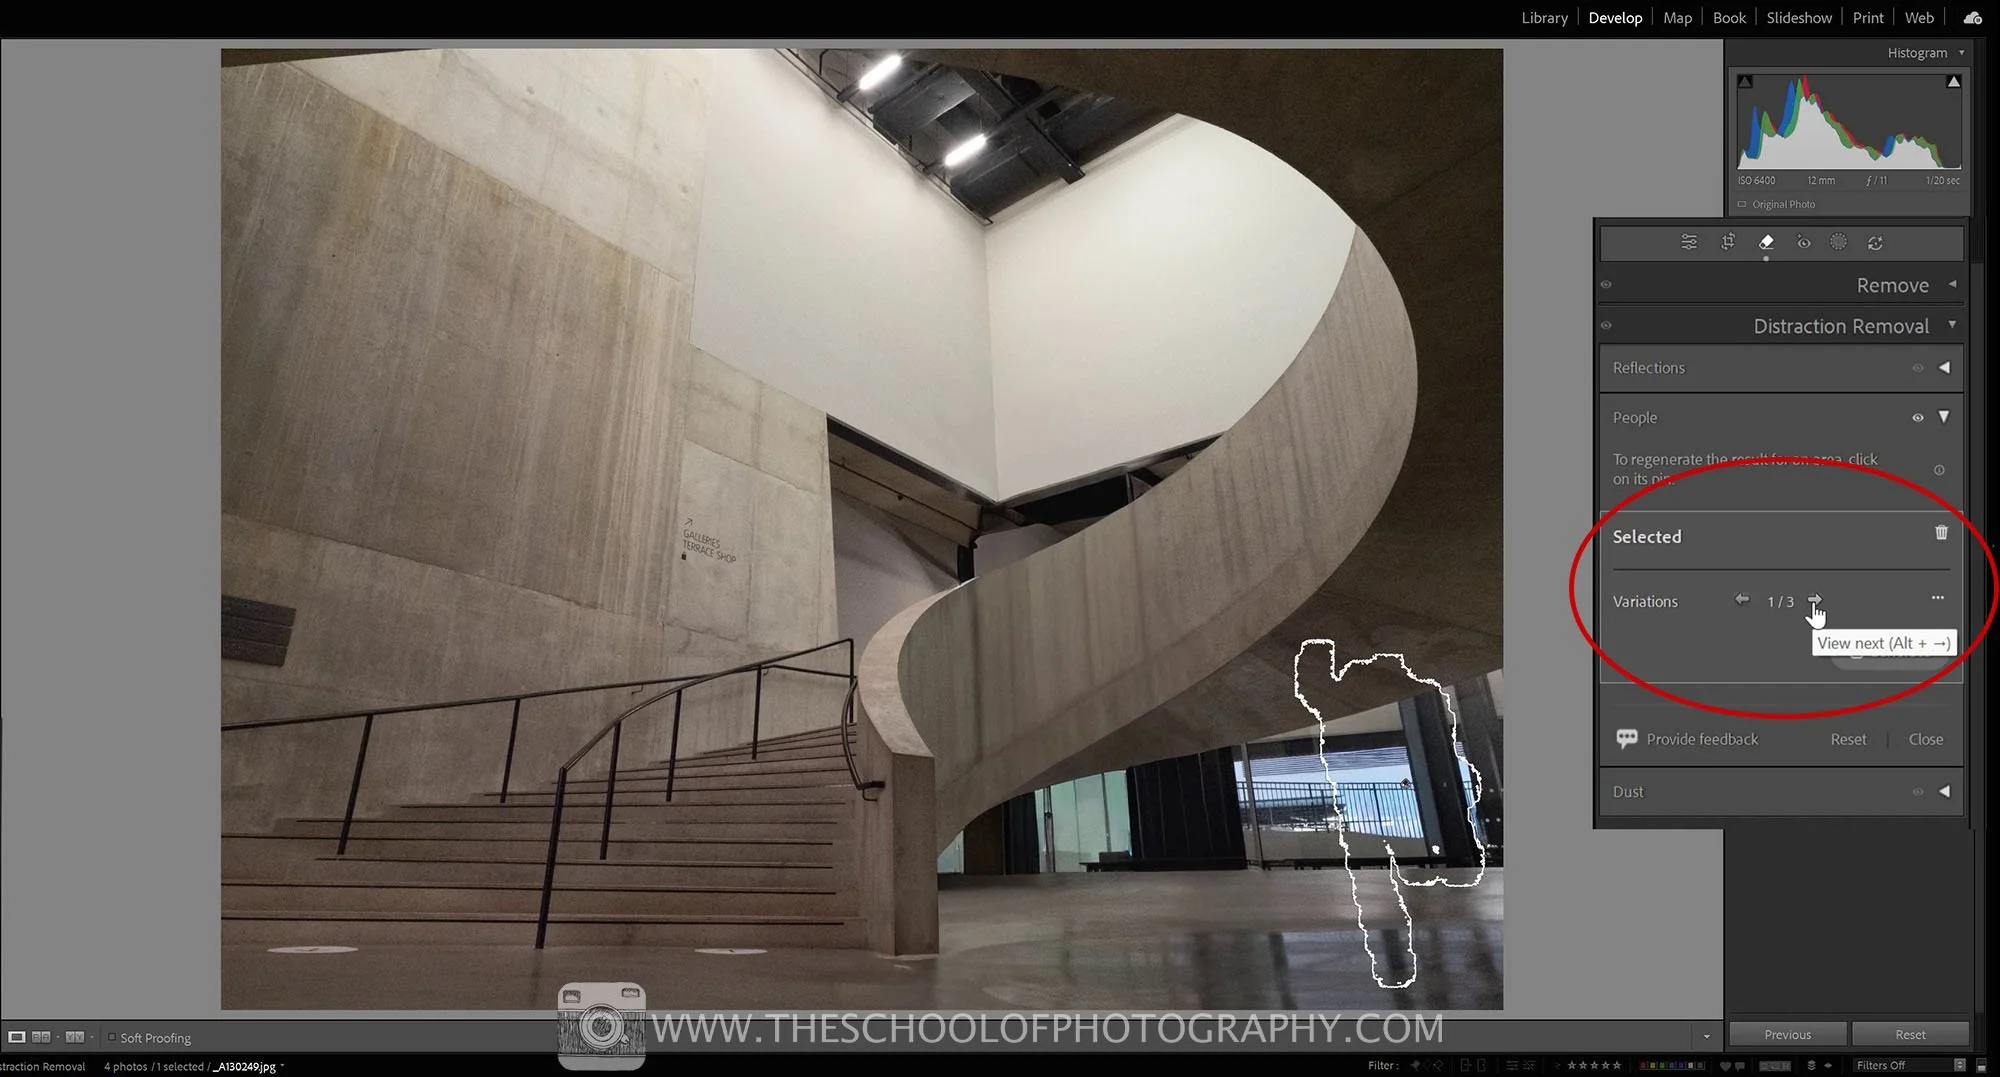
Variation options after removal
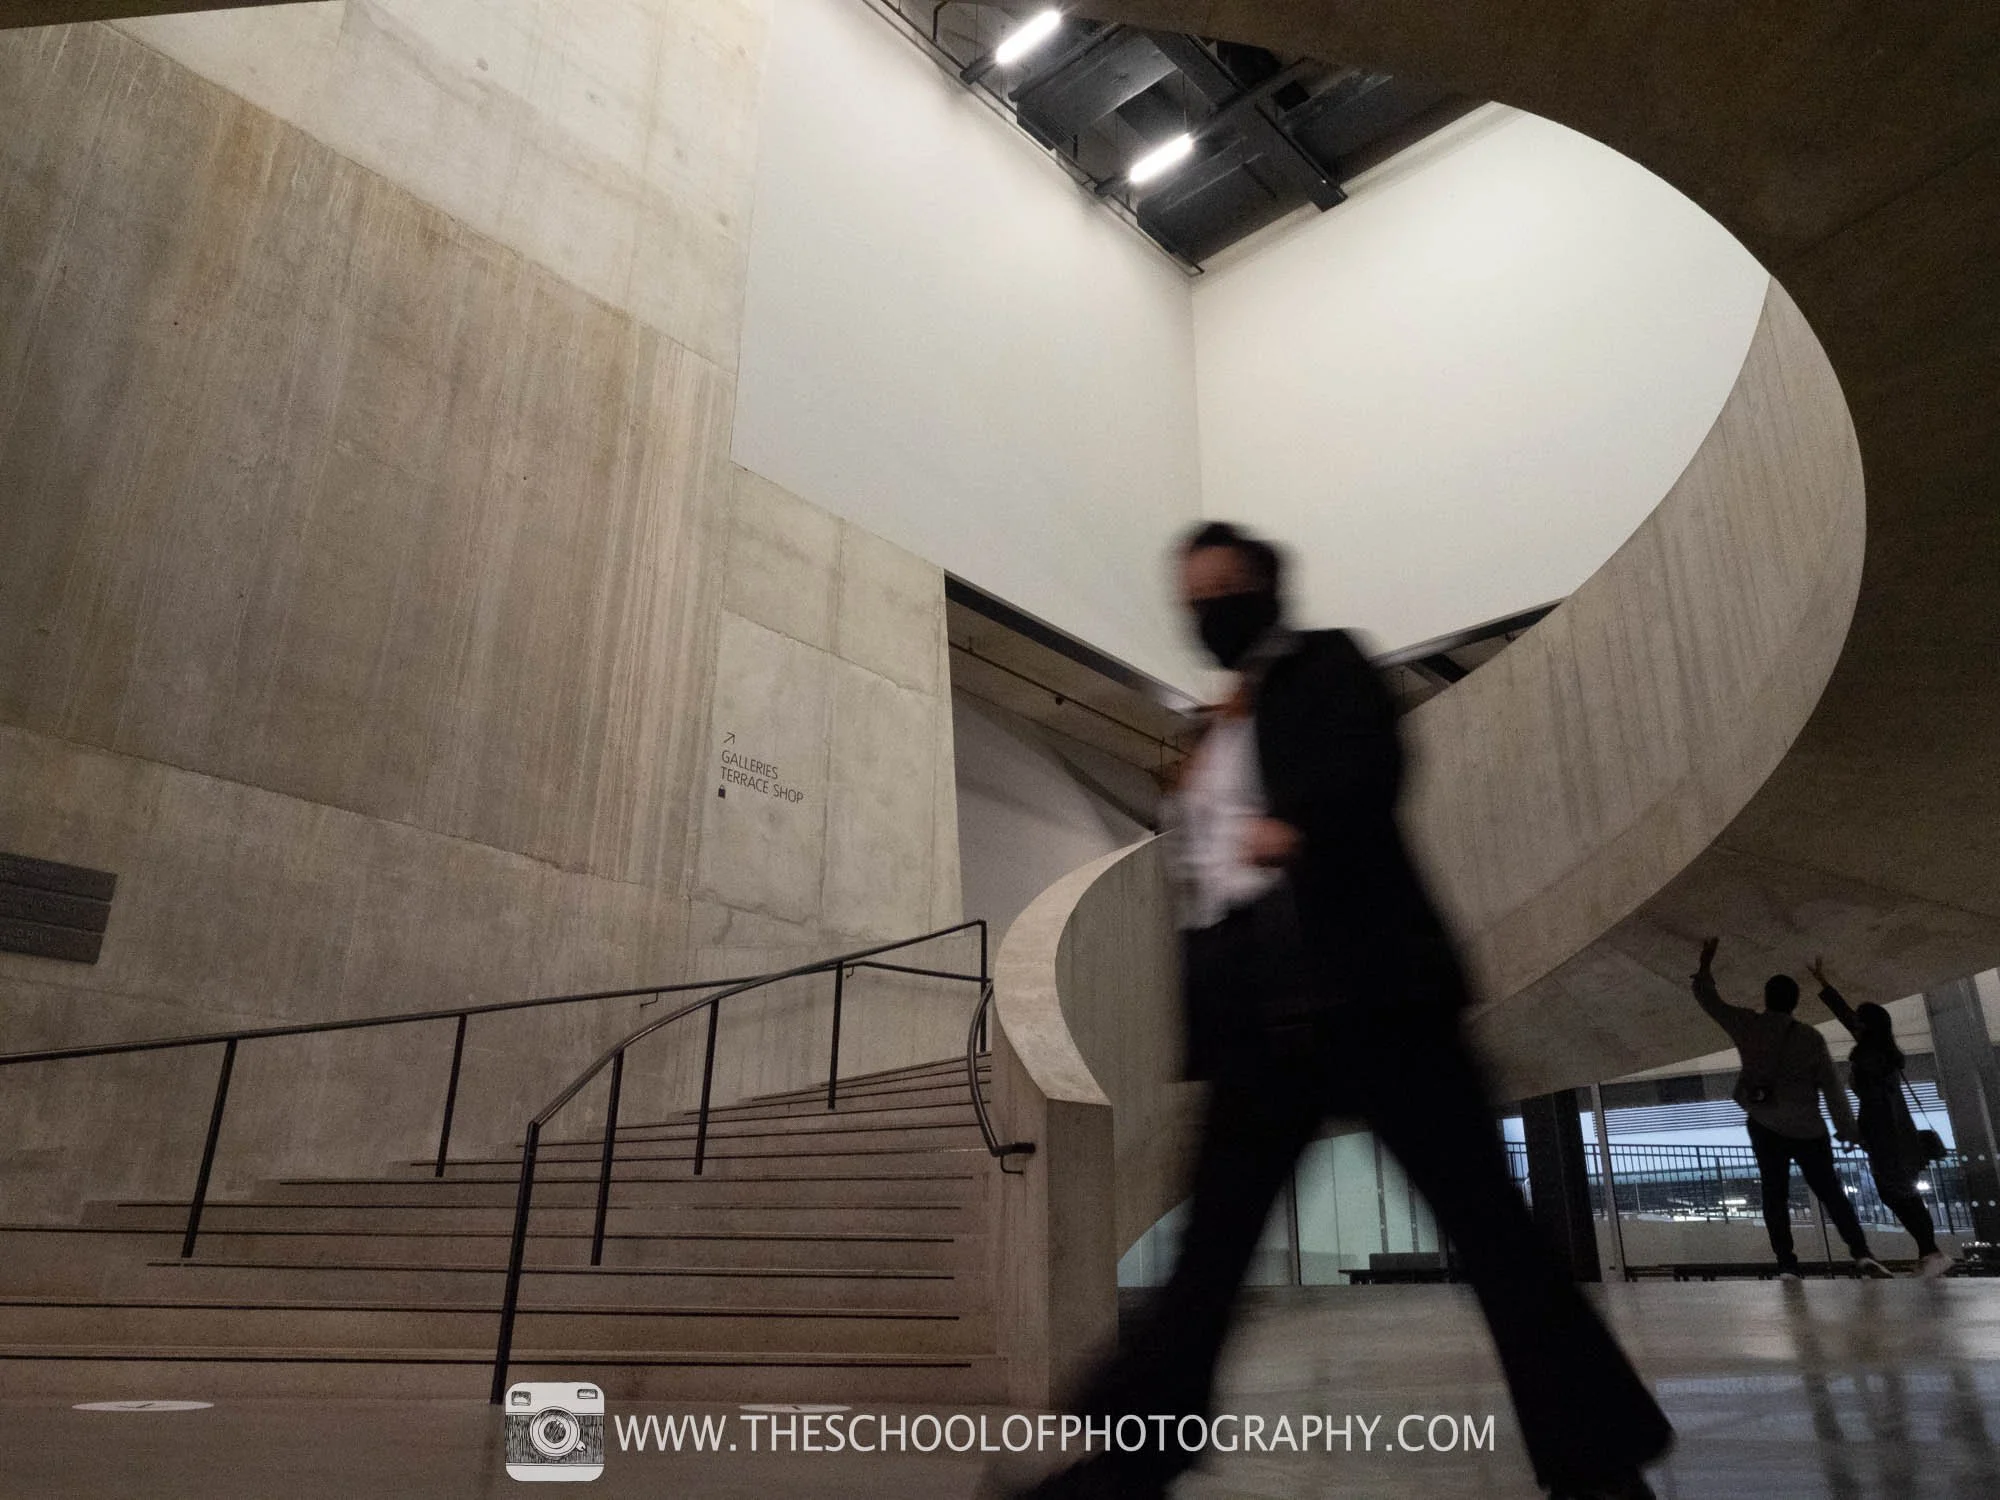
Removing Only Certain People:
If you want to keep one person but remove others:
1. Click the pin over the person you want to keep.
2. Disable the removal for that specific pin.
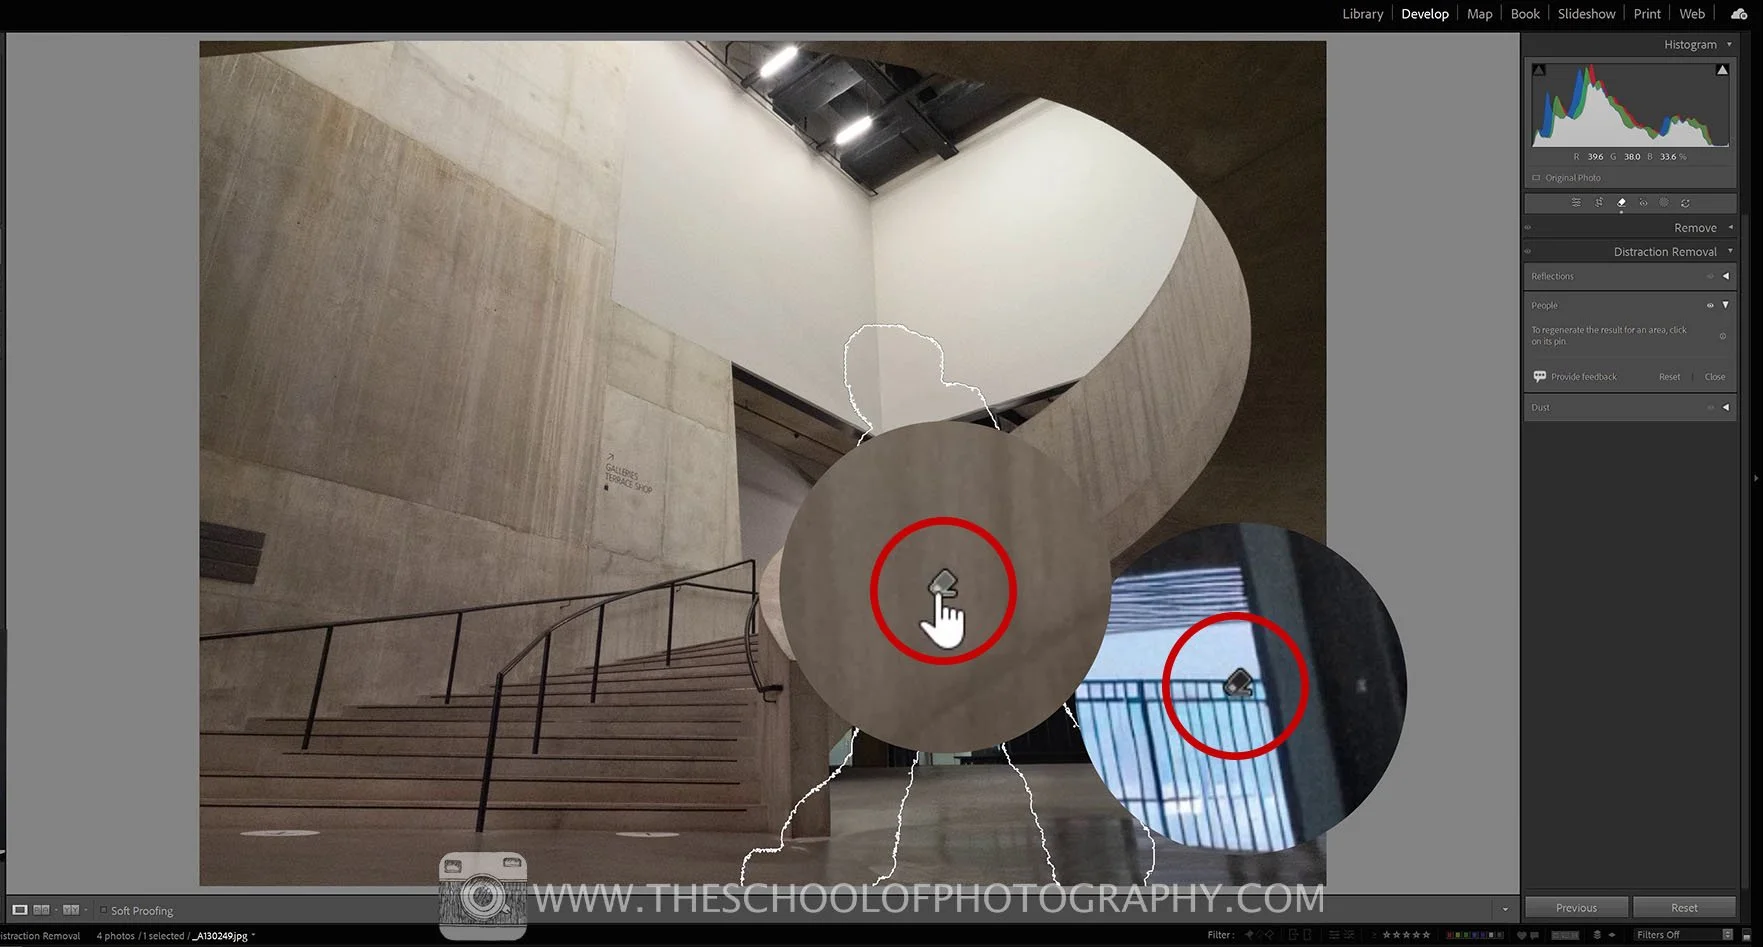
Removing Only Certain People
This is ideal for situations where a main subject is important, but background people are distracting.
Once removed, you’re free to finish the image creatively — convert it to black and white, increase contrast, or stylise it for social media without those distractions pulling attention away.
How Lightroom Compares to Other Photo Editing Software
Many photographers ask how to remove distractions from photos using popular photo editing software — and until recently, the answer usually involved Photoshop.
While tools like Photoshop’s Content-Aware Fill and Generative Fill are still extremely powerful, Lightroom’s Distraction Removal has closed the gap significantly:
· No need to switch applications
· Faster workflow
· Non-destructive editing
· AI trained specifically for reflections and people
For photographers who prefer an efficient, streamlined workflow, Lightroom’s approach is often more than enough for everyday distraction removal.
Learn more on Lightroom here - Learn more on Photoshop here.
Why Distraction Removal Matters
Distraction removal isn’t about “faking” photos — it’s about directing attention. By removing elements that don’t add to the story, you allow viewers to focus on what matters most in the frame.
Used carefully, Lightroom’s AI tools help photographers refine images without losing authenticity or intent.
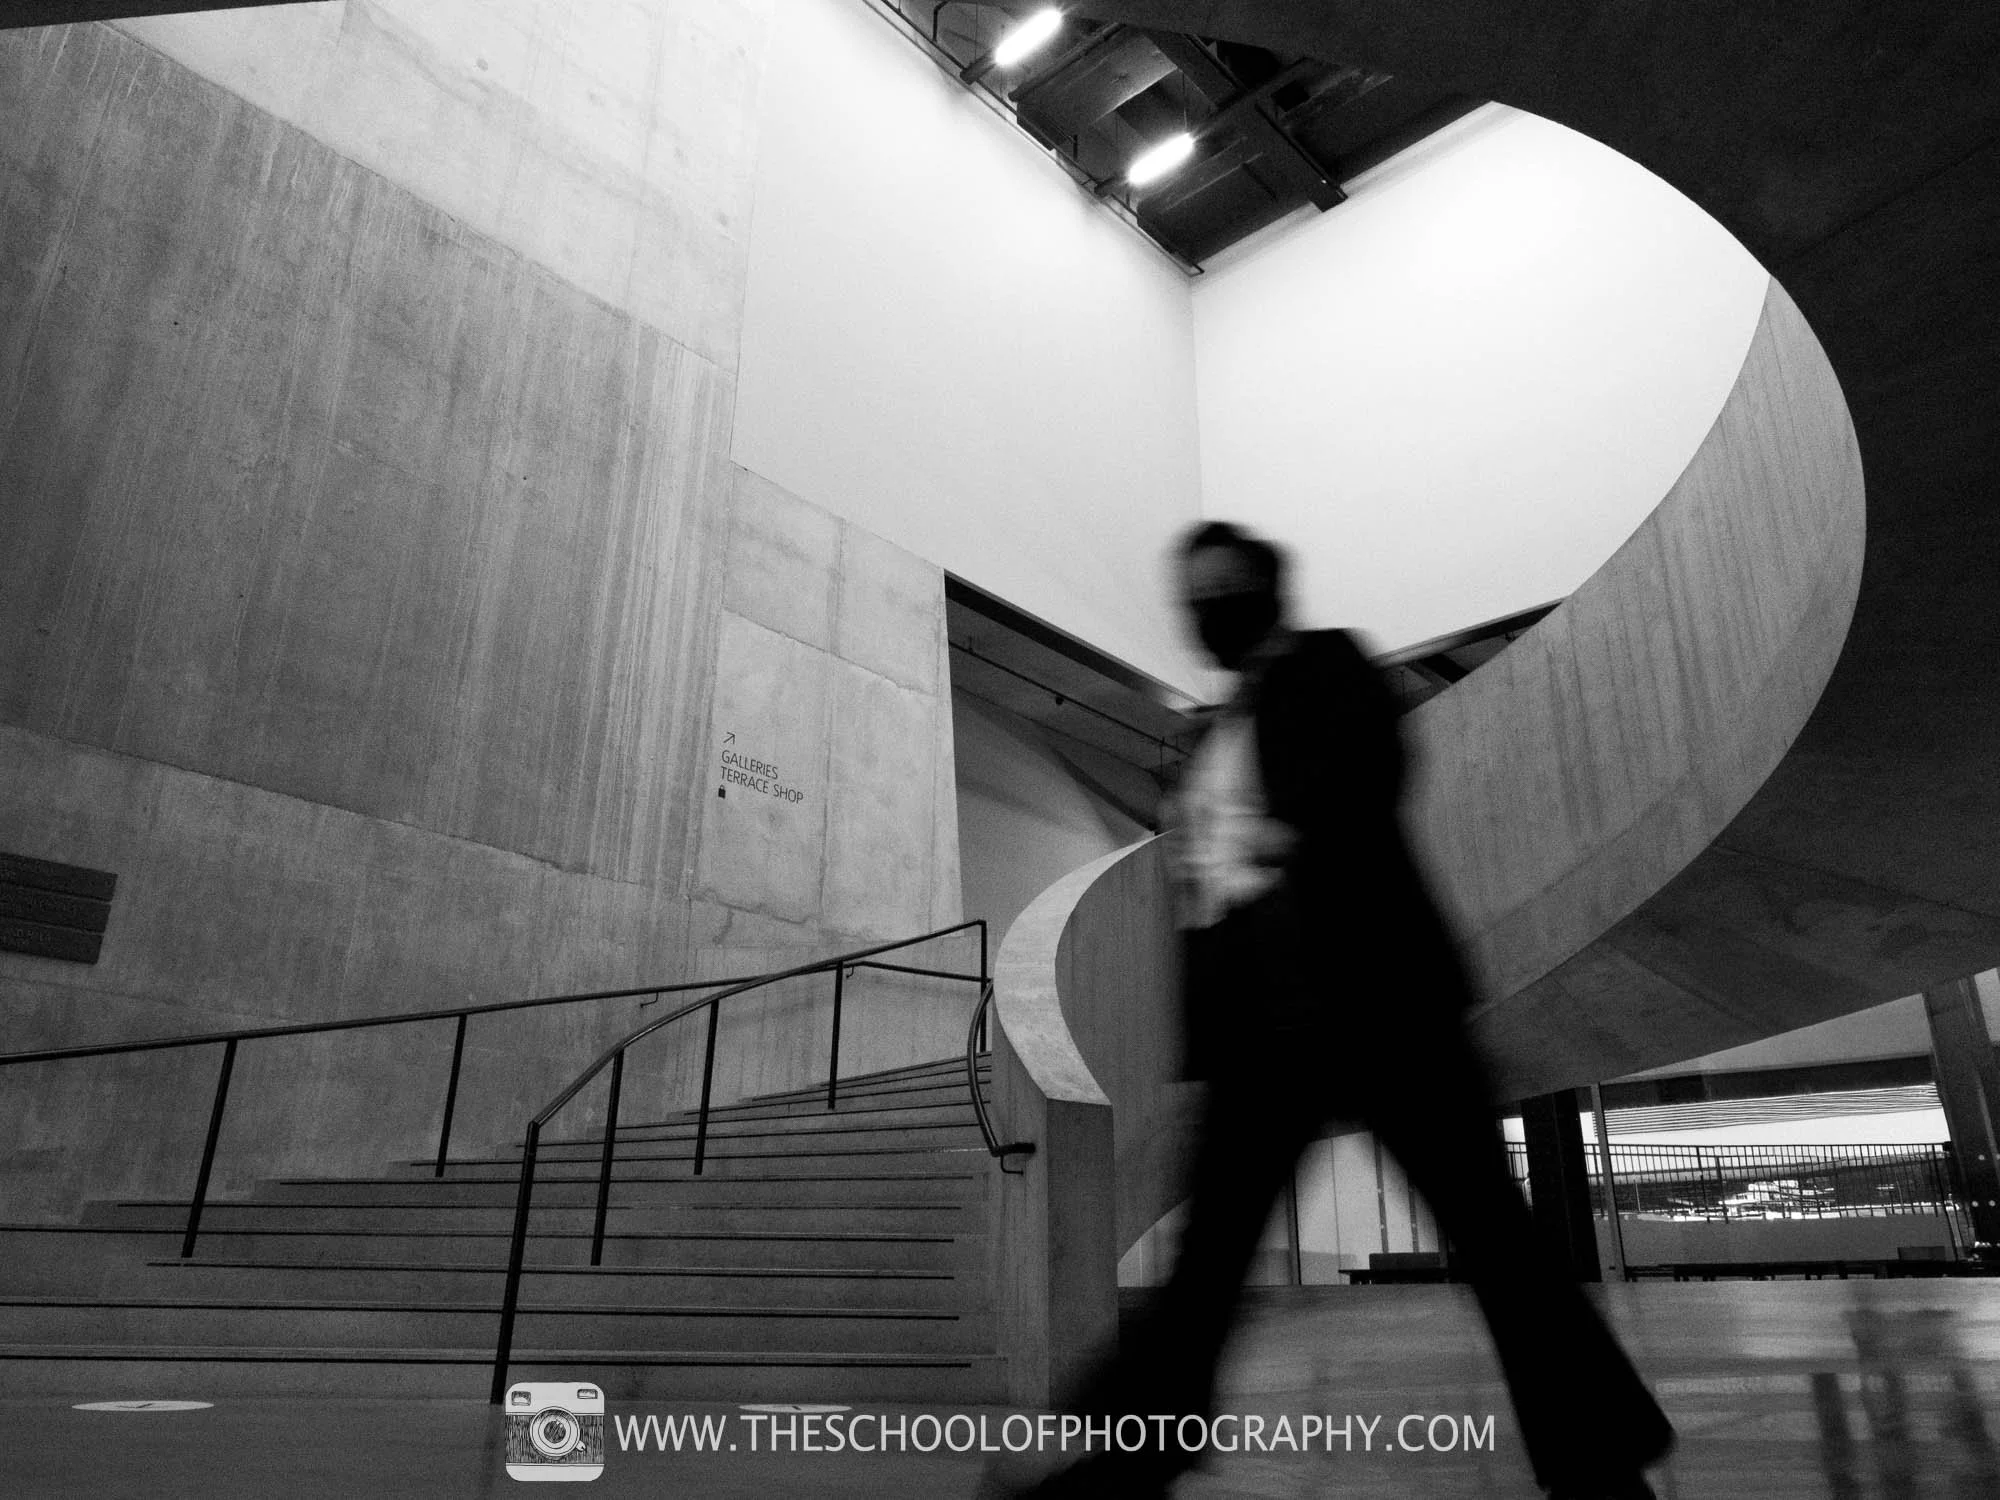
Final image
Conclusion
Lightroom’s Distraction Removal tool is one of the most powerful additions to the software in recent years. Whether you’re removing reflections from glass or clearing people from a scene, it allows you to clean up images quickly and convincingly.
If you’ve been wondering how to use distraction removal in Lightroom, where to find it, or whether it can replace other editing tools — the answer is simple: it’s fast, effective, and well worth learning.
To truly master Lightroom, including AI tools like Distraction Removal, Masking, and advanced retouching, explore our in-depth Lightroom course
Like this? - Check out more free tutorials below


I hope you enjoyed this blog on How to Use Distraction Removal in Lightroom. If you did, please leave us a comment and support us by sharing it with your friends and subscribe to our newsletter at the bottom of this page for more.
We also have an excellent learning community on social media so please join us there as well.
Thanks for watching and remember – Learn more at The School of Photography.