Tips for Street Photography – Equipment and Mistakes to avoid!
Master great street photography and avoid these common mistakes! Use our essential tips, from composition tricks to respectful interactions to elevate your skills and create professional looking street photography!
What is street photography?
Street photography is a visual diary of our bustling urban landscapes. It offers a glimpse into everyday lives within the bustling streets, squares, and alleyways.
A brief history of street photography
Street photography emerged alongside the advent of portable cameras in the late 19th century. Early practitioners, armed with small and portable equipment, ventured into the streets to document the rapidly changing urban environments. Notable early examples include the works of Eugène Atget, whose haunting images of Parisian streets captured the city's essence in the early 20th century.
The genre became more popular during the mid-20th century, as 35mm cameras made photography more accessible. Famous street photographers like Henri Cartier-Bresson, often regarded as the father of modern street photography, embraced the concept of "the decisive moment." Cartier-Bresson's work, along with that of other famous street photographers like Robert Doisneau and Walker Evans, solidified urban photography as a respected and evocative art form.

Eugene Atget - Organ Grinder and Girl 1898-99

Henri Cartier-Bresson - Jean Paul Sartre 1946

Robert Doisneau - La maison de carton 1957
More contemporary street photographers include Martin Parr and Stephen Shore. Both artists capture the banal ordinary in the every day in a diaristic style. Their images are impactful because of their ability to tell the story of the moment and create something relatable.
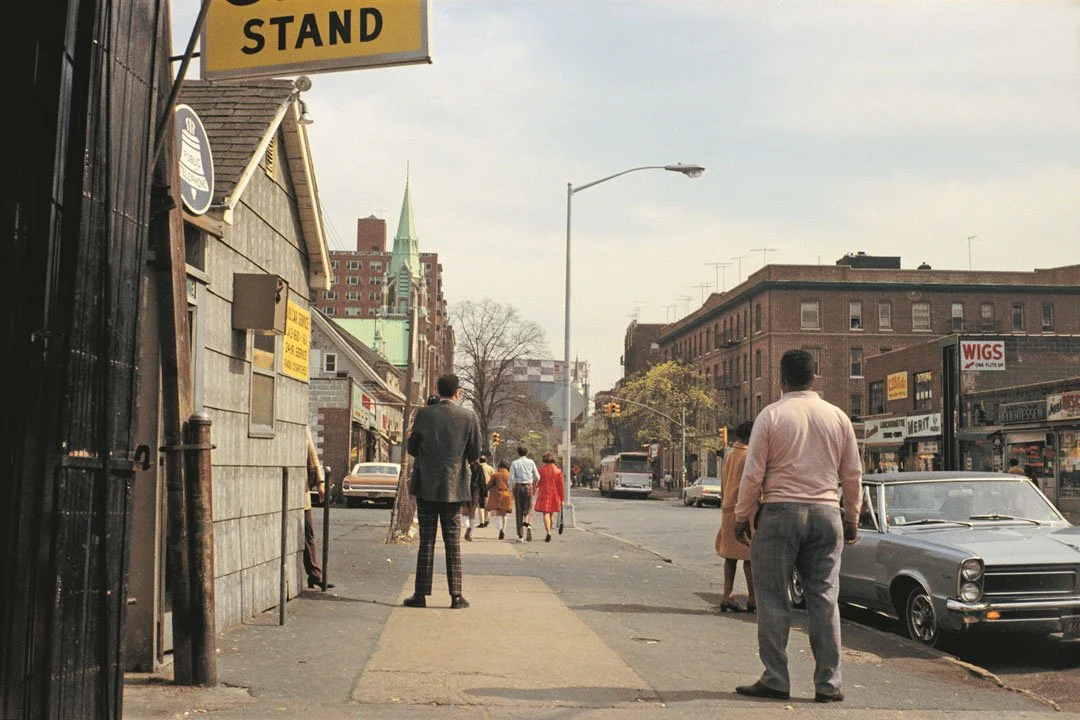
© Stephen Shore - Queens, New York, April 1972

© Martin Parr - Death by Selfie
Looking to find out more about street photography? Check out our street photography course here.
Street photography equipment
When it comes to street photography, you can start by using a standard lens. This lens has a focal length of 50mm on a full-frame camera, 31mm on a crop sensor, and 25mm on a Micro 4:3 camera.
For more info on focal lengths on different cameras, click here.
Using this focal length gives you an ‘as your eye sees’ look, which means it gives you the most realistic view of what is actually there.
A prime lens can also be handy when doing street photography as this limitation forces you to be creative. A prime lens certainly does that as it forces you to get close and think about framing things better in a shot. This is because you can't zoom in or out very quickly and have limited options for cropping in when you’re editing.
As Robert Capa said, “If your photos are not good enough, you're not close enough“. Using a prime lens for street photography forces you to get in there and get the shot.

Canon 5D MIII with 50mm prime lens
Best camera settings for street photography
As you can imagine there is no one specific camera setting that will suit all street photography but there are settings that will create your style. Try starting with shooting at an aperture of f/8 or above because it gives you a longer depth of field meaning that if you miss the focus point it's not going to matter too much, but if you want a challenge you can shoot at f/2.8 and get a shallower depth of field.
When you shoot at f2.8, you have to get the focus point absolutely correct and it does risk losing the shot if your settings are off – but the overall effect is worth it!
When it comes to the rest of the settings, it depends on the light. If it's a really bright day you can put your camera onto aperture priority (A or AV mode), set it to f2.8, and know that the shutter speed will be quick enough to avoid camera shake and stop things from blurring.
If it's not a bright day (if it's cloudy or you're in a setting where there's not much light) then you can put it onto a fully manual, set the shutter speed to 1/125th of a second (this will avoid camera shake) and put the aperture on f2.8 again. Then put your ISO on auto to pick up the slack.
If the ISO goes high you might get a bit of noise, but when it comes to street photography, it's all about getting the shot. Just get that shot - if there's noise, there's noise. If you've missed the focus point a bit, you've missed the focus point a bit. Just try and get the shot - get the feeling of the place and show the story.
To learn how to use and control your camera settings, click here.

Street Portraits
Another reason to use f2.8 is because it’s great for street portraits. Street portraiture can be one of the most challenging subjects to tackle because not only do you have to get all of your settings right and your style right, but you’ve also got to interact with people.
The only advice I can give when it comes to this is to be yourself, be genuine - go up to people and tell them what you want to do and if they're good for a portrait then that's great, if they're not say thanks and walk away, don't worry about it.


The beauty of being at places like the Edinburgh Fringe Festival is that you have loads of performers. You have loads of people that love being in front of a camera. I think my favourite shot was this one that I took down at the Scottish Parliament of a young girl with a mask on her face.
Get access to ALL our online courses - 1000’s of videos, worksheets, critiques of students work, personalised support and much more with our monthly membership.
How to take great street photography

Masahiro Miyagi on Unsplash
Tip 1: Consider the background
One of the most common mistakes in street photography is just focusing on the subject and neglecting the background. A distracting background can detract from the main subject of your photo. Before pressing the shutter, always assess the entire frame and ensure that the background complements rather than competes with your subject.
Backgrounds in street photography are important for context and storytelling, providing a setting that enhances the narrative. They ensure visual clarity and contribute to aesthetic appeal, creating a balanced and good-looking street photo.
Practical tips for considering the background:
Use your depth of field to isolate subjects with a shallow background and experiment with angles and perspectives for complementary backgrounds.
Look for clean and unobtrusive backgrounds that emphasise your subject.
Incorporate elements like signs or people in the foreground to add interest and guide the viewer's eye.
Be patient and wait for the right moment when the background harmonizes with your subject.
Using creative framing with elements like doorways or windows for a natural frame creates a way to lead into the image and draw focus to your subject.
Check for distractions in the background, adjusting your composition or waiting for the right moment to minimize them.
Tip 2: Interaction
Street photography often involves a connection between the photographer and the subject, even if it's just a fleeting moment. Don’t just be a passive observer; interact with the people you’re shooting and seek permission if necessary. This way, you’ll capture genuine emotions and expressions.
Human connection in street photography makes your photos more relatable. When you interact with your subject, it becomes a shared moment and far more genuine, adding life to your street photography. This also stresses the importance of respect and consent when making street photos. It’s important to keep in mind ethical and considerate street photography practices. Prioritize the dignity and privacy of individuals and avoid confrontation when you’re shooting.
Practical tips for interaction in street photography:
Approach people with kindness when taking street photos and introduce yourself as ‘a photographer.’
Ask for permission, especially when taking close-up pictures, using simple gestures or a quick chat.
If you keep a friendly and open attitude, you’ll capture real moments between people.
Consider building rapport over time if you’re a frequent visitor to a community and always respect personal boundaries, and if someone declines, move on.
You can also share your work with subjects as a thank you and to show your appreciation!
By approaching your subjects with respect, empathy, and a genuine interest in their stories, you can create great street photography that resonates on a deeper level.


Wellstudio on Unsplash
Tip 3: Follow composition rules
Want to go over the basics of composition?
Composition can either make it or break it when it comes to creating great street photography. Composition will tell a story, emphasise relationships between subjects, and create dynamics within an image, especially in lively urban environments. Attention to composition helps refine complex scenes into impactful images, giving beauty to the ordinary or mundane.
Simple composition tips in street photography:
Utilize the Rule of Thirds for balanced placements and guide the viewer's eye with leading lines, adding depth to your scenes.
Frame your main subject with elements like doorways or people to provide context and immersion in the environment.
You can enhance your photograph by balancing the foreground and background in busy scenes.
Look for symmetry or patterns or embrace negative space strategically for a more impactful street photo.
Experiment with various perspectives and angles to infuse your street photography with compelling compositions.
Experiment with these ideas and you'll develop an intuitive sense of composition in your street photography. Find out more about the rules of composition in photography with our beginner’s course.
Tip 4: Master your camera settings
Mastering your camera settings is crucial in street photography. Fumbling with settings in that ‘blink and you miss it’ situation could mean a poorly exposed image or missing the shot altogether. Practice regularly, experiment with different settings, and become comfortable with your gear to ensure you can capture decisive moments swiftly.
Practical tips to level up your technical skills:
Get familiar with your camera and its settings!
Understand the relationship between aperture, shutter speed, and ISO—to expose correctly in every situation.
Ditch auto mode and switch to a manual mode. This will enable you to have control in rapidly changing street photography conditions.
Use spot or zone focusing – Learn how to focus properly here.
Learn to adapt quickly, learning from mistakes after each shoot for continuous improvement.
Improve your technical ability in photography with our beginner’s course.

Boris Stefanik on Unsplash

Mick-A-Matic camera used by Stephen Shore
Tip 5: Making the most of your gear
While having a high-quality camera is beneficial, remember that the best camera is the one you have with you when creating great street photography. Don't let the lack of expensive equipment with all the bells and whistles hinder your creativity. In the beginning, it’s better to focus on developing your skills rather than constantly upgrading your gear.
Why gear shouldn't be the sole focus:
In great street photography, creativity surpasses equipment. While quality gear contributes to better images, the real magic lies in your vision and ability to capture the moment. Iconic street photos can be taken with basic gear, proving that understanding composition, lighting, and storytelling is the focus – photographer Stephen Shore is famous for having taken images from his “All the Meat You Can Eat” series on a Mickey Mouse camera! Basic equipment doesn't limit creativity; it makes you push boundaries by working with what you’ve got.
Looking to find out what kit you need as a beginner? Read our recommendations.
Tip 6: Stay patient
Street photography often requires patience to capture the perfect moment. Resist the urge to rush or force shots. Take your time, sometimes it’s best to stay in one place and wait for life to happen.
Embrace the idea of ‘The Decisive Moment’ and wait patiently for that time when everything in a scene aligns to create a compelling street photograph.
Remember to:
Spend time observing the scene before lifting the camera. Take notice of the details, notice the interaction and understand the flow of the environment.
Choose a focal point and try to anticipate potential moments that could unfold.
Stay present and be ready to capture unexpected moments.
Consider a prime lens with a fixed focal length. This limitation will make you think deliberately about your compositions and force you to physically move to find the right angles.
Stay committed to your chosen spot and avoid switching locations too much.
Remember that patience is a skill that develops over time. Learn from each time you go out and you’ll create some great street photography.

Craig Whitehead on Unsplash

Benjamin Suter on Unsplash
Tip 7: Enhance your photos with post-processing
Once you’ve captured the photo, it doesn’t stop there. Post-processing will enhance visual appeal by adjusting contrast, brightness, and colour saturation. You can emphasize the mood of a street scene through techniques like desaturation for a vintage look or increased vibrancy for a lively atmosphere.
Considerations:
Neglecting this step can limit the potential of your images. Learn basic editing techniques to enhance your photos without overdoing it, maintaining the authenticity of the street scene.
Learn editing tools in software like Adobe Lightroom and Photoshop, understanding adjustments to exposure, contrast, highlights, and shadows.
Avoid excessive manipulation, keep the authenticity of the scene!
Develop a consistent post-processing style that complements your street photography vision. You can also create a preset or action to speed up your process!
Use cropping carefully to enhance composition without compromising image quality.
Experiment with black-and-white editing, it usually works well to emphasize contrasts and textures.
Tip 8: Be confident and respectful
Fear of confrontation can hold street photographers back from capturing powerful moments. While it's essential to respect people's privacy, don't let the fear of being questioned prevent you from pursuing your passion. Develop a respectful and confident approach when shooting in public spaces.
While street photography is generally legal in most countries, it's crucial to adhere to ethical guidelines:
Respect people's privacy and dignity, and if a person requests not to be photographed, don’t photograph them.
Avoid capturing images that may be considered harassment or invasion of privacy.
Always be aware of local laws and regulations, as they can vary, and seek legal advice if you have specific concerns or questions.

Marcos Gallardo on Unsplash

Rene Bohmer on Unsplash
Tip 9: Play with light and shadows
Light is everything in photography, and some of the best street photos show this. Experiment with different times of day, shadows, and low light to add depth and mood to your images.
Practical tips for leveraging light and shadow:
Understand natural light. Do you know about colour temperature, hard and soft light, etc? If not, click here.
Experiment with different times of day, for varied lighting effects.
Use shadows to enhance your composition.
Use reflections on surfaces for dynamic compositions in urban environments.
Utilize artificial light sources at night for unique effects.
Create silhouettes against bright backgrounds.
When editing, selectively enhancing light and shadow will emphasize areas and create specific moods.
Tip 10: Be original
While it's natural to draw inspiration from other photographers, try to avoid copying their style. Develop your unique style and perspective. Capture scenes that resonate with you personally and let your passion and individuality shine through and you’ll create great street photography.
Practical tips to foster originality:
Experiment with styles to discover your own authentic approach.
Tell your unique stories through street photography, consider the narratives and emotions you want to convey.
Focus on personal projects. Delve deeper into specific themes important to you. This will help you develop a distinct body of work.
Take risks. If you’re in your comfort zone you’re in the wrong place.
Develop a consistent visual language with recurring themes, compositions, or editing styles.
Be patient in finding your voice. Understand that it's a gradual process involving exploration, experimentation, and making plenty of mistakes, Cartier Bresson famously once said, “Your first 10,000 photos are your worst.”

Jon Tyson on Unsplash
Some more examples of street photography


Conclusion:
By avoiding common mistakes and taking on these tips to make great street photography, aspiring street photographers can enhance their skills and create compelling and authentic images that truly capture the streets. Remember, each mistake is an opportunity to learn and grow as a photographer. Embrace the challenges, stay curious, and keep refining your craft to become a better street photographer.
Happy snapping!
Want to learn street photography, check out our course here.
Like this? - Check out more free tutorials below


I hope you liked this blog on avoiding classic mistakes in Street Photography. If you did please leave us a comment and support us by sharing it with your friends and subscribe to our newsletter at the bottom of this page for more.
We also have an excellent learning community on social media so please join us there as well.
Thanks for watching and remember – Learn more at The School of Photography.
