Why Are My Photos Blurry? 5 Common Causes and How to Fix Them
You’ve set your exposure correctly. As far as you’re concerned, the focus is absolutely fine. Then you get home, open the image on your computer and zoom in. It’s soft.
So, why are my photos blurry, even when they looked sharp on the camera? And why are my camera photos blurry when the focus appeared to be correct?
The frustrating thing is that there isn’t one single answer. If you have ever asked, “Why are my pictures blurry?” or “Why is my camera blurry?”, the cause is usually shutter speed, aperture, ISO, autofocus or the viewfinder diopter.
Here are five of the most common reasons your photos are blurry — and what you can do about them.
1. Your Shutter Speed Is Too Slow
One of the first things to check when your photos are blurry is your shutter speed.
You may have heard the old rule that you should be able to handhold a camera at 1/60 sec or faster and still get a sharp photograph. It’s a useful starting point, but there are plenty of variables.
One of the biggest is your focal length.
If you’re shooting with a wide-angle lens, it’s much easier to handhold the camera without your movement becoming obvious in the photograph. Zoom in with a telephoto lens, though, and every tiny movement is magnified.
At 18mm, for example, a small amount of camera movement might not cause a problem. At 200mm, that same movement becomes much more noticeable.
And focal length isn’t the only consideration.
Think about photographing a portrait. You’re talking to your model, directing them and moving the camera around. Or perhaps you’re doing street photography: you spot something, quickly raise the camera and take the shot.
Your hands and camera are moving, and if they move during the exposure, you get camera shake.
That camera shake can make an otherwise correctly focused photograph appear soft or blurry. If the whole image shows a similar blur, rather than one area simply being out of focus, a shutter speed that is too slow is often the cause.
What shutter speed should you use for sharp photos?
Generally, when shooting handheld:
At wider focal lengths, try to stay at 1/125 sec or faster.
When zoomed in, aim for at least 1/250 sec.
In many situations, 1/500 sec or faster will give you a much better chance of consistently sharp results.
Modern cameras and lenses often include image stabilisation, including IBIS (in-body image stabilisation). It’s brilliant technology, but don't make the mistake of relying on it completely.
Yes, stabilisation can allow you to use surprisingly slow shutter speeds when both you and your subject are completely still. In real-world photography, however, things move.
Want to learn how shutter speed works? Click here for our beginners photography course!
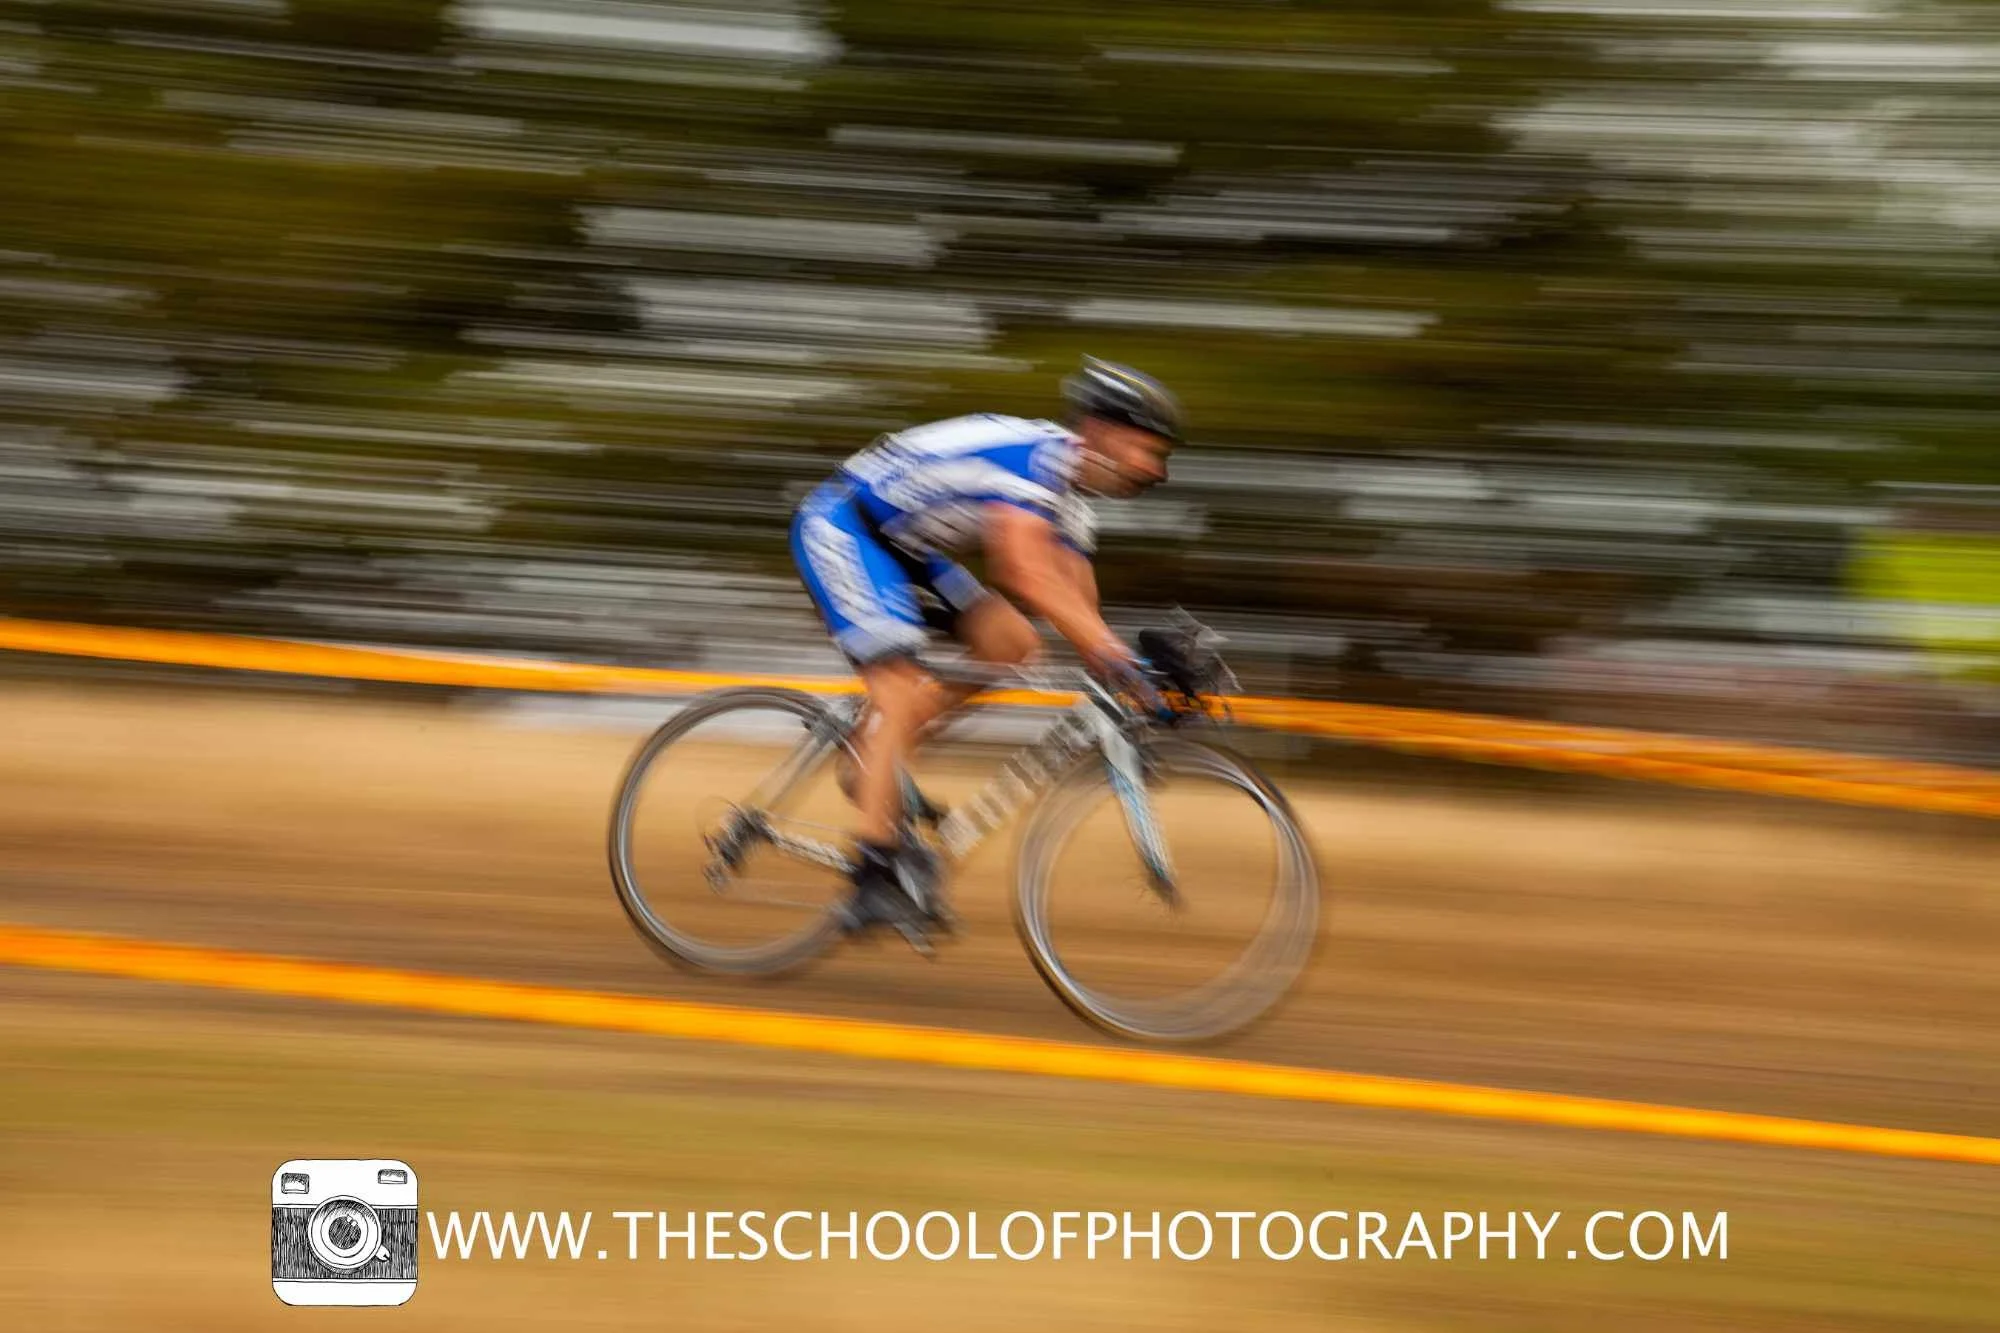
Taken with a shutter speed of 1/8th second. A slow shutter speed will create what is called camera shake.
Get access to ALL our online courses - 1000’s of videos, worksheets, critiques of members work, personalised support and much more with our monthly membership.
2. Your Aperture Is Too Wide
Aperture can also have a huge effect on how sharp your photograph appears. If only part of the picture is sharp, your camera may not be faulty; the depth of field may simply be too shallow.
Wide aperture, such as f/1.2, f/1.8 or f/2.8, creates a shallow depth of field. Only a relatively small area around your focus point will appear sharp, while areas in front of and behind it become increasingly blurred.
That can look fantastic. It's how photographers create those beautiful portraits with a sharp subject and soft, creamy background.
But it also makes accurate focusing much less forgiving.
Imagine photographing something at f/1.2. You get your focus point exactly where you want it, but then either you or the subject moves slightly. Your intended point of focus can quickly move outside that very narrow zone of sharpness.
Close the aperture to something like f/8 or f/11 and your depth of field becomes much greater, making it easier to keep more of the photograph sharp.
What is the best aperture for sharp photos?
There isn't one aperture that's correct for every photograph.
However, if you're photographing a scene where you want plenty of detail to appear sharp (a landscape, for example) f/8 or f/11 can be a very useful starting point.
If you deliberately want a shallow depth of field and blurry background, you can absolutely use a wider aperture. You just need to be much more precise with your focus.
The important thing is to understand the trade-off rather than simply setting the widest aperture your lens offers every time.
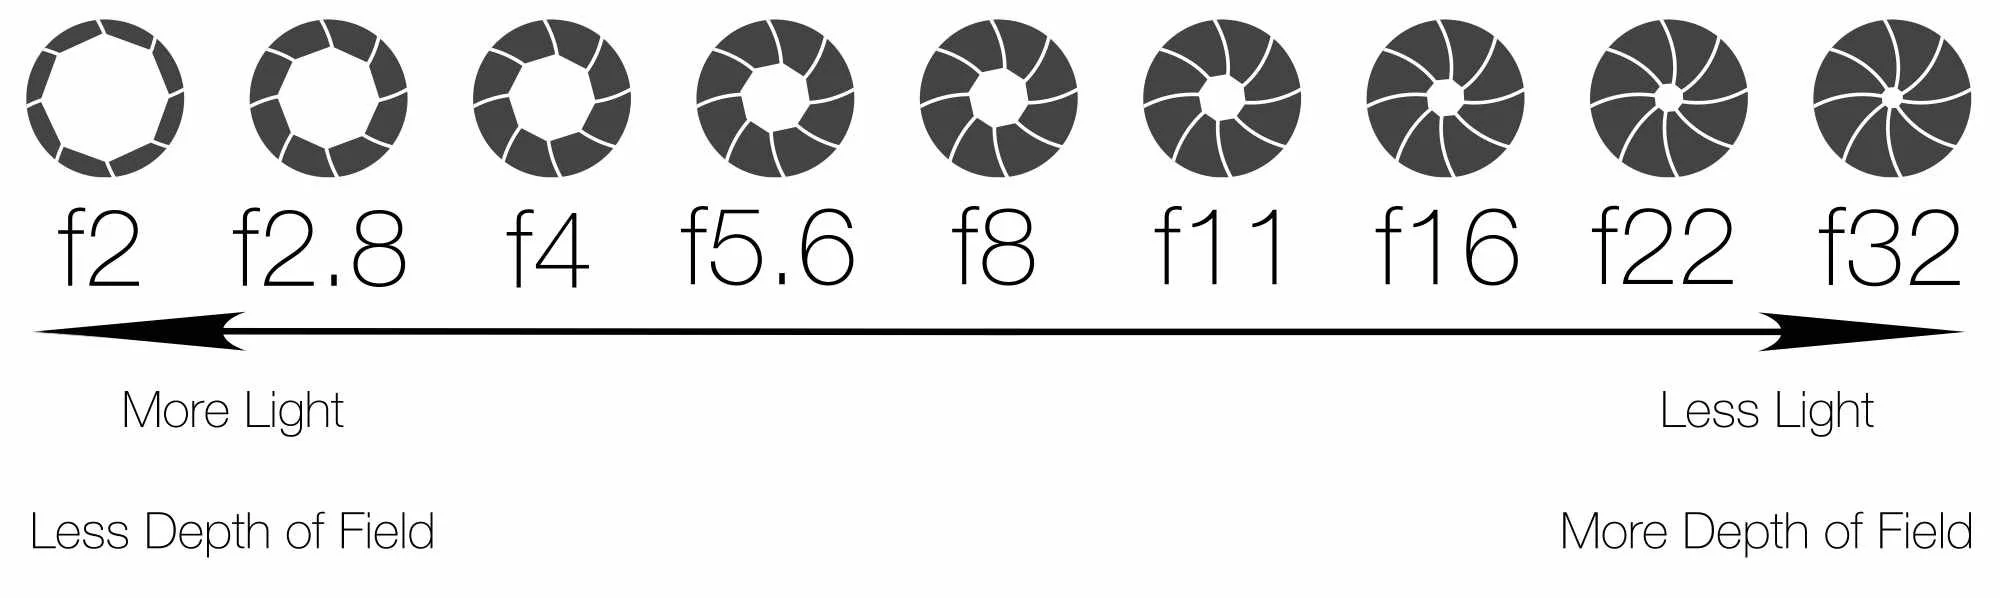
How aperture affects light and depth of field, from f/2 to f/32.
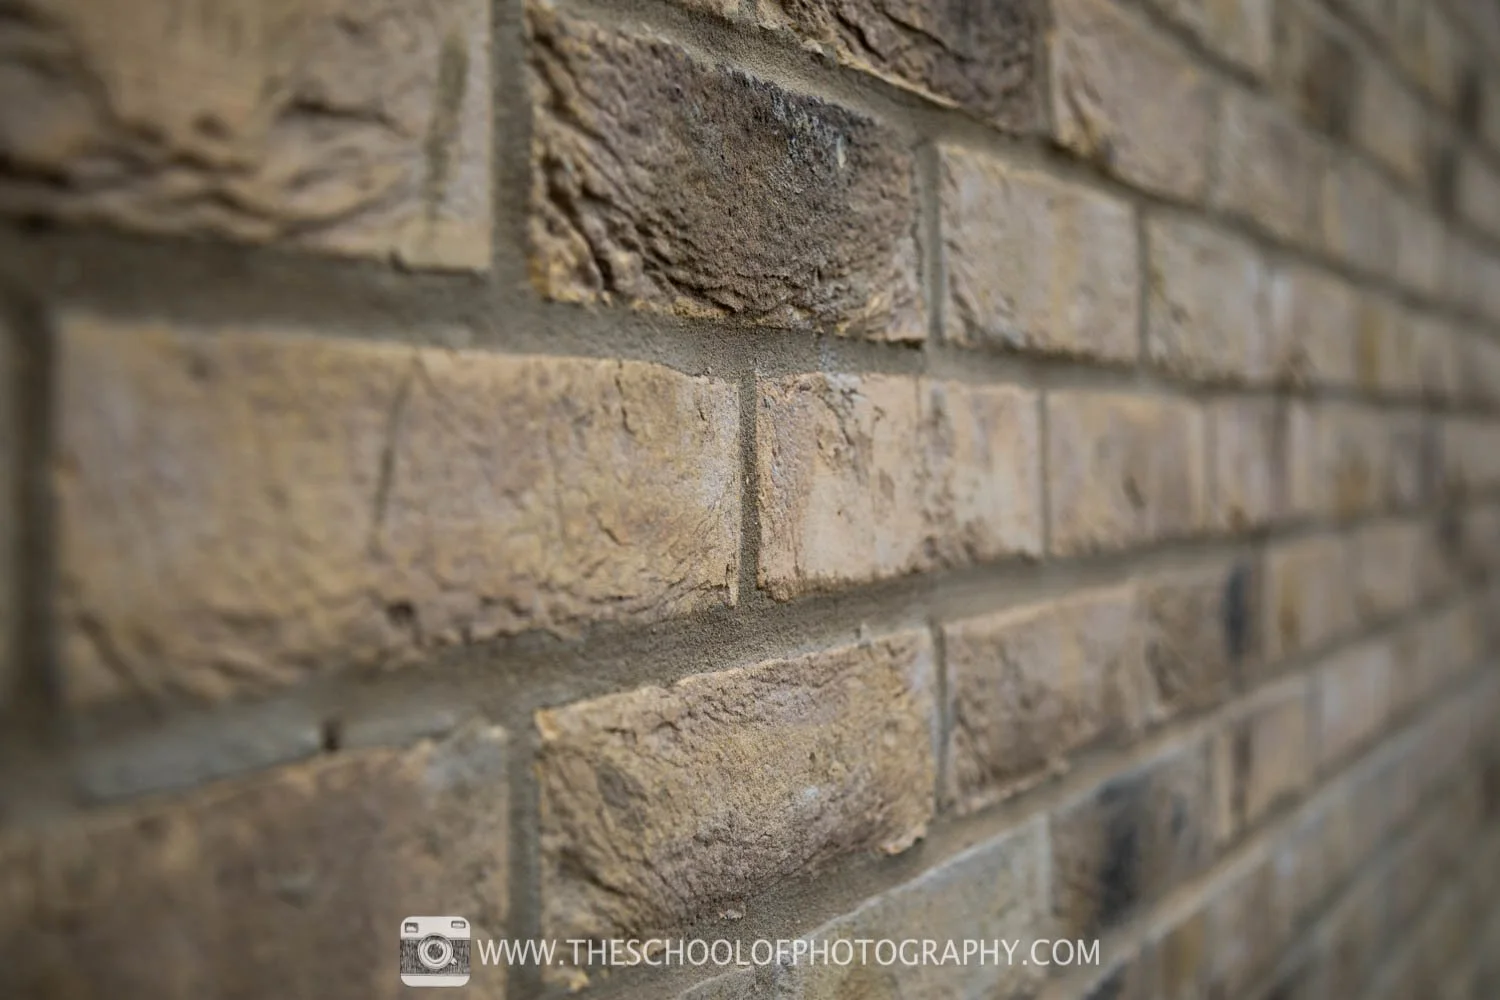
f/4, narrow depth of field
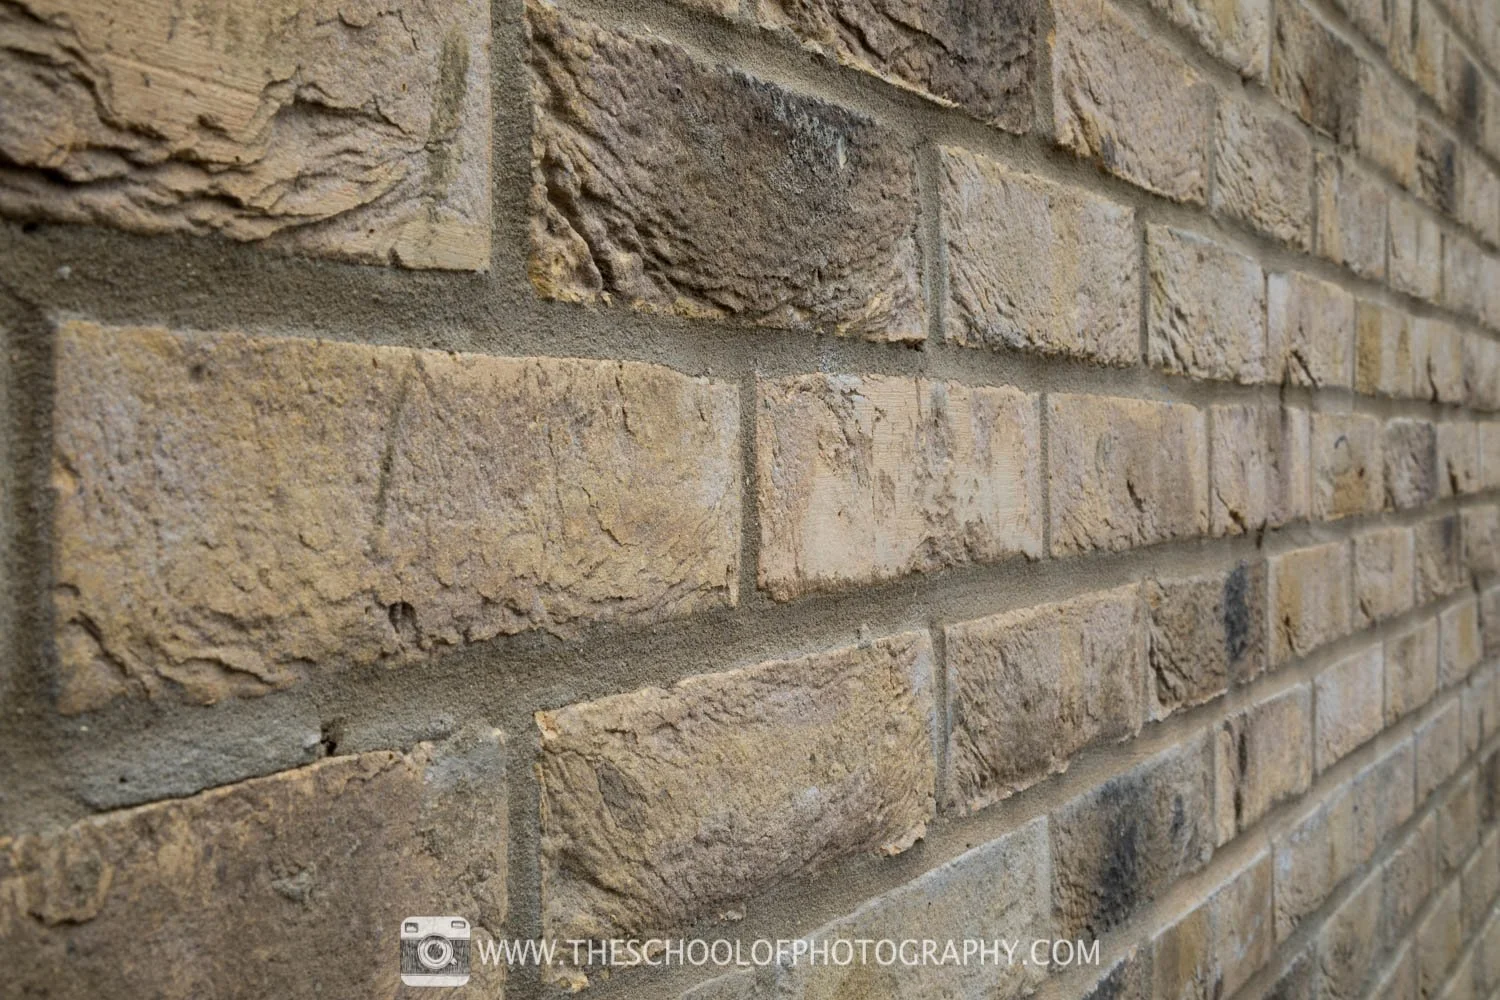
f/22, long depth of field
3. Your ISO Is Too High
Your shutter speed can be fast enough, and your aperture can give you plenty of depth of field, yet your image may still appear soft.
The problem could be your ISO.
As you increase ISO, you also increase the amount of visible noise in your photographs. That noise can reduce fine detail and make an image appear less clean and sharp.
In the video, we demonstrate this by photographing the same scene at ISO 160 and then at ISO 6400, while keeping the aperture at f/11. The resulting images show the difference that high ISO can make to apparent image quality.
That doesn't mean you should be frightened of increasing your ISO.
If you're photographing in low light and need a faster shutter speed to prevent camera shake or freeze your subject, increasing the ISO might be the right decision. A noisy photograph is often preferable to a completely blurred one.
The principle is simply this:
Keep your ISO as low as you reasonably can while still getting the shutter speed and aperture you need.
Modern denoise software can certainly help with high-ISO images, but it's always better to start with the best-quality image you can create in camera.
To learn how to use and control your ISO settings, click here.
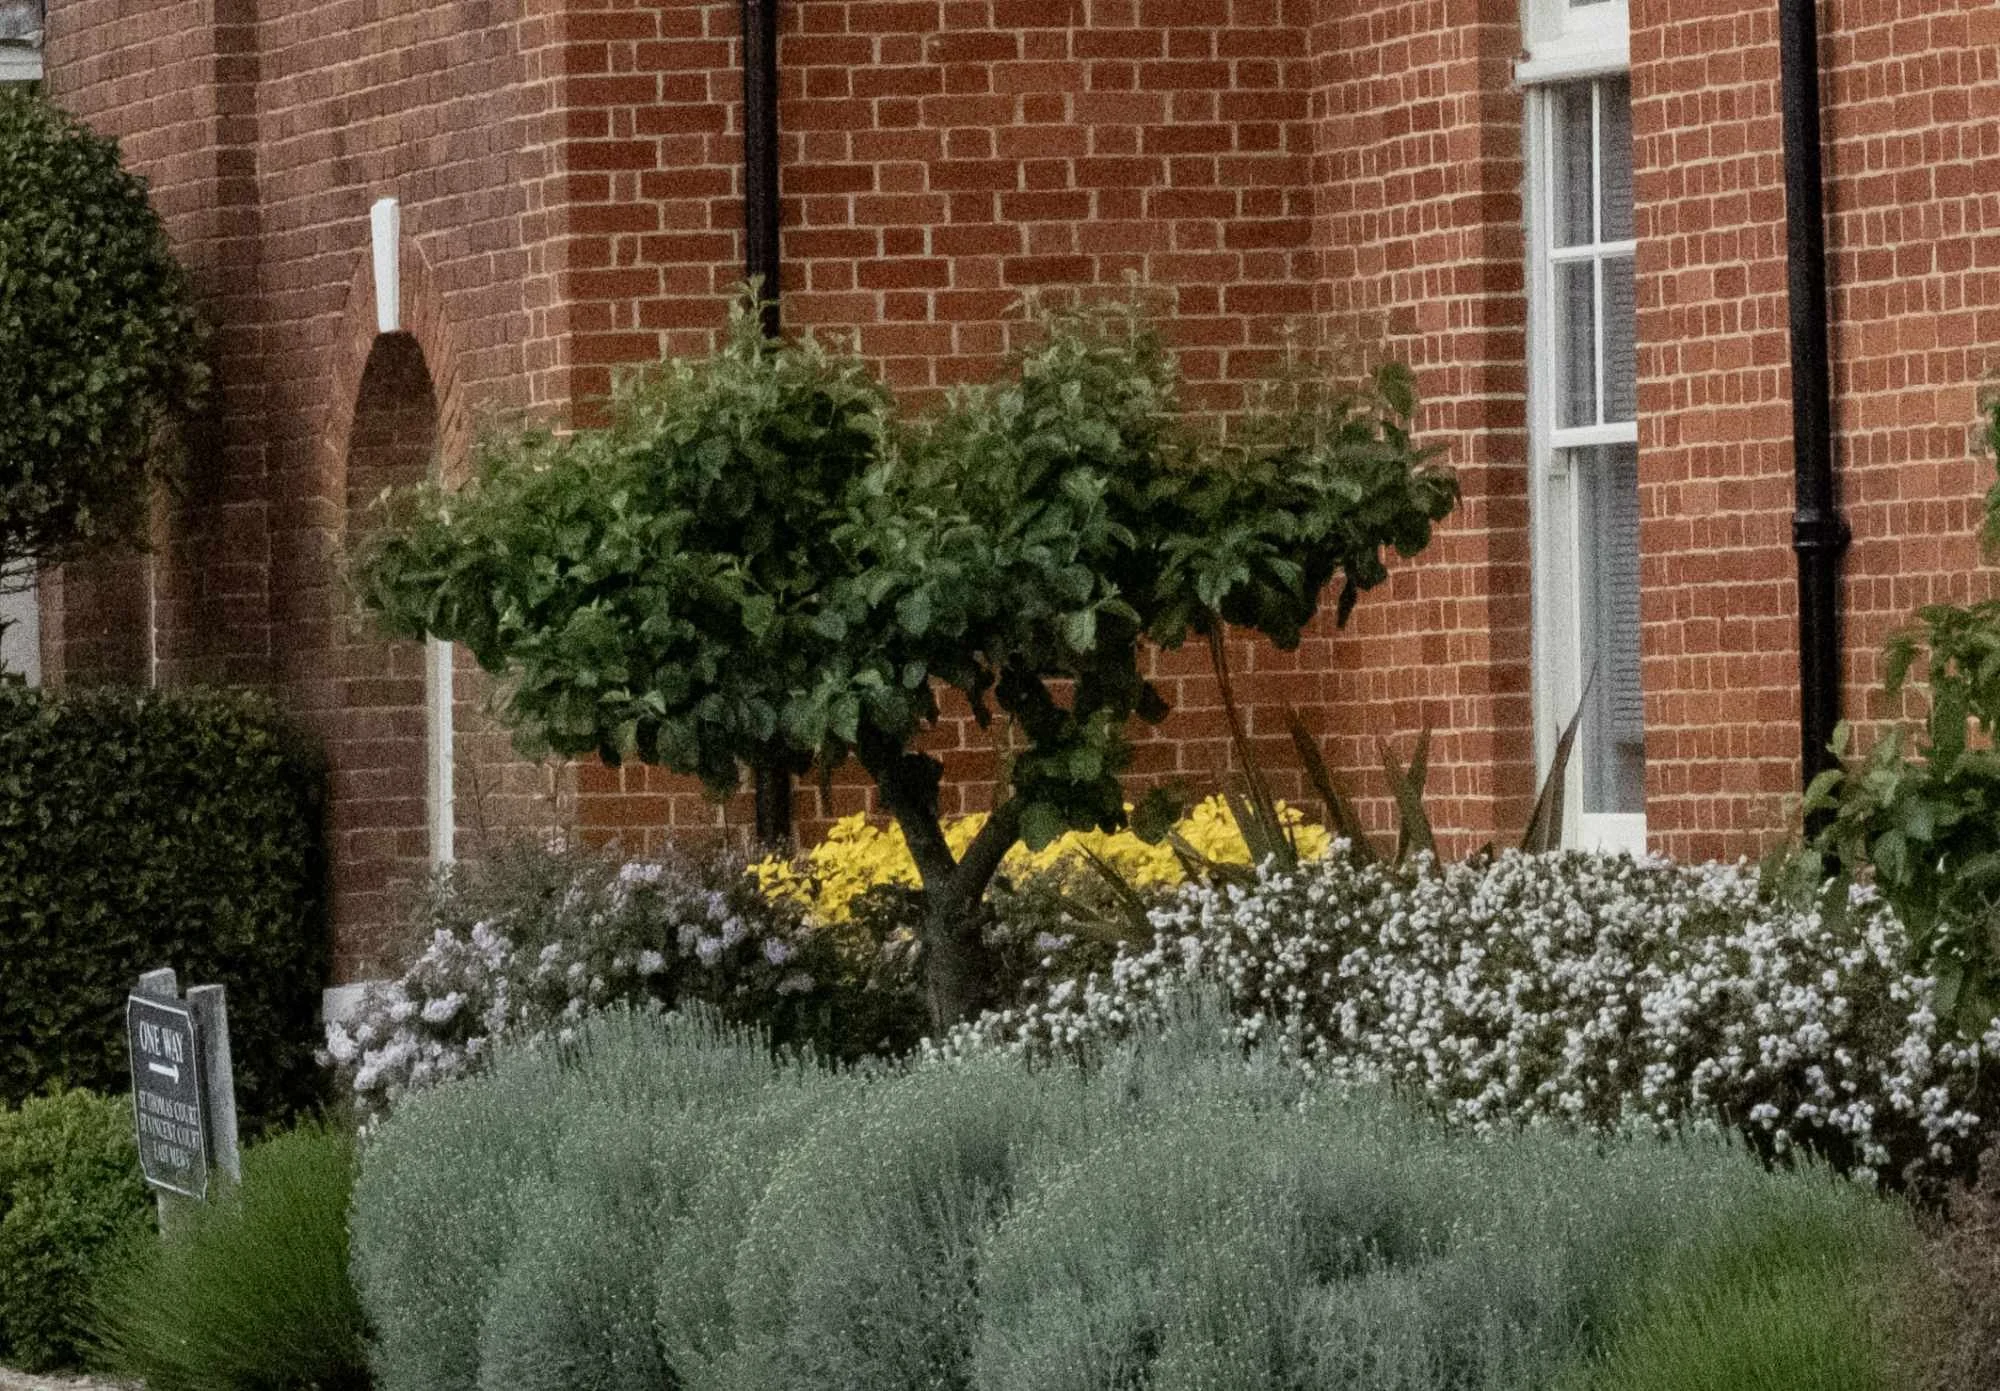
A photo example of high ISO, showing lots of grain.
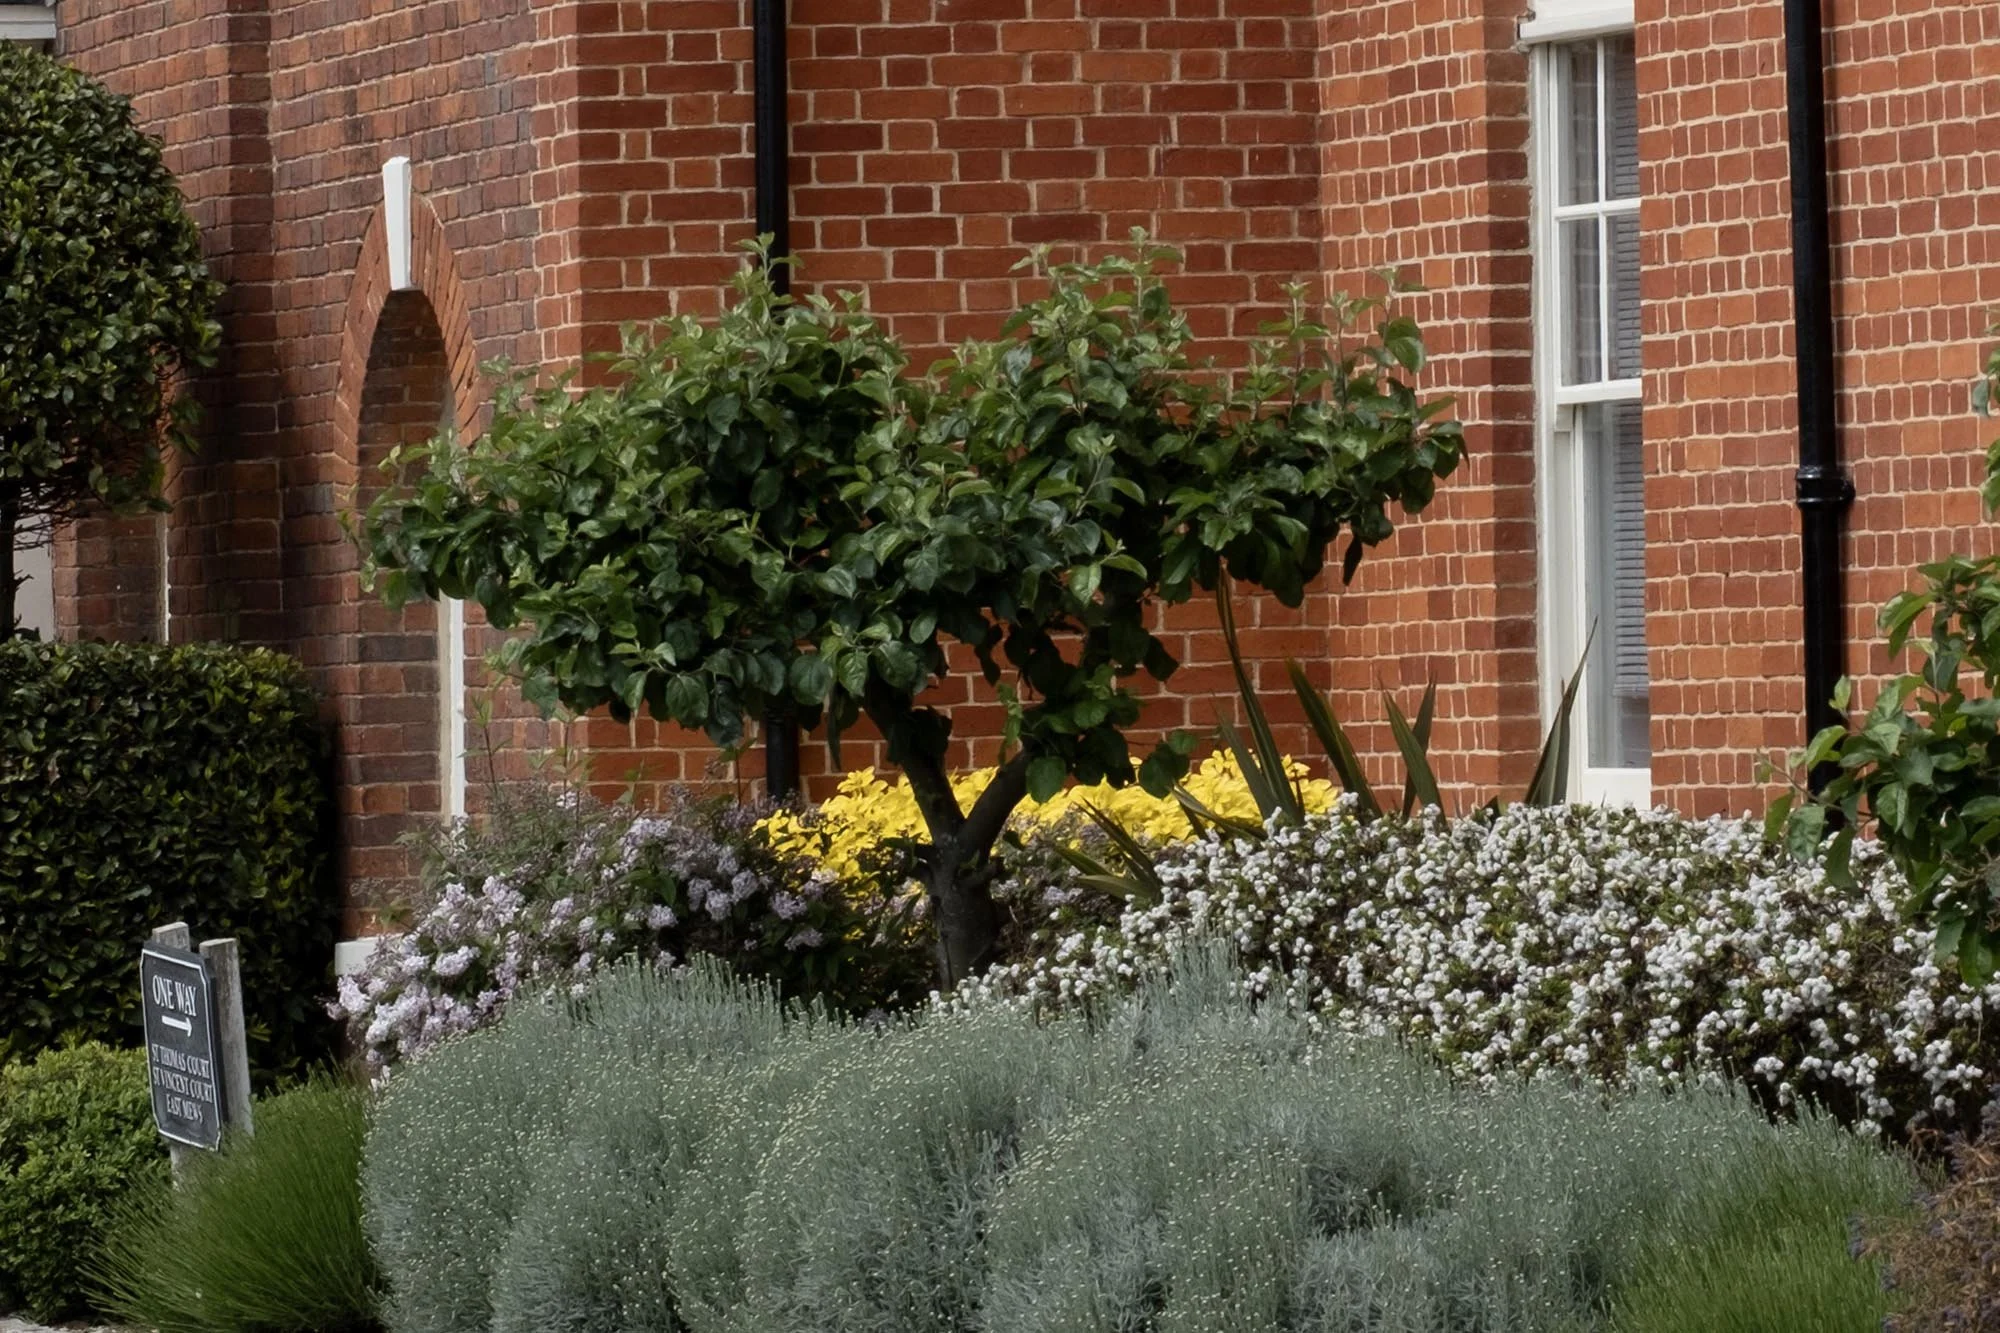
A photo example of lower ISO, which is producing a clearer image.
4. You’re Using the Wrong Autofocus Settings
Modern cameras have incredibly sophisticated autofocus systems.
They can detect faces, track eyes and even recognise and follow animals. That's fantastic when you understand how and when to use those features.
However, sophisticated autofocus doesn't automatically mean sharp photographs.
One of the problems beginners encounter is giving the camera too much control over what it focuses on.
For example, a wide or whole-area autofocus mode allows the camera to search across a large portion of the frame for something to focus on.
But what if you want the object in the foreground to be sharp and your camera decides to focus on something in the background?
The camera doesn't know what your photograph is supposed to be about.
You do.
That's why, while you're learning photography, using a single or spot autofocus point can be a great way to take control.
Position that autofocus point over the part of the scene you want sharp, focus, and you know exactly what you've asked your camera to focus on.
Once you've mastered focusing alongside aperture, shutter speed, ISO and exposure, you can start experimenting with more sophisticated tracking modes. They can make photography faster and easier, particularly with moving subjects, but you should understand the fundamentals first.
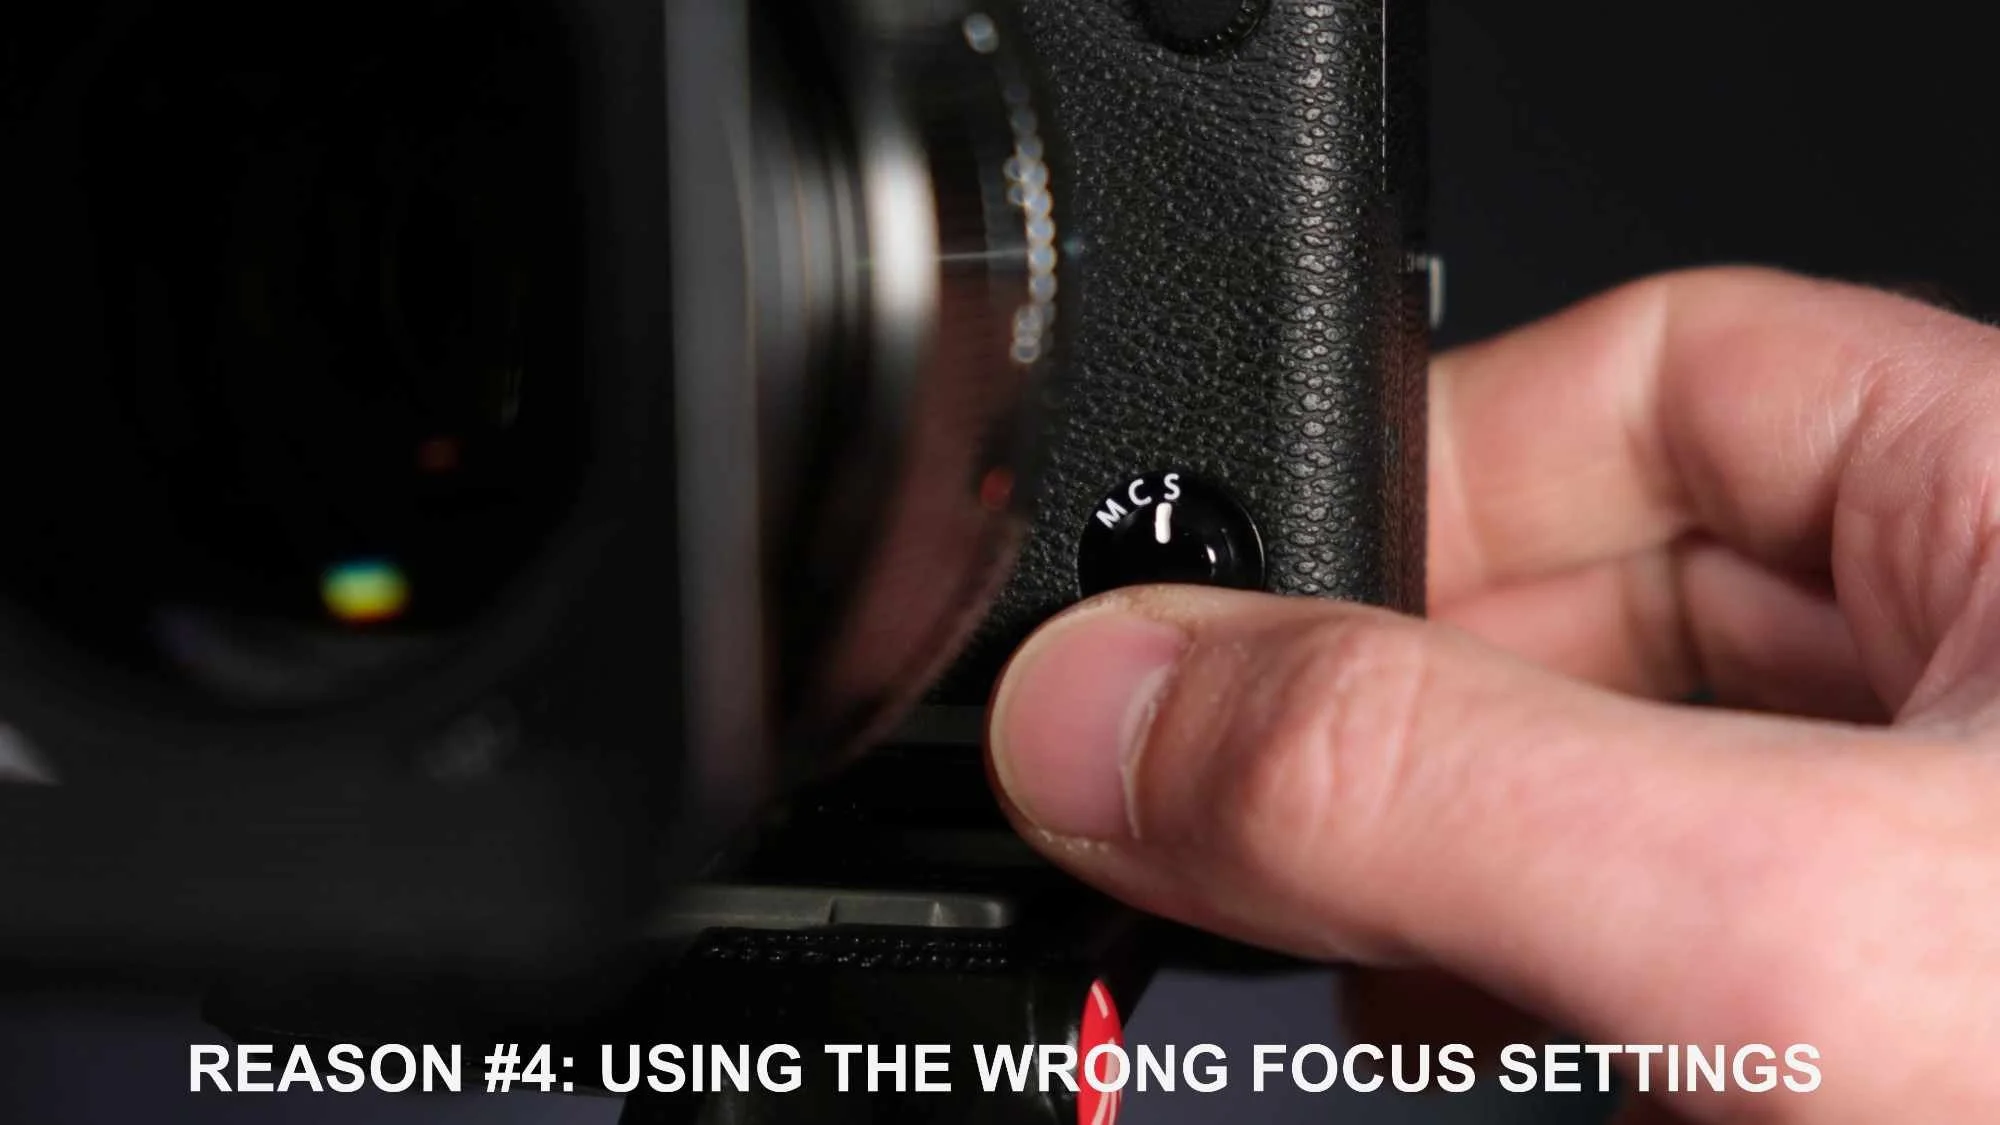
Using the wrong focus settings can be a major cause of blurry or missed shots.
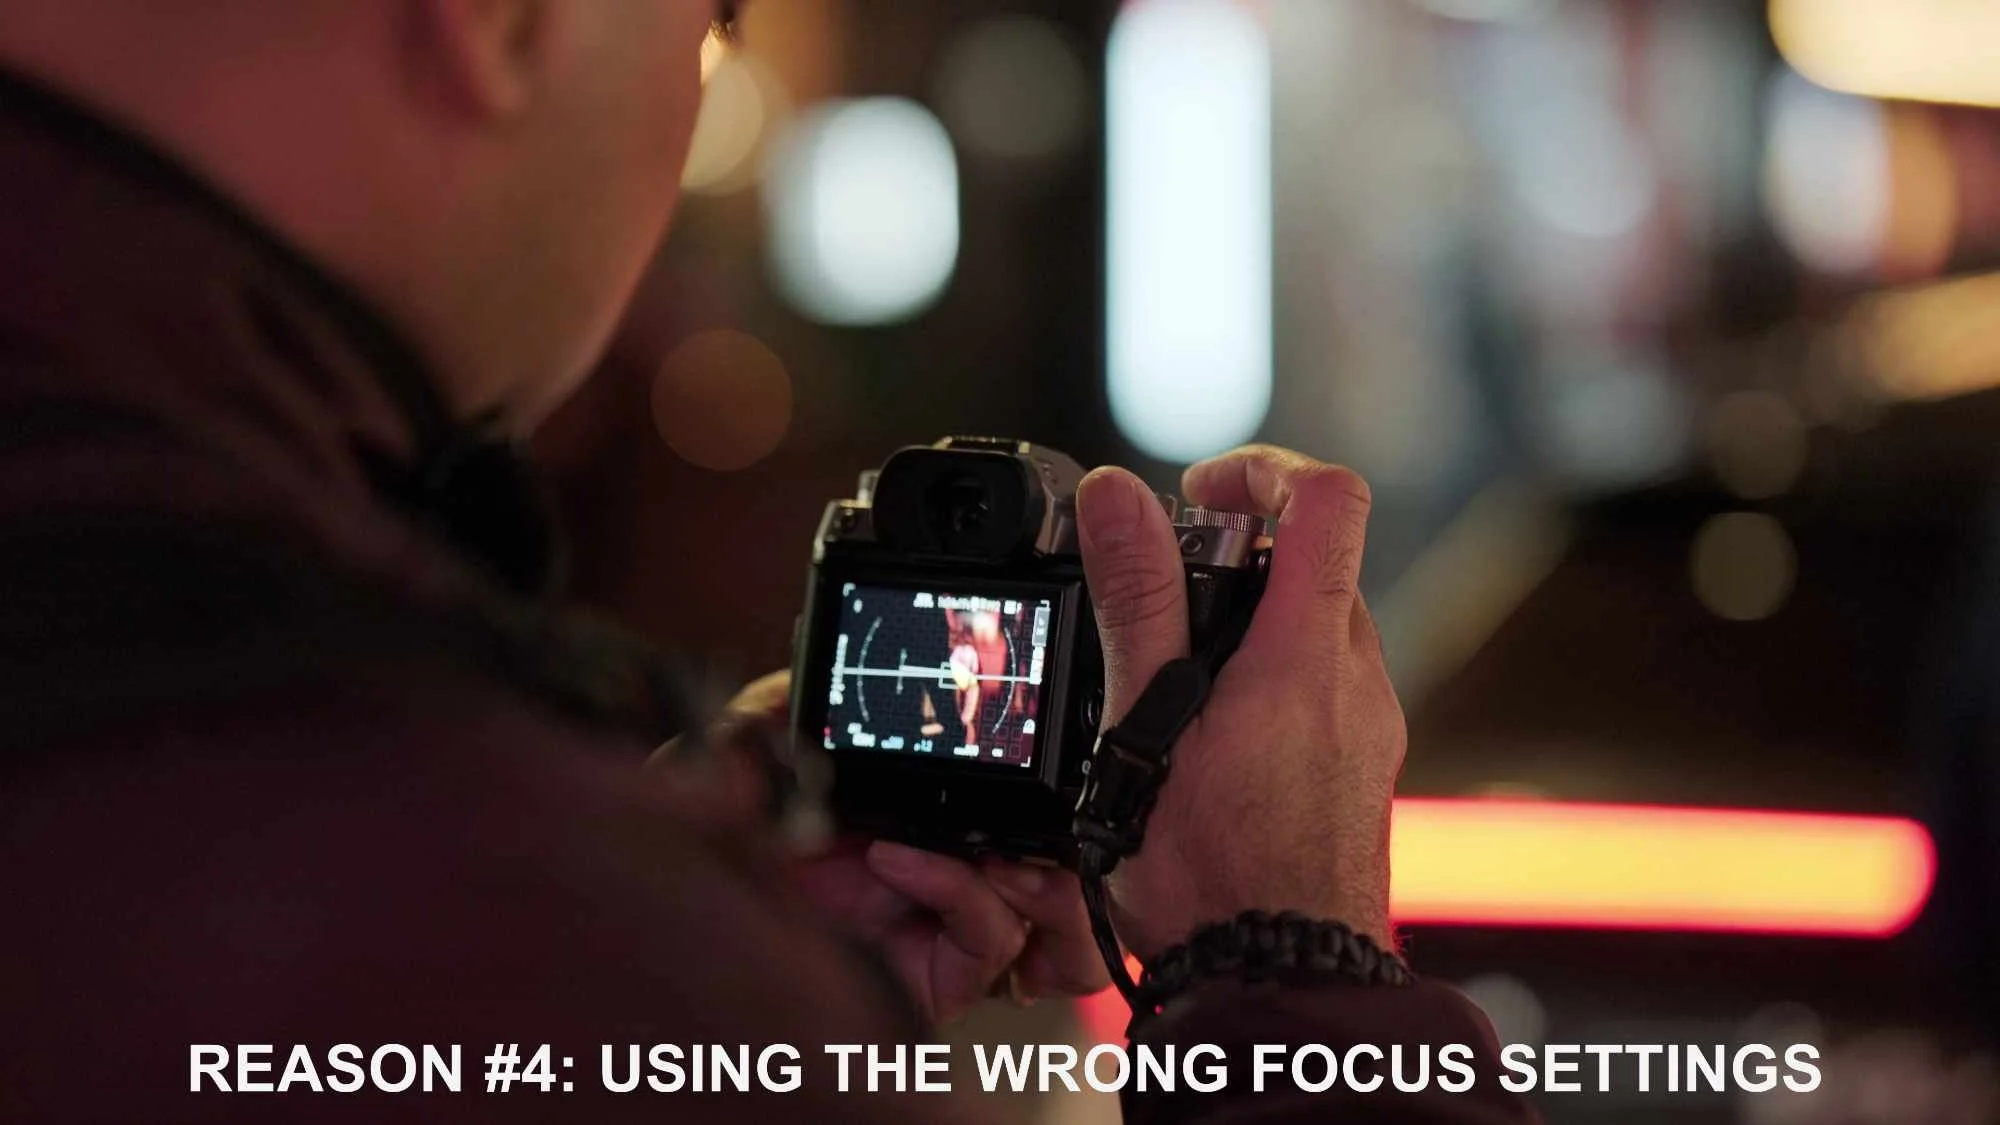
Choosing the right focus settings is essential for capturing sharp images in challenging conditions.
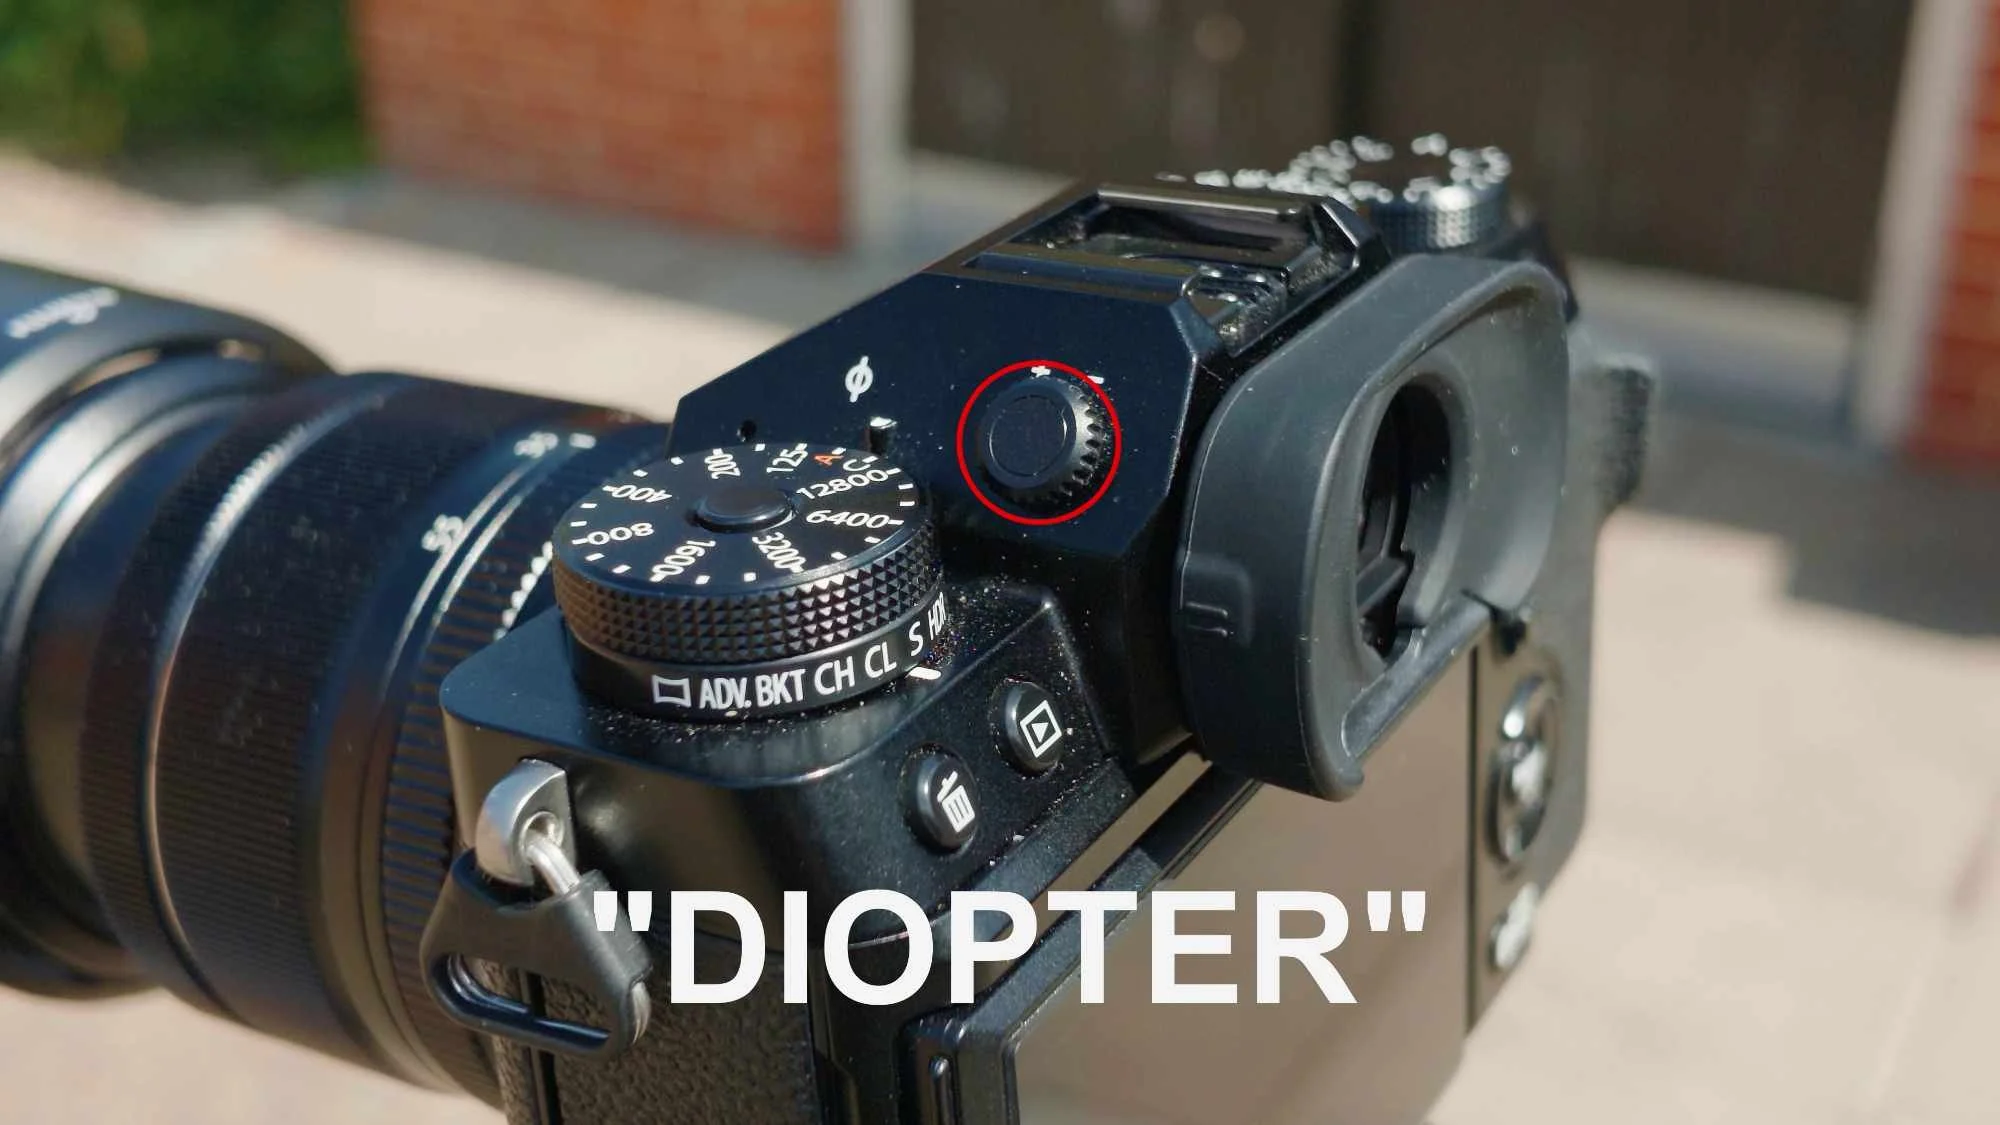
The diopter adjustment helps ensure the viewfinder display appears sharp to your eyesight.
5. Check Your Camera’s Diopter
This final one is easily overlooked.
If your photographs look blurry through the viewfinder, the problem might not actually be your focus at all.
It could be your camera's diopter.
On most cameras you'll find a small adjustment dial beside the viewfinder. Its purpose is to adjust the viewfinder to suit your eyesight.
This is particularly useful if you wear glasses because you can adjust the viewfinder so that the information and image inside it appear sharp to your eye.
To set it, look through the viewfinder and turn the diopter adjustment until the display appears sharp.
It's a tiny control, but if it's accidentally knocked out of position, it can leave you wondering why everything through your viewfinder suddenly looks blurry.
So, Why Are My Photos Blurry?
The main lesson here is that there isn't one magic camera setting that guarantees sharp photographs.
If your photos keep coming out blurry or soft, work through these five things:
Shutter speed — is it fast enough to prevent camera shake?
Aperture — do you have enough depth of field?
ISO — is excessive noise reducing image quality?
Autofocus settings — is the camera focusing where you want it to?
Diopter — is your viewfinder adjusted correctly?
Photography is about controlling all of these things together.
Learning how shutter speed, aperture, ISO and focusing interact takes time, but once you understand them, you'll stop relying on the camera to make all the decisions and start taking control of your photographs yourself.
And that is ultimately how you get consistently sharper images.
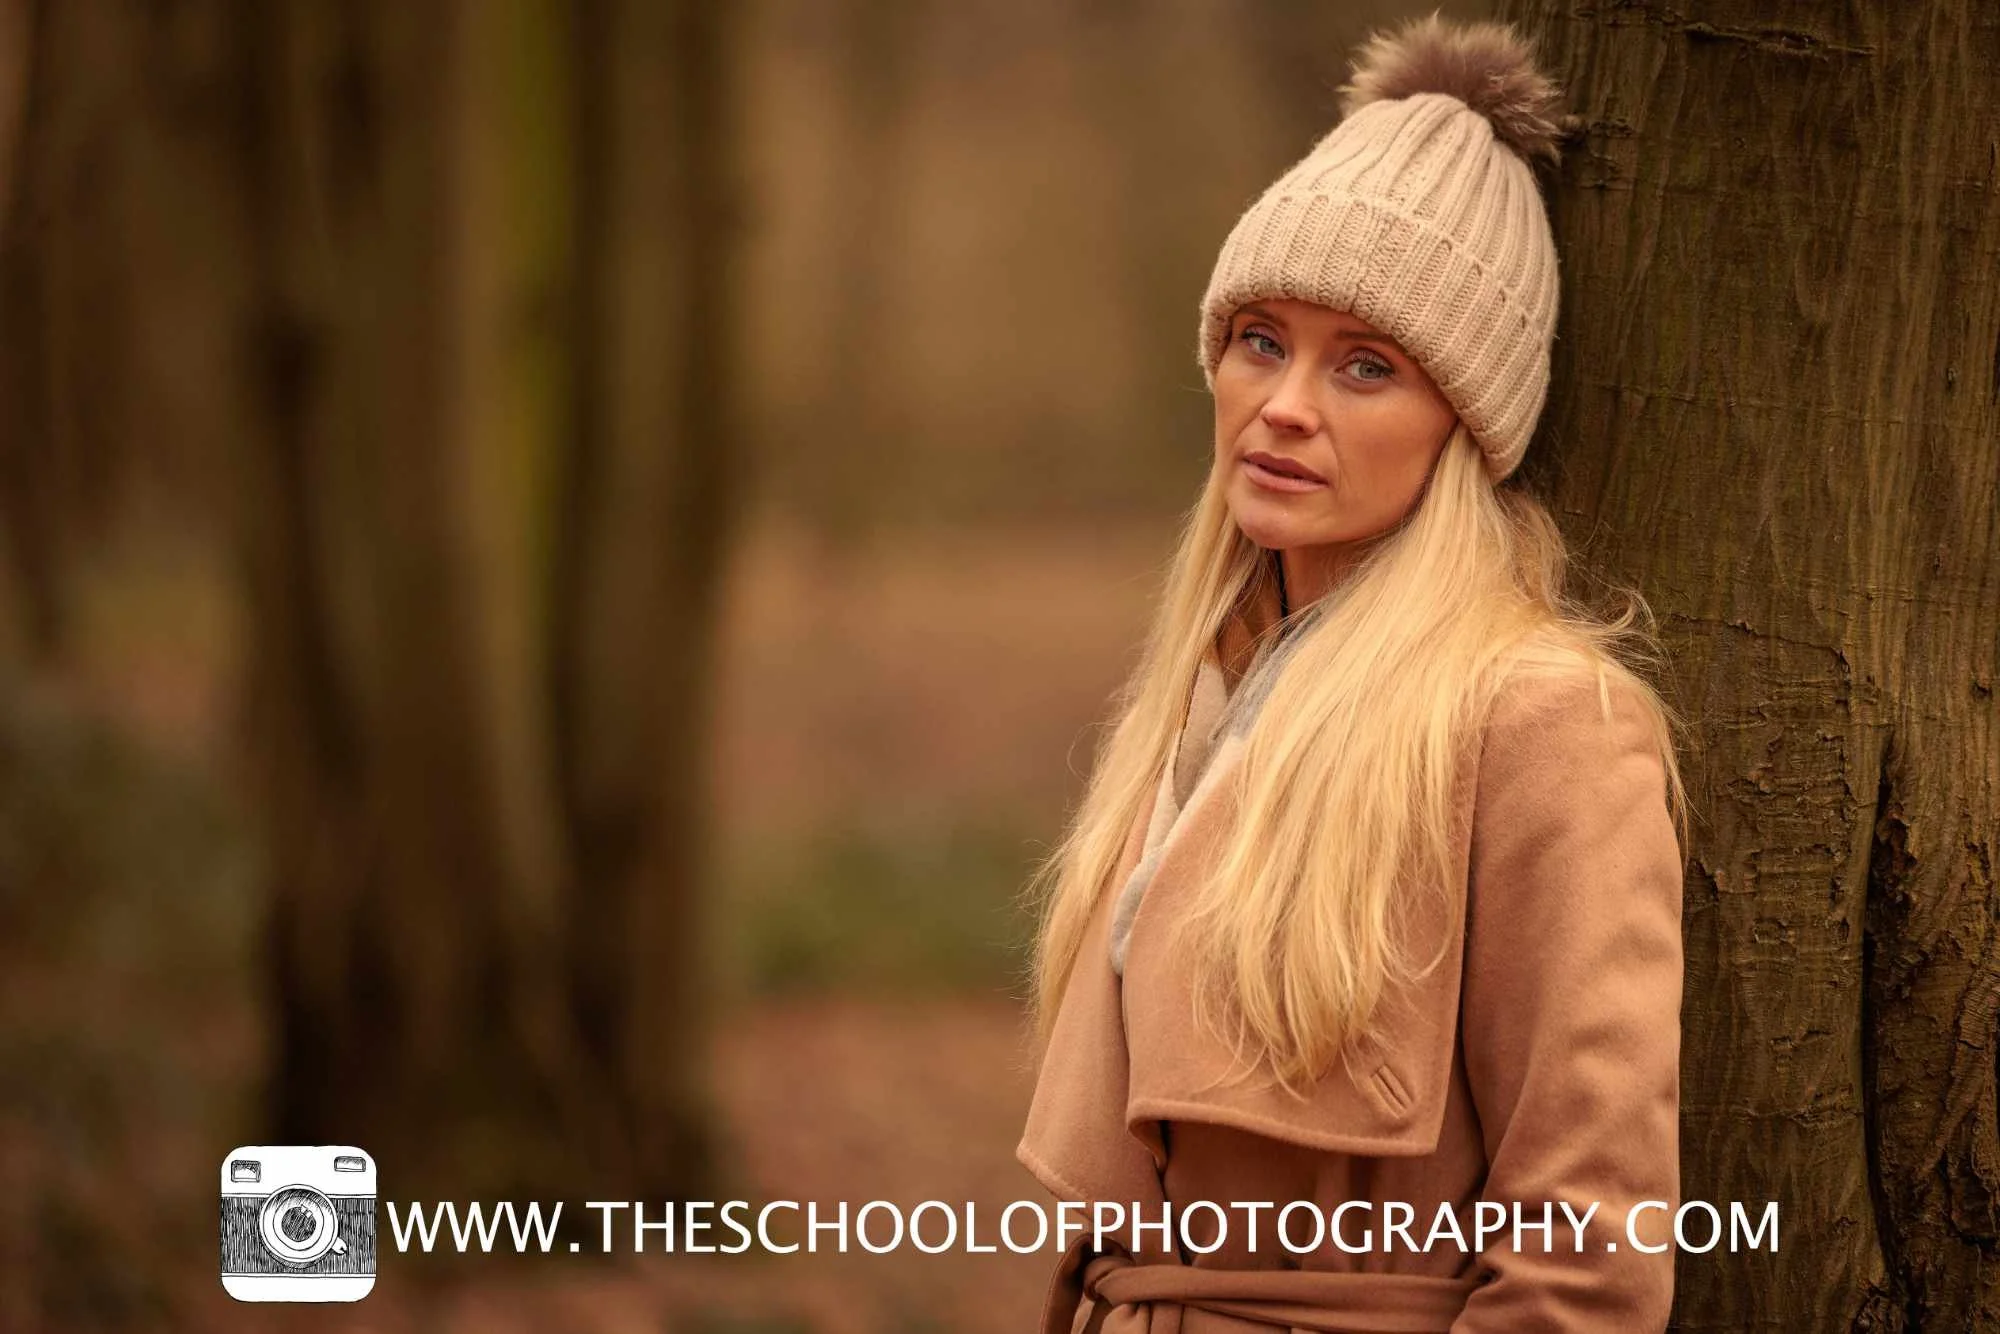
In this portrait, the subject’s face and eyes are crisp and sharply focused, while the surrounding trees and background are softly blurred, demonstrating how a sharp subject can stand out against a shallow depth of field.
Frequently Asked Questions About Getting Sharp Photos
Why are my photos blurry even when they look in focus on my camera?
A photo can look sharp on your camera's small screen but appear soft when you view it at full size on a computer. Common causes include a shutter speed that's too slow, camera shake, a very shallow depth of field, high ISO or the camera focusing on the wrong part of the scene. Checking your images at a larger size will give you a much better idea of whether they're genuinely sharp.
What shutter speed should I use to get sharp photos?
When shooting handheld at wider focal lengths, 1/125 sec or faster is a good starting point. When using a longer focal length or zoom lens, try 1/250 sec or faster. In situations where either you or your subject is moving, 1/500 sec or faster can give you a better chance of getting a sharp image. The correct shutter speed will always depend on your focal length, subject movement and how steadily you can hold the camera.
What is the best aperture for sharp photos?
There isn't one aperture that will be best for every photograph. If you want a larger area of the image to appear sharp, apertures around f/8 or f/11 are useful starting points. Wider apertures such as f/1.8 or f/2.8 create a shallower depth of field, which means accurate focusing becomes much more important.
Why are my photos blurry at low shutter speeds?
A slow shutter speed gives the camera more time to record movement during the exposure. If your hands or camera move while the photograph is being taken, that movement can be recorded as camera shake and make the image look blurry. Your subject can also move during the exposure, causing motion blur.
Does a high ISO make photos less sharp?
A high ISO doesn't necessarily mean your focus is wrong, but it can introduce more visible noise and reduce fine detail, which can make a photograph appear softer. Where possible, keep your ISO as low as you reasonably can while still using the shutter speed and aperture you need.
Why are my photos blurry at f/1.8 or f/2.8?
Wide apertures such as f/1.8 and f/2.8 produce a shallow depth of field. This means only a relatively small area of the photograph may be in sharp focus. If either you or your subject moves slightly after focusing, the part you wanted sharp can fall outside that area.
Which autofocus setting should a beginner use?
A single or spot autofocus point is a good way to learn because it gives you direct control over where the camera focuses. Instead of allowing the camera to choose a subject from across the frame, you position the autofocus point over the area you want to be sharp. Once you're comfortable controlling focus, you can start experimenting with your camera's more advanced tracking modes.
Does image stabilisation guarantee sharp photos?
No. Image stabilisation and in-body image stabilisation (IBIS) can help compensate for movement of the camera, but they don't guarantee a sharp photograph. They also can't stop a moving subject from becoming blurred. Understanding shutter speed is still essential if you want consistently sharp images.
Why does everything look blurry through my camera viewfinder?
If everything looks blurry through your viewfinder even when the camera has focused correctly, check the diopter adjustment beside the viewfinder. The diopter allows you to adjust the viewfinder to suit your eyesight. If it has been moved accidentally, the viewfinder can appear blurry even though the photographs themselves are correctly focused.
How can I take sharper photos?
Start by making sure your shutter speed is fast enough to avoid camera shake, choose an aperture that gives you enough depth of field, keep ISO as low as reasonably possible and take control of where your camera focuses. Sharp photography isn't controlled by one setting — it's the result of understanding how all of these settings work together.
Learn Photography Properly
This article gives you a quick overview of why your photographs might not be sharp, but understanding how all of these camera settings work together is a much bigger subject.
At The School of Photography, we teach photography properly, from complete beginners through to more advanced photographers.
Our courses cover everything from the fundamentals of photography to Lightroom, Photoshop, portraiture, wildlife, macro, studio lighting, landscape photography and much more.
So, if you're serious about improving your photography and want to understand your camera rather than simply hoping it gets the shot right, take a look at our photography courses and join thousands of other photographers learning with The School of Photography.
Like this? - Check out similar tutorials below


I hope you liked this blog on Why Are My Photos Blurry. If you did, please leave us a comment and support us by sharing it with your friends and subscribe to our newsletter at the bottom of this page for more.
We also have an excellent learning community on social media so please join us there as well.
Thanks for watching and remember – Learn more at The School of Photography.
About the author
Hi, I’m Marc Newton and I’m a photographer, educational speaker, author, teacher of photography and the founder of The School of Photography. Follow my personal work on Facebook, Instagram.