Natural Light Photography: A Complete Guide to Shooting with Available Light
In photography natural light is one of the most powerful tools at your disposal. It’s free, accessible, and can add a level of authenticity and beauty that artificial lighting sometimes struggles to replicate. Whether you’re shooting portraits, landscapes, or everyday moments, understanding how to use natural light effectively can dramatically improve your photos.
In this guide, we’ll explore the fundamentals of natural light photography, how to harness it for different situations, and advanced techniques that will help you take your images to the next level.
What Is Natural Light Photography and How Does It Work?
Types of Natural Light in Natural Light Photography
Natural light photography is one of the most powerful and versatile techniques in photography. Using sunlight as your primary light source is not only free and accessible, but it also creates authentic, natural-looking images that artificial lighting often struggles to replicate. From soft window light and golden hour glow to dramatic backlighting and overcast skies, understanding how natural light works can transform your photography.
Whether you’re shooting portraits, landscapes, product photography, or everyday moments, learning how to control light direction, timing, and camera settings will dramatically improve your results. In this complete guide to natural light photography, you’ll discover essential techniques, the best times of day to shoot, recommended camera settings, and advanced tips to help you capture stunning, professional-quality images using available light.
Natural light photography using soft window light for a clean, natural look.
Ann Tsvetknova on Unsplash
Side lighting in natural light photography adds depth, texture, and dimension.
Darren Brockman on Unsplash
Natural Light Photography: Understanding and Mastering Available Light
Direction of Natural Light in Photography
Natural light photography is all about learning to see, shape, and control the light that already exists around you. Unlike studio lighting, where you create and position light sources, natural light requires observation and adaptation. The quality, direction, intensity, and colour of available light will all influence how your final image looks.
To truly master natural light photography, you must understand how light interacts with your subject. Light creates highlights, shadows, depth, mood, and texture. By recognising how it falls across a scene, you can make intentional creative decisions instead of leaving the result to chance.
One of the most important aspects to understand is the direction of natural light.

Natural light photography using soft daylight to create a natural, balanced image.
Alicja Koczaska on Unsplash
Natural Light Photography: Best Time of Day to Shoot
Golden Hour Photography in Natural Light Photography
In natural light photography, the time of day dramatically affects the quality, colour, and direction of light. The angle of the sun determines how shadows fall, how textures appear, and how much contrast your image will have. Understanding how light direction changes throughout the day allows you to choose the best conditions for your subject.
Front Lighting
Front lighting occurs when the sun is positioned behind the photographer, shining directly onto the subject. This creates evenly lit images with minimal shadows, making it ideal for capturing detail, vibrant colours, and sharp results. Front lighting works particularly well for portraits, travel photography, and scenes where clarity is more important than mood or drama. However, because shadows are reduced, images can sometimes appear flatter with less depth.
Side Lighting
Side lighting happens when the sun strikes the subject from the left or right. This is one of the most effective lighting directions in natural light photography because it creates contrast, depth, and texture. The shadows formed by side light emphasise shapes, lines, and facial features, making it especially powerful for portrait photography and landscape photography. If you want dimension and a more dynamic image, side lighting is often the best choice.
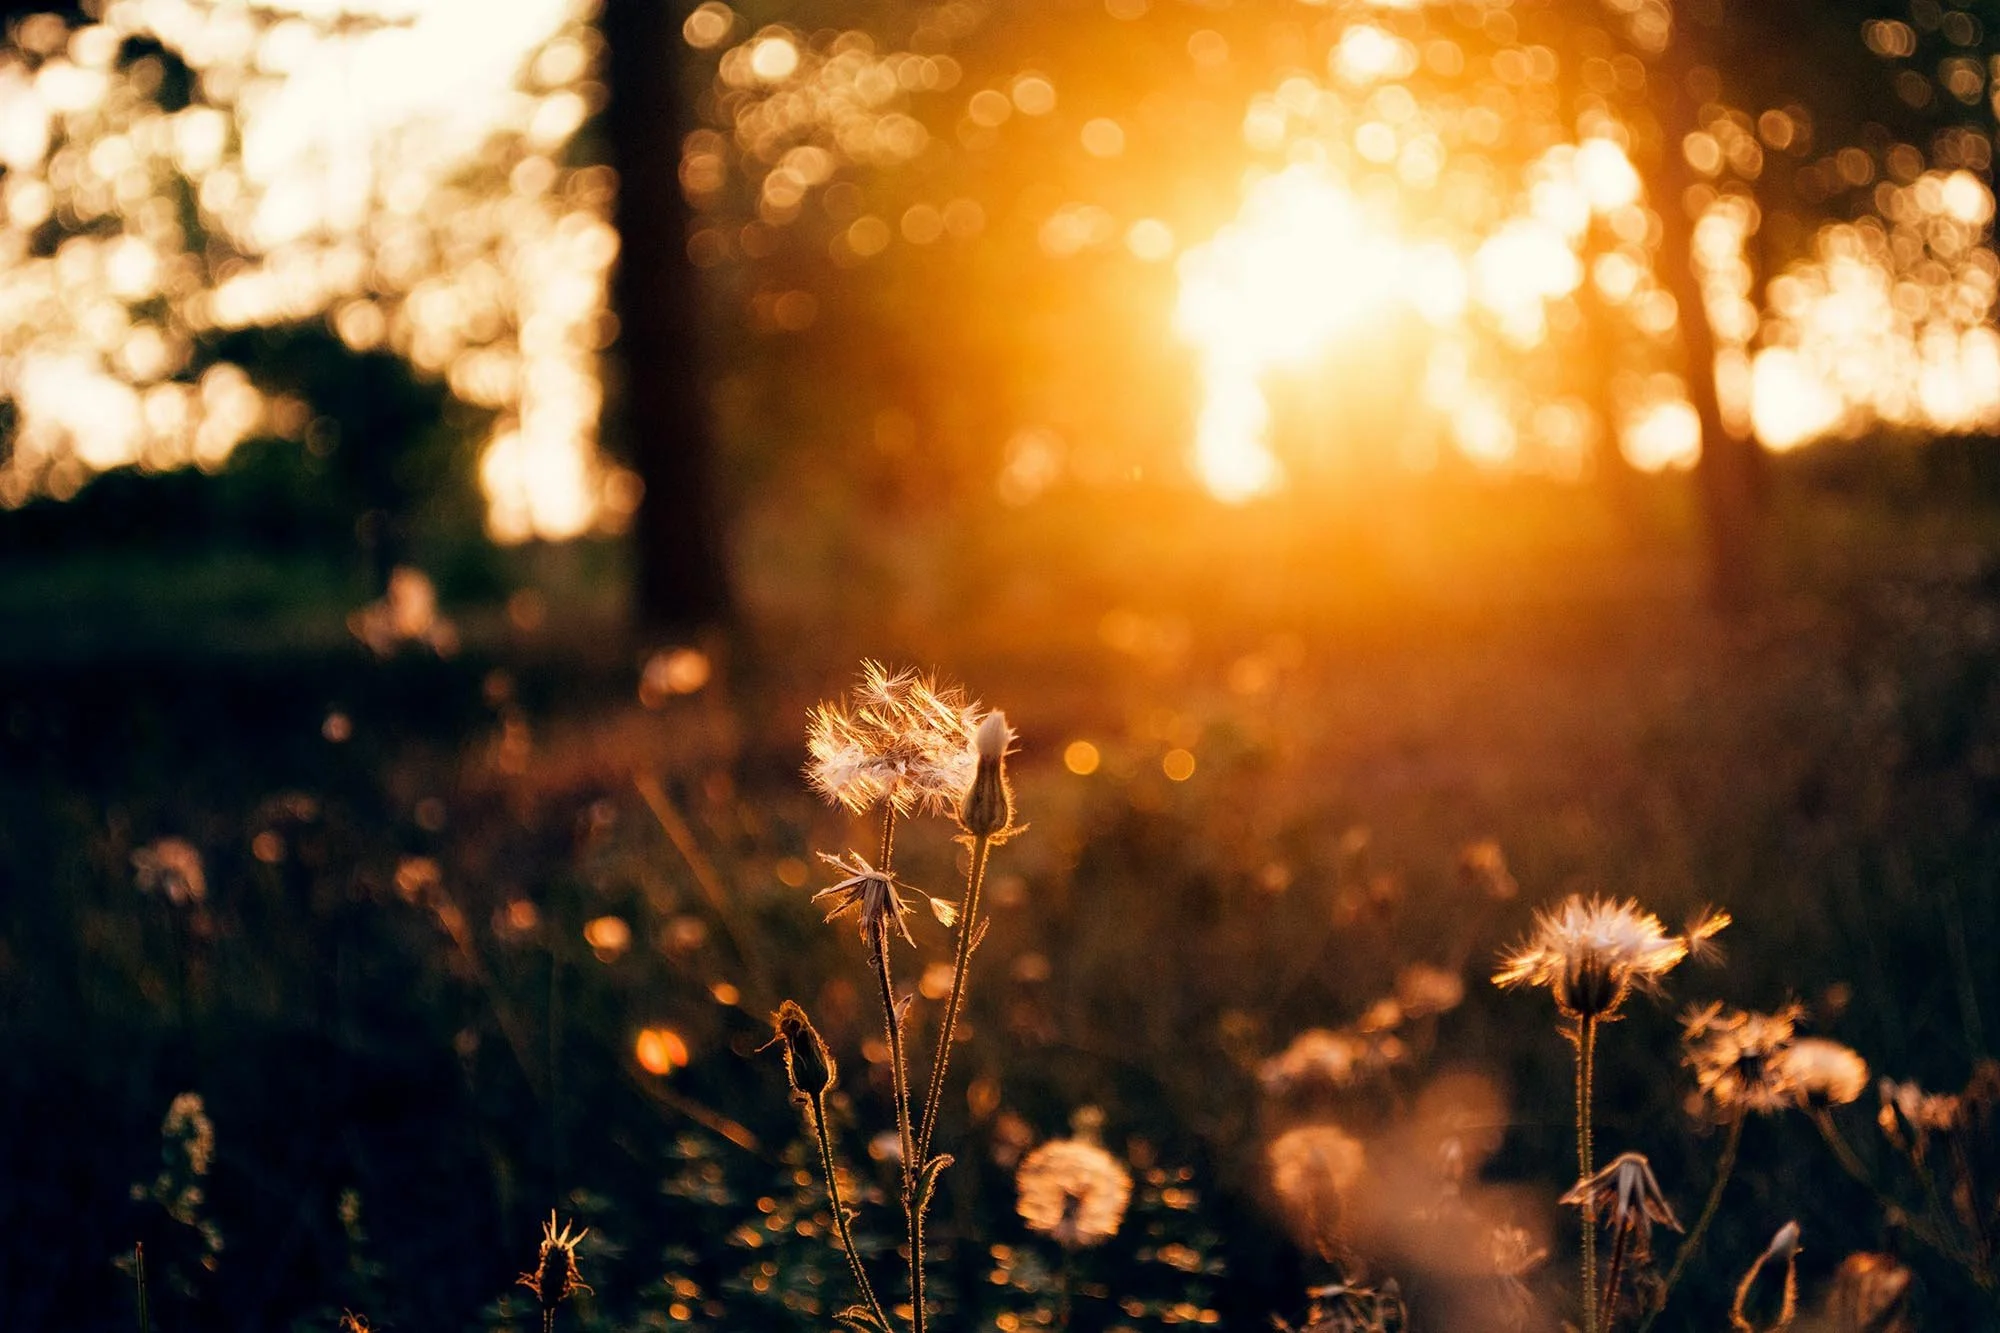
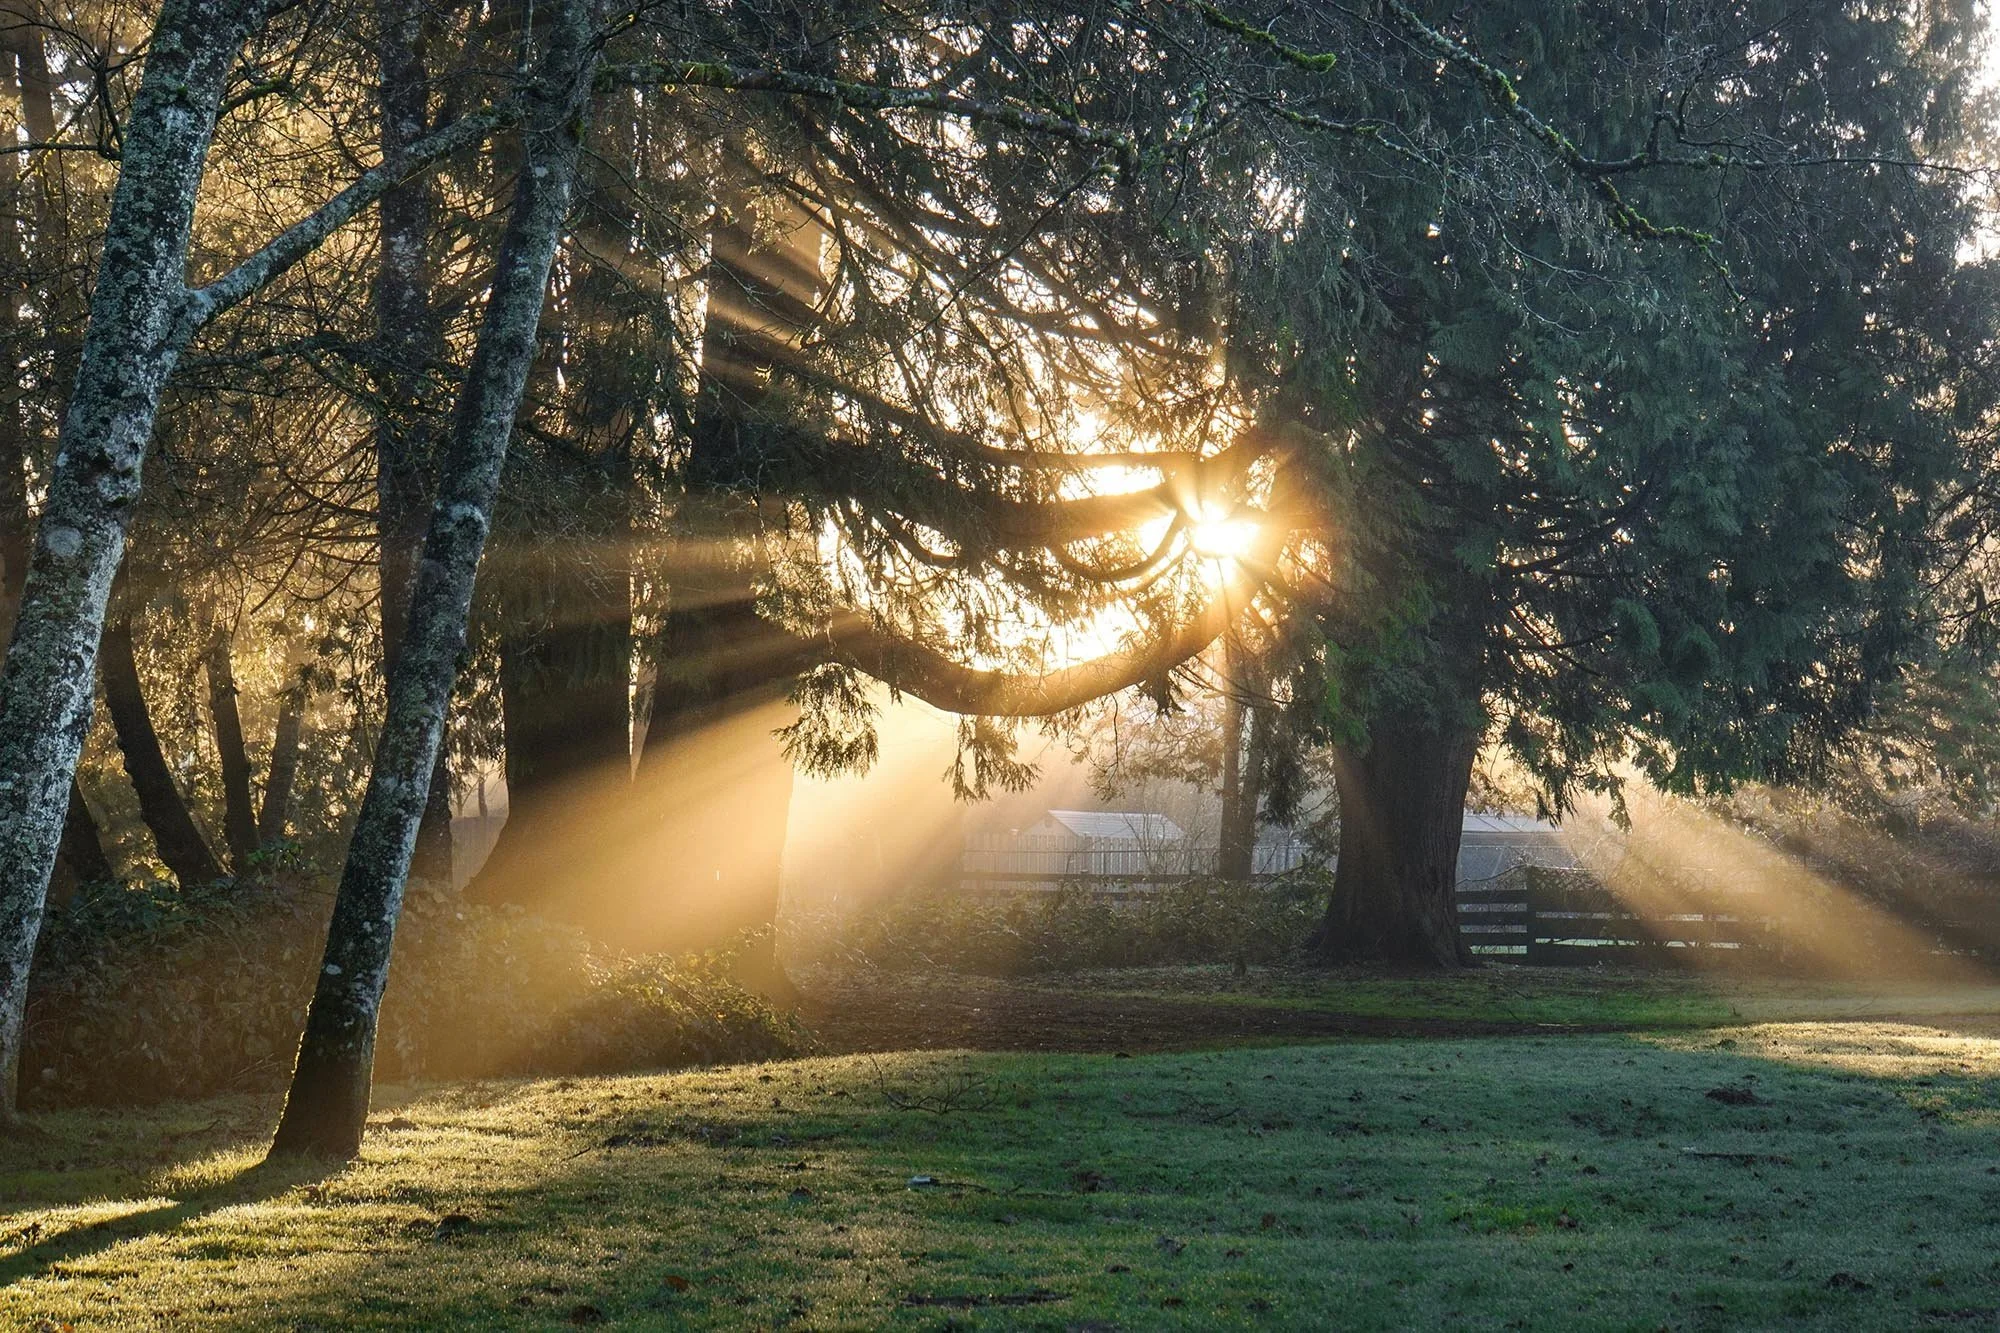
Backlighting
Backlighting occurs when the light source is behind the subject. This can create dramatic silhouettes, glowing rim light, and beautiful flare effects — particularly during golden hour. Backlighting is especially effective in early morning or late afternoon when the sun is lower in the sky and softer in intensity. While it can be challenging to expose correctly, mastering backlighting can elevate your natural light photography and produce striking, professional-looking images.

Natural light food photography showing pancakes and fresh fruit with soft shadows and warm highlights.
Micheile Henders on Unsplash
Natural Light Photography Camera Settings: ISO, Aperture & Shutter Speed
Choosing the Right Aperture for Natural Light Photography
When shooting in natural light photography, understanding the quality of light — whether it is hard or soft — helps you choose the right aperture and exposure settings. Light quality affects contrast, shadow detail, and how much texture appears in your image. By adjusting your aperture accordingly, you can control depth of field while balancing highlights and shadows.
Hard Light
Hard light is direct and undiffused, typically seen in bright midday sun. It creates strong contrast and sharp, defined shadows. In natural light photography, hard light can emphasise texture, structure, and detail, making it effective for architectural shots or dramatic portraits.
When working in hard light, you may need a narrower aperture (higher f-number) to maintain sharpness and control bright highlights. Being mindful of exposure is essential to avoid blown-out areas in high-contrast scenes.
Soft Light
Soft light is diffused by clouds, window sheers, shade, or reflectors. It produces gentle transitions between highlights and shadows, resulting in more even and flattering illumination. Overcast days and golden hour are common examples of soft natural light.
Soft light is particularly popular in portrait photography because it reduces harsh shadows and smooths skin tones. In these conditions, you can use a wider aperture (lower f-number) to create a shallow depth of field while maintaining balanced exposure.

Natural light food photography showing desserts lit with soft, diffused daylight.
Maryam Sicard on Unsplash

Chocolate truffles photographed using soft natural daylight for clean highlights and gentle shadows.
Yulia Khebnikova on Unsplash
Using Natural Light Photography Techniques for Different Photography Styles
Natural Light Portrait Photography Techniques
In natural light portrait photography, understanding colour temperature is essential for capturing accurate skin tones and creating the right mood. Natural light changes colour throughout the day, shifting from warm golden tones at sunrise and sunset to cooler blue tones during midday and shade. Learning to recognise these changes allows you to adjust your white balance settings and reduce the need for heavy post-processing.
Colour temperature is measured in Kelvin (K) — a scale used to describe the warmth or coolness of light.
Lower Kelvin values (2000–4000K) produce warmer, orange or yellow tones.
Higher Kelvin values (6000–10,000K) produce cooler, blue tones.
Neutral daylight typically sits around 5500K.
Understanding how colour temperature affects natural light photography helps you make creative decisions about mood, atmosphere, and skin tone accuracy.
Warm Light (Golden Hour)
Warm light occurs at sunrise and sunset, commonly known as golden hour. During this time, the sun sits lower in the sky, and its light passes through more of the atmosphere. This scatters shorter blue wavelengths and allows warmer tones — yellows, oranges, and reds — to dominate.
Golden hour light typically ranges from 2000K to 4000K and creates soft, flattering illumination. In portrait photography, this warm glow enhances skin tones and produces a natural, inviting feel.
Neutral Midday Light
Around midday, when the sun is highest in the sky, natural light becomes more neutral. Colour temperature is approximately 5500K, which is close to white daylight. While this light is brighter and more direct, it can also be harsher and create strong shadows.
For natural light portrait photography, midday light often benefits from diffusers, reflectors, or open shade to soften contrast.
Blue Hour
Blue hour occurs twice daily:
Just before sunrise
Shortly after sunset
During these short periods, the sun is below the horizon and indirect light creates a soft, predominantly blue tone. Colour temperatures can range from 8000K to 10,000K, producing a cooler, moodier atmosphere. Blue hour works well for dramatic portraits and cinematic effects.
Overcast and Shade
Cloud cover and shaded areas diffuse sunlight, often producing cooler light between 6500K and 10,000K. Although cooler in tone, overcast light is soft and even — making it ideal for flattering portraits with minimal harsh shadows.
By understanding how colour temperature shifts throughout the day, you gain greater control over mood, tone, and skin accuracy in natural light photography. Instead of relying heavily on editing, you can choose the right time of day and adjust your camera’s white balance to create the desired effect in-camera.
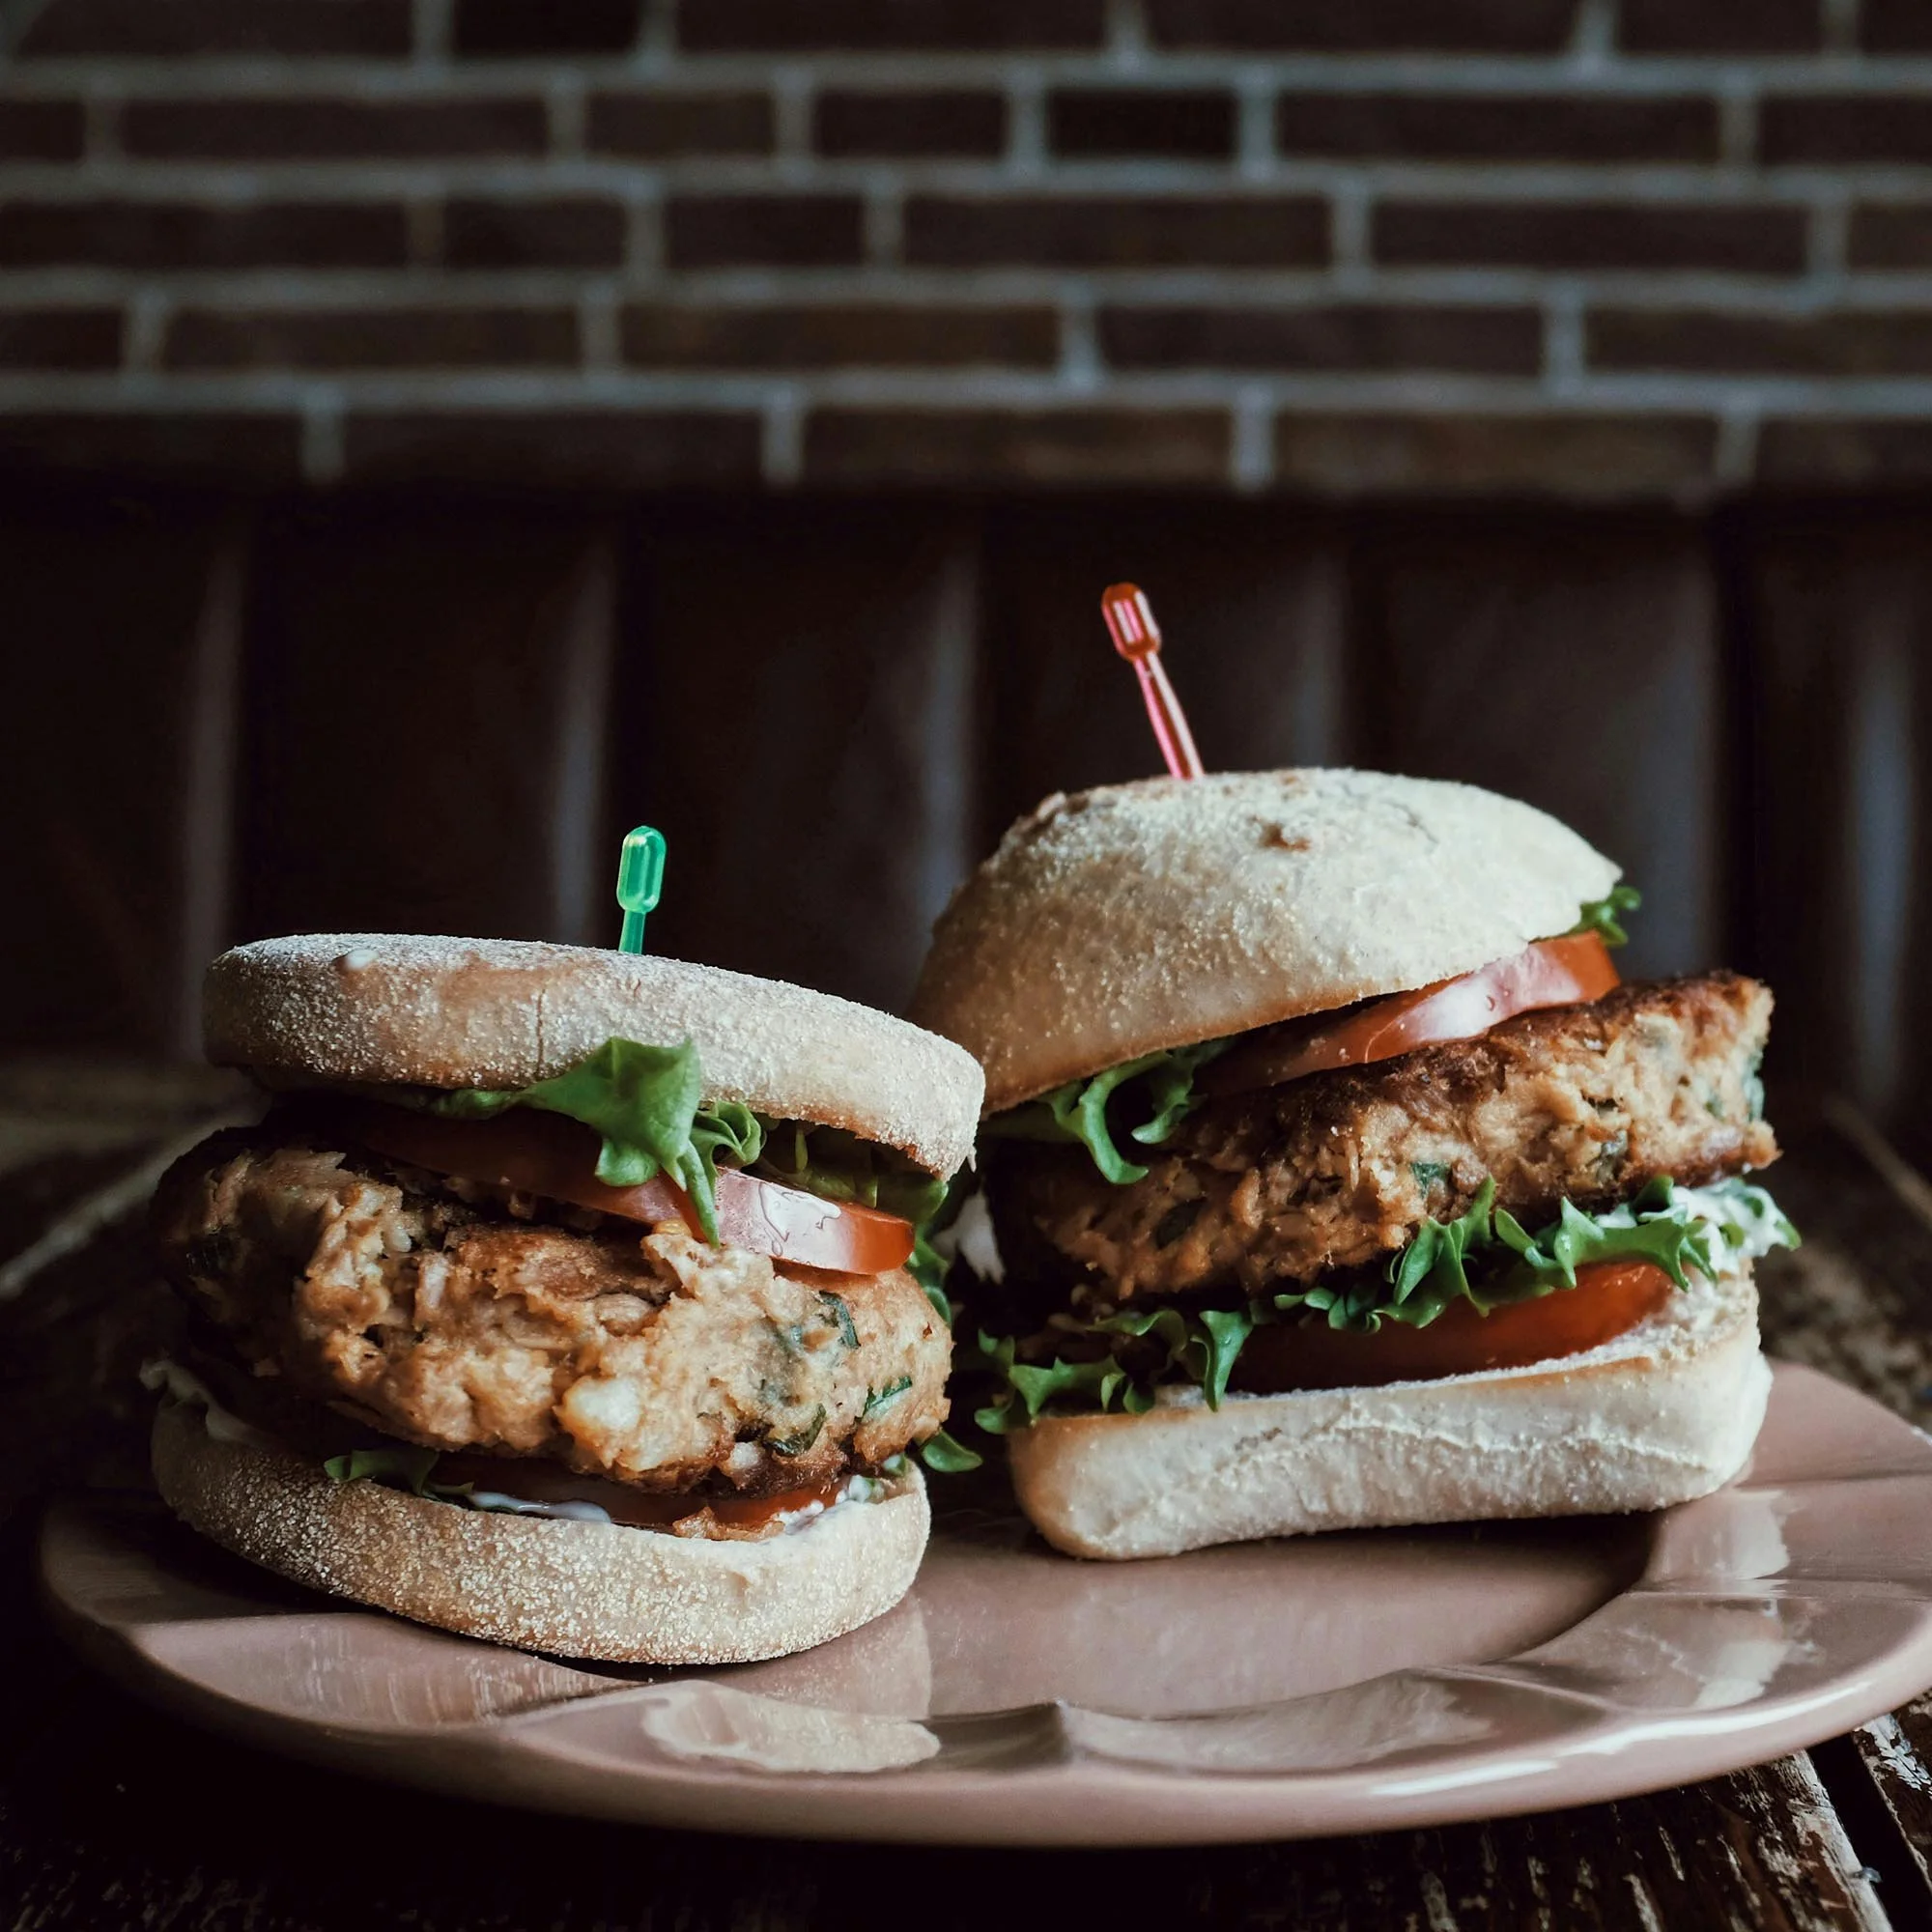
Burgers photographed using natural light to create a moody, dramatic food photography style.
Thanos Pal on Unsplash
Natural Light Photography Tips for Better Photos
How to Soften Harsh Natural Light in Natural Light Photography
Harsh natural light — most common during midday when the sun is high in the sky — can create strong contrast, blown highlights, and deep, unflattering shadows. While hard light can be used creatively, most photographers aim to soften it to achieve more balanced exposure and flattering results.
In natural light photography, learning how to control and modify harsh light is a key skill. The goal is to reduce contrast, diffuse shadows, and create smoother transitions between highlights and dark areas.
1. Move Into Open Shade
One of the simplest ways to soften harsh natural light is to reposition your subject into open shade. This could be under a tree, beside a building, under an archway, or near a doorway. Open shade blocks direct sunlight while still allowing soft ambient light to illuminate your subject evenly.
This technique works particularly well for portrait photography, as it reduces harsh shadows under the eyes and nose while maintaining natural skin tones.
2. Use a Diffuser
A diffuser is one of the most effective tools in natural light photography. By placing a translucent material between the sun and your subject, you spread and soften the light source. This reduces sharp shadows and lowers contrast.
Even simple solutions like sheer curtains, white fabric, or purpose-built reflectors with diffusion panels can dramatically improve results when shooting in strong sunlight.
3. Adjust Your Shooting Angle
Sometimes softening harsh light is as simple as changing your angle. Turning your subject slightly away from direct sunlight or positioning the sun to the side can reduce extreme contrast. Side lighting often creates more flattering dimension compared to direct overhead light.
You can also experiment with slight backlighting, allowing the sun to fall behind your subject while exposing for their face.
4. Use Reflectors to Fill Shadows
Reflectors bounce light back onto your subject, helping to lift deep shadows without adding artificial lighting. A white reflector creates soft fill light, while a silver reflector produces brighter, more defined highlights.
In natural light photography, reflectors are especially useful when shooting outdoors during bright conditions where shadows appear too dark.
5. Adjust Camera Settings for Better Exposure
In harsh light, protecting highlights is crucial. Slightly underexposing your image can help preserve detail in bright areas. Shooting in RAW format also gives you more flexibility to recover shadows and highlights during editing.
Lower ISO settings and careful aperture selection can help maintain image quality while balancing exposure in high-contrast scenes.
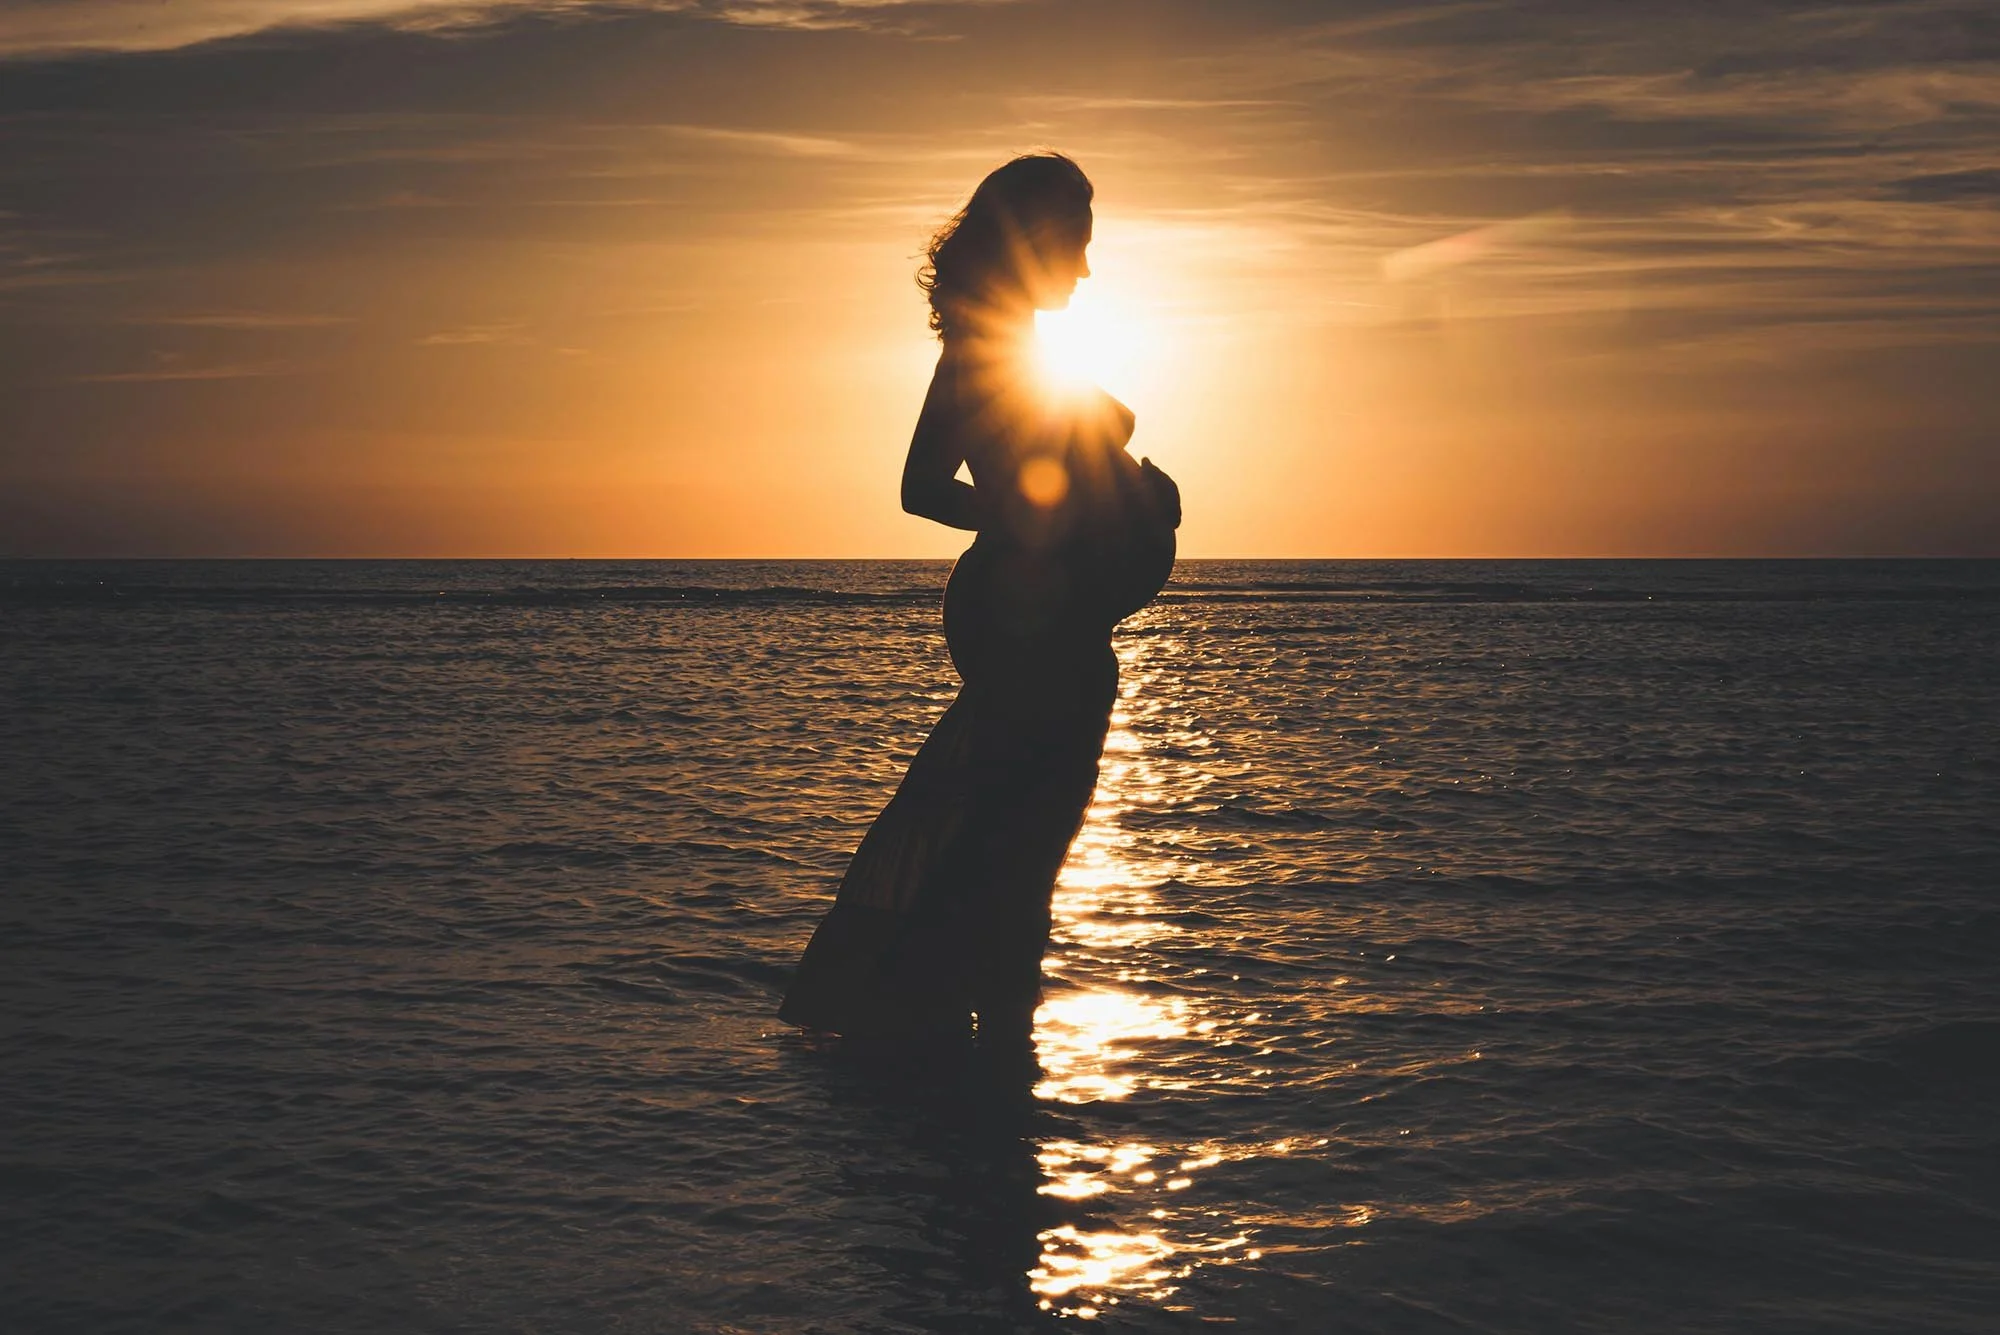
Silhouette portrait photographed at sunset using natural light and backlighting.
Alexandre Dinaut on Unsplash
Building on these techniques, you can apply light control principles across different photography styles. Whether you're shooting portraits, landscapes, or product photography, understanding how to soften and shape natural light allows you to create more professional, polished images — even in challenging conditions.
Mastering Natural Light Photography: Key Takeaways
In natural light photography, portrait photography often benefits from soft, diffused light that creates flattering skin tones and minimises harsh shadows. Using natural light for portraits allows you to achieve authentic, professional-looking results without the need for artificial lighting. Understanding when and how to use available light is key to mastering natural light portrait photography.
Golden Hour
Golden hour — the hour after sunrise and the hour before sunset — is widely regarded as the best time for natural light photography, especially for portraits. During this time, the light is warm, soft, and directional, creating a beautiful glow around your subject. The lower angle of the sun produces longer, softer shadows, adding depth, dimension, and a cinematic quality to your images.
Overcast Days
Cloudy conditions are ideal for natural light photography because the clouds act as a giant diffuser. This creates soft, even lighting — similar to a natural softbox — that reduces harsh shadows and balances skin tones. Overcast light is particularly effective for close-up portraits, lifestyle photography, and situations where you want a smooth, flattering finish.
Backlighting
Backlighting is a powerful technique in natural light photography. Positioning your subject with the light source behind them can create a dramatic rim light or glowing halo effect, especially during golden hour. To prevent underexposure, use a reflector to bounce light back onto the subject’s face or slightly increase your exposure while protecting highlights.
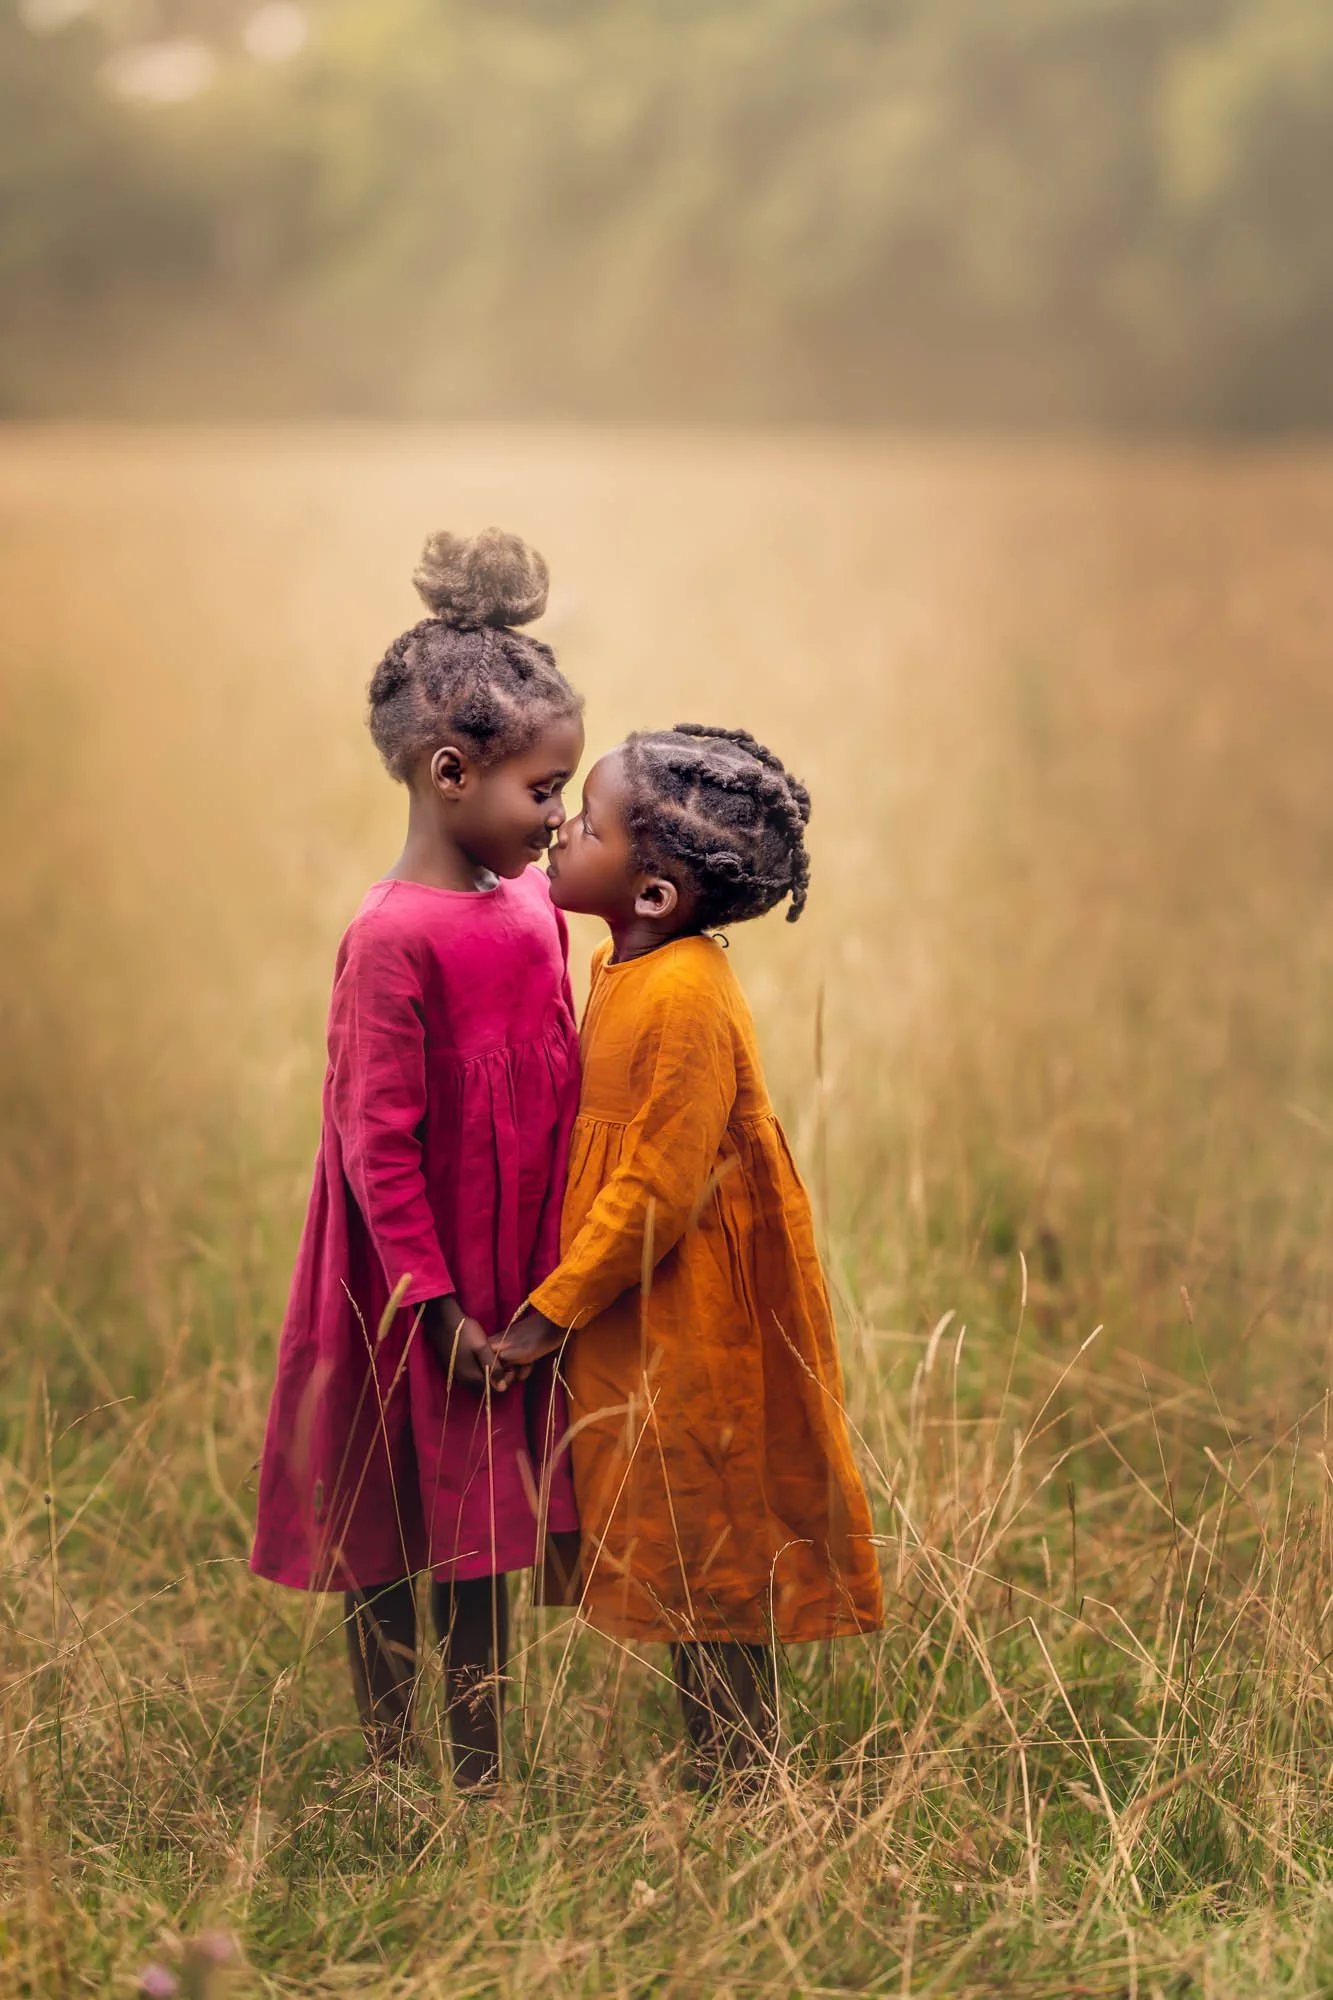
Natural light portrait of children photographed outdoors using soft, diffused daylight. Taken from our Fine Art Family Portraiture Course with Sujata Setia.

Backlit natural light portrait of a child, with soft light coming from behind the subject. Taken from our Fine Art Family Portraiture Course with Sujata Setia.

Fashion portrait photographed on an overcast day, creating soft, even natural lighting.
Best Time to Use Natural Light in Landscape Photography
In natural light photography, the direction, quality, and colour of light are just as important in landscape photography as they are in portraits. When planning a landscape shoot, considering the time of day and the angle of the sun can dramatically influence mood, texture, and depth. Understanding how natural light interacts with terrain, water, and sky will help you capture more dynamic and visually compelling landscape images.
Golden Hour
Golden hour is one of the best times for natural light photography in landscapes. The warm, low-angle sunlight enhances textures and creates long shadows that add depth and dimension to your scene. This soft, directional light works beautifully in forests, deserts, mountains, and coastal environments, bringing out rich colours and natural contrast without harsh highlights.
Midday Light
Although midday light can be harsh and challenging for portraits, it can still be effective in natural light photography for landscapes. The strong overhead sun creates bold contrast, vibrant colours, and crisp details — ideal for capturing dramatic skies, turquoise waters, or architectural structures. Because shadows are shorter at midday, it can also be useful for minimising distracting shadow patterns in certain compositions.
Cloudy or Overcast Skies
Cloud cover acts as a natural diffuser, softening the light and reducing harsh shadows. In natural light landscape photography, overcast conditions are excellent for capturing scenes with heavy texture, such as woodlands, waterfalls, or rocky terrain. The diffused light creates even exposure across the frame, helping preserve detail in both highlights and shadows.

Forest landscape photographed at sunrise using natural light filtering through the trees. Forest Photography Course with Jack Lodge.
Natural Light Product Photography Techniques
In natural light photography, soft and even lighting is essential when shooting products. Harsh shadows and overexposed highlights can distract from important details, textures, and colours. Using natural light for product photography is especially effective when capturing food, handmade items, or lifestyle products where you want to create a warm, authentic, and inviting feel.
Diffused Light
Diffused light is ideal for natural light product photography. Position your product near a large window with sheer curtains to soften direct sunlight, or place it on a light-coloured surface to help reflect and spread the light evenly. This reduces harsh reflections and glare while maintaining clean, professional-looking highlights. Soft window light is particularly effective for food photography and small eCommerce products.
Reflectors
Reflectors are simple but powerful tools in natural light photography. A white reflector creates soft fill light, while a silver reflector produces a brighter, more defined bounce. Placing a reflector opposite your light source helps fill in deep shadows and creates balanced, even illumination across the product. This technique ensures your subject stands out clearly without losing detail in darker areas.

Product photographed indoors using natural light for clean, even illumination.
Get access to ALL our online courses - 1000’s of videos, worksheets, critiques of members work, personalised support and much more with our monthly membership.
Advanced Natural Light Photography Techniques
Reflectors and diffusers are essential tools for controlling light in natural light photography. Because you cannot reposition the sun, these tools allow you to modify existing light — either by bouncing it back onto your subject or softening it to reduce contrast.
Reflectors
Reflectors are used to bounce natural light back onto your subject, helping to fill in shadows and create a more balanced exposure. In portrait photography, this can reduce shadows under the eyes and chin. In product photography, it helps reveal detail without adding artificial light.
You don’t need expensive equipment — a white foam board, a mirror, or even a light-coloured wall can act as a reflector.
White reflectors create soft, neutral fill light.
Silver reflectors produce brighter highlights and stronger contrast.
Gold reflectors add warmth, which can enhance skin tones during golden hour natural light photography.
Diffusers
When sunlight is too harsh — particularly during midday — a diffuser helps soften and spread the light evenly across your subject. Diffusion reduces sharp shadows, lowers contrast, and creates smoother transitions between highlights and darker areas.
You can use a professional collapsible diffuser, sheer curtains, or even a white bedsheet to soften direct sunlight. In natural light photography, diffusers are especially useful for portraits and product shots where flattering, even illumination is key.

Sheer white fabric used as a natural light diffuser to soften window light.

A white foam board reflector is used to bounce natural window light back onto the subject.
Why You Should Shoot in RAW for Natural Light Photography
In natural light photography, lighting conditions can change quickly and unpredictably. From strong backlighting and high-contrast midday sun to mixed lighting in shaded areas, achieving perfect exposure in-camera isn’t always easy. This is why shooting in RAW format is one of the most important technical decisions you can make.
RAW files capture significantly more image data than JPEG files. Instead of compressing and discarding information, RAW preserves the full dynamic range recorded by your camera sensor. This gives you far greater flexibility when editing natural light images.
Greater Dynamic Range
Natural light photography often involves scenes with bright highlights and deep shadows — for example, portraits during golden hour or landscapes at sunrise. RAW files retain more detail in both bright and dark areas, allowing you to:
Recover blown-out highlights
Lift shadow detail without excessive noise
Maintain smoother tonal transitions
This is especially useful when shooting backlit portraits or high-contrast outdoor scenes.
More Accurate White Balance
Because natural light shifts in colour temperature throughout the day, your white balance can easily appear too warm or too cool. RAW files allow you to adjust white balance non-destructively in post-processing without degrading image quality.
Whether you’re correcting cool tones from overcast light or fine-tuning the warmth of golden hour, RAW gives you full control.
Better Exposure Adjustments
Even experienced photographers occasionally underexpose or slightly overexpose when working with changing natural light. RAW files allow you to adjust exposure more effectively without losing detail or introducing banding and artefacts.
This flexibility is invaluable in natural light photography, where lighting conditions can evolve within minutes.
Improved Editing Flexibility
If you plan to enhance colours, adjust contrast, or apply creative grading, RAW files handle edits far more gracefully than JPEGs. Skin tones remain smoother, gradients stay cleaner, and overall image quality is preserved.
Shooting in RAW ensures you maximise the potential of every natural light image. While it requires slightly more storage space and post-processing time, the increased dynamic range, colour accuracy, and editing flexibility make it an essential choice for serious natural light photography.
Using Manual Mode and Exposure Settings in Natural Light Photography
Whether you're using a DSLR, mirrorless camera or even a film camera, taking control of your exposure settings is crucial when working with natural light. You have less control over the scene as you’re not setting your own lighting conditions, so you need to know how to adapt your settings to get the shot!
Shutter Speed: To avoid motion blur, use a faster shutter speed, especially when shooting handheld. A good rule of thumb for handheld shots is to set the shutter speed to at least the inverse of your lens’s focal length (e.g., 1/50 sec for a 50mm lens).
Learn about focal lengths and shutter speeds here.
Aperture: For portraits, a wide aperture (e.g., f/1.8 to f/4) will help you create a shallow depth of field and keep the background beautifully blurred. For landscapes, use a smaller aperture ( f/8 to f/16) to keep both foreground and background in sharp focus.
What is aperture in photography? we’ll have it explained in no time!
ISO: Keep your ISO as low as possible to avoid noise. However, if the light is low (such as on an overcast day or at dusk), you may need to raise your ISO to maintain a good exposure.
Want to master the settings on your camera? Check out our Beginner’s photography course.
Mastering Natural Light Photography
Natural light photography is one of the most powerful and versatile approaches to creating compelling images. By understanding light direction, intensity, colour temperature, and exposure, you gain the ability to shape mood, depth, and atmosphere in any environment. Mastering natural light photography isn’t about controlling the sun — it’s about learning to observe it, adapt to it, and use it creatively.
The key to improvement is consistent practice. As you continue shooting in different lighting conditions — from golden hour and blue hour to overcast skies and bright midday sun — you’ll develop an intuitive understanding of how natural light behaves and how to use it to your advantage.
We’d love to see how you apply these natural light photography techniques in your own work. Share your images and experiences with our community, keep refining your skills, and continue exploring the endless creative possibilities that available light provides.
Keep learning, keep shooting, and enjoy the journey of mastering natural light photography.
Check out these tutorials below


I hope you liked our blog Natural Light Photography, if you did, please leave us a comment, and support us by sharing it with your friends and subscribe to our newsletter at the bottom of this page for more.
We also have an excellent learning community on social media so please join us there as well.
Thanks for watching and remember – Learn more at The School of Photography.