
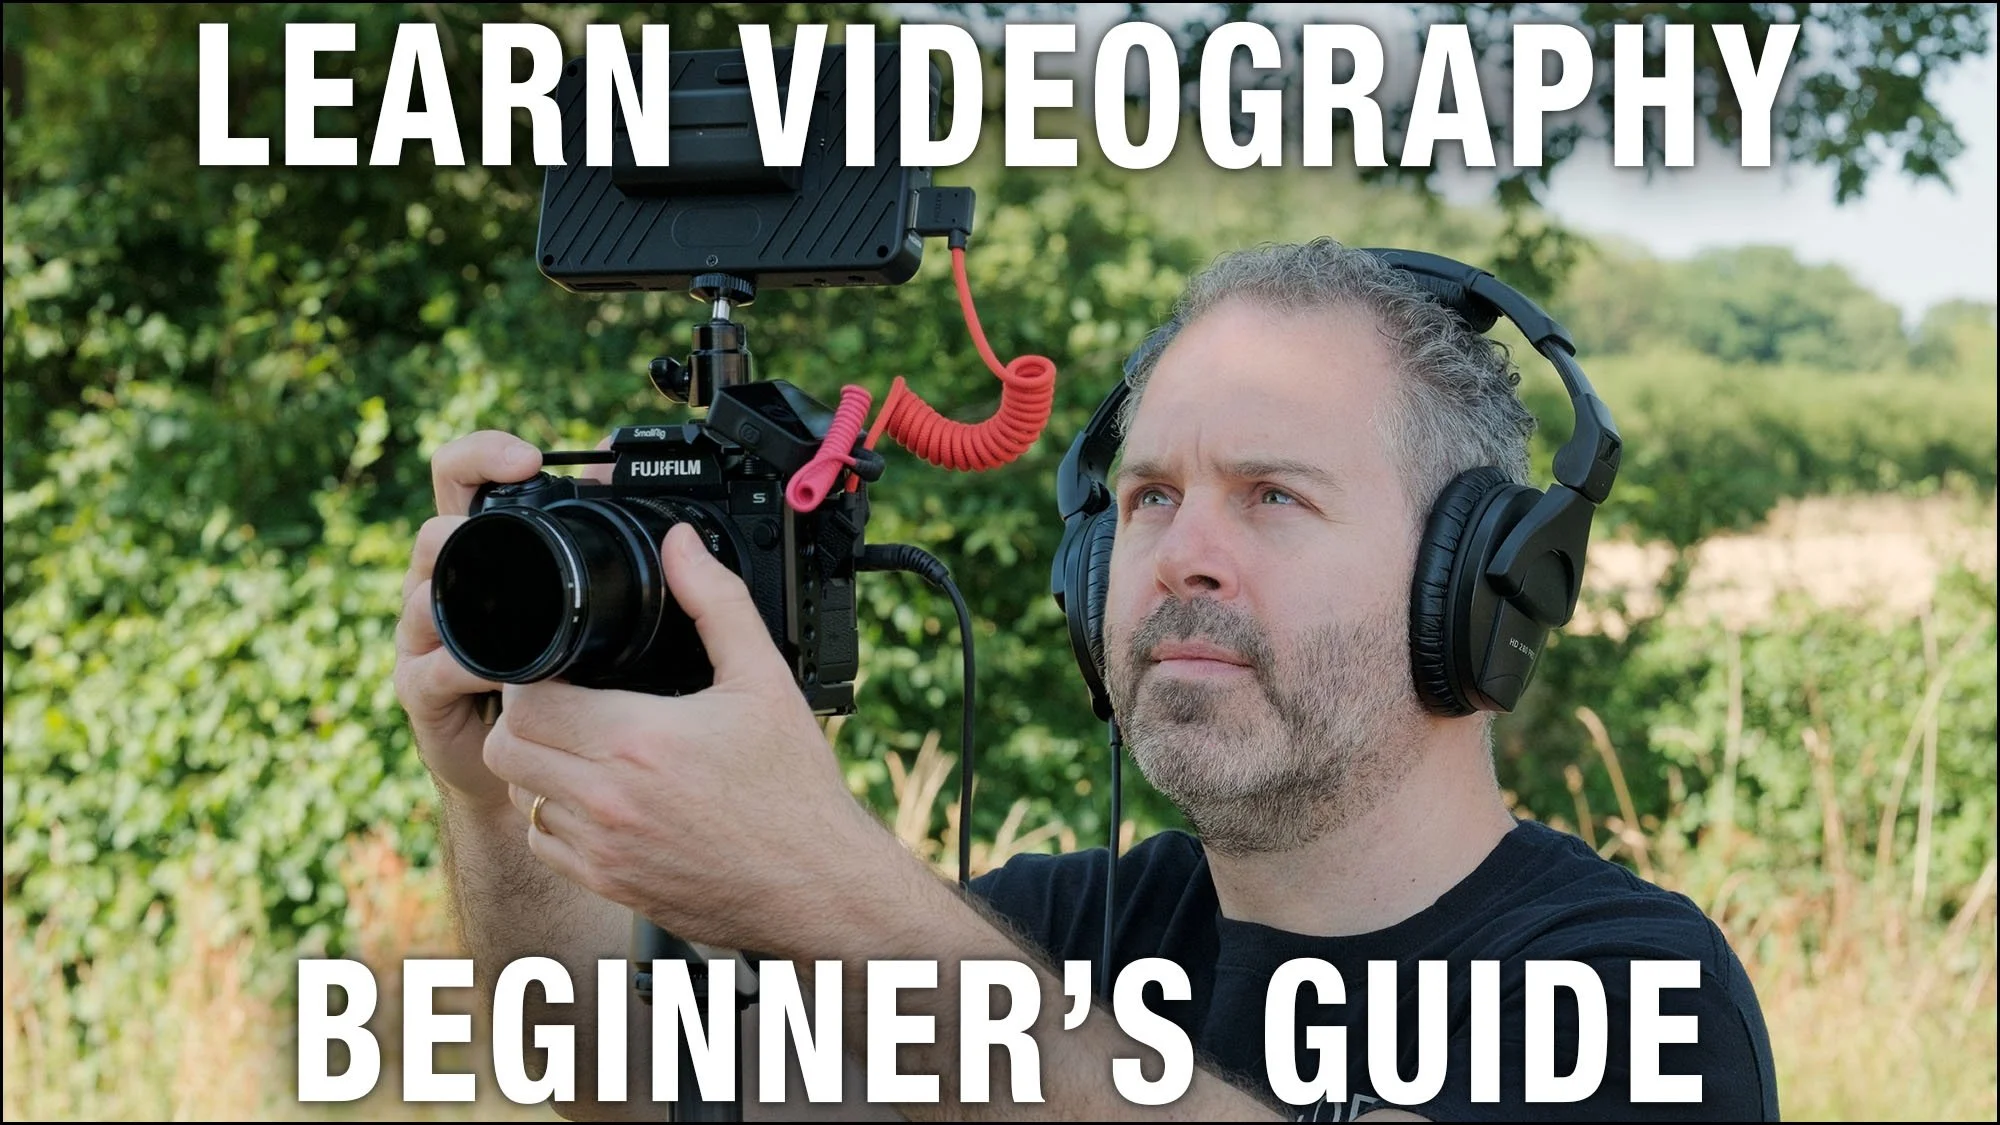
Studio Lighting Course

Course Description
A comprehensive online studio lighting course teaching you how to start a photographic studio and how to use professional lighting equipment for portraiture.
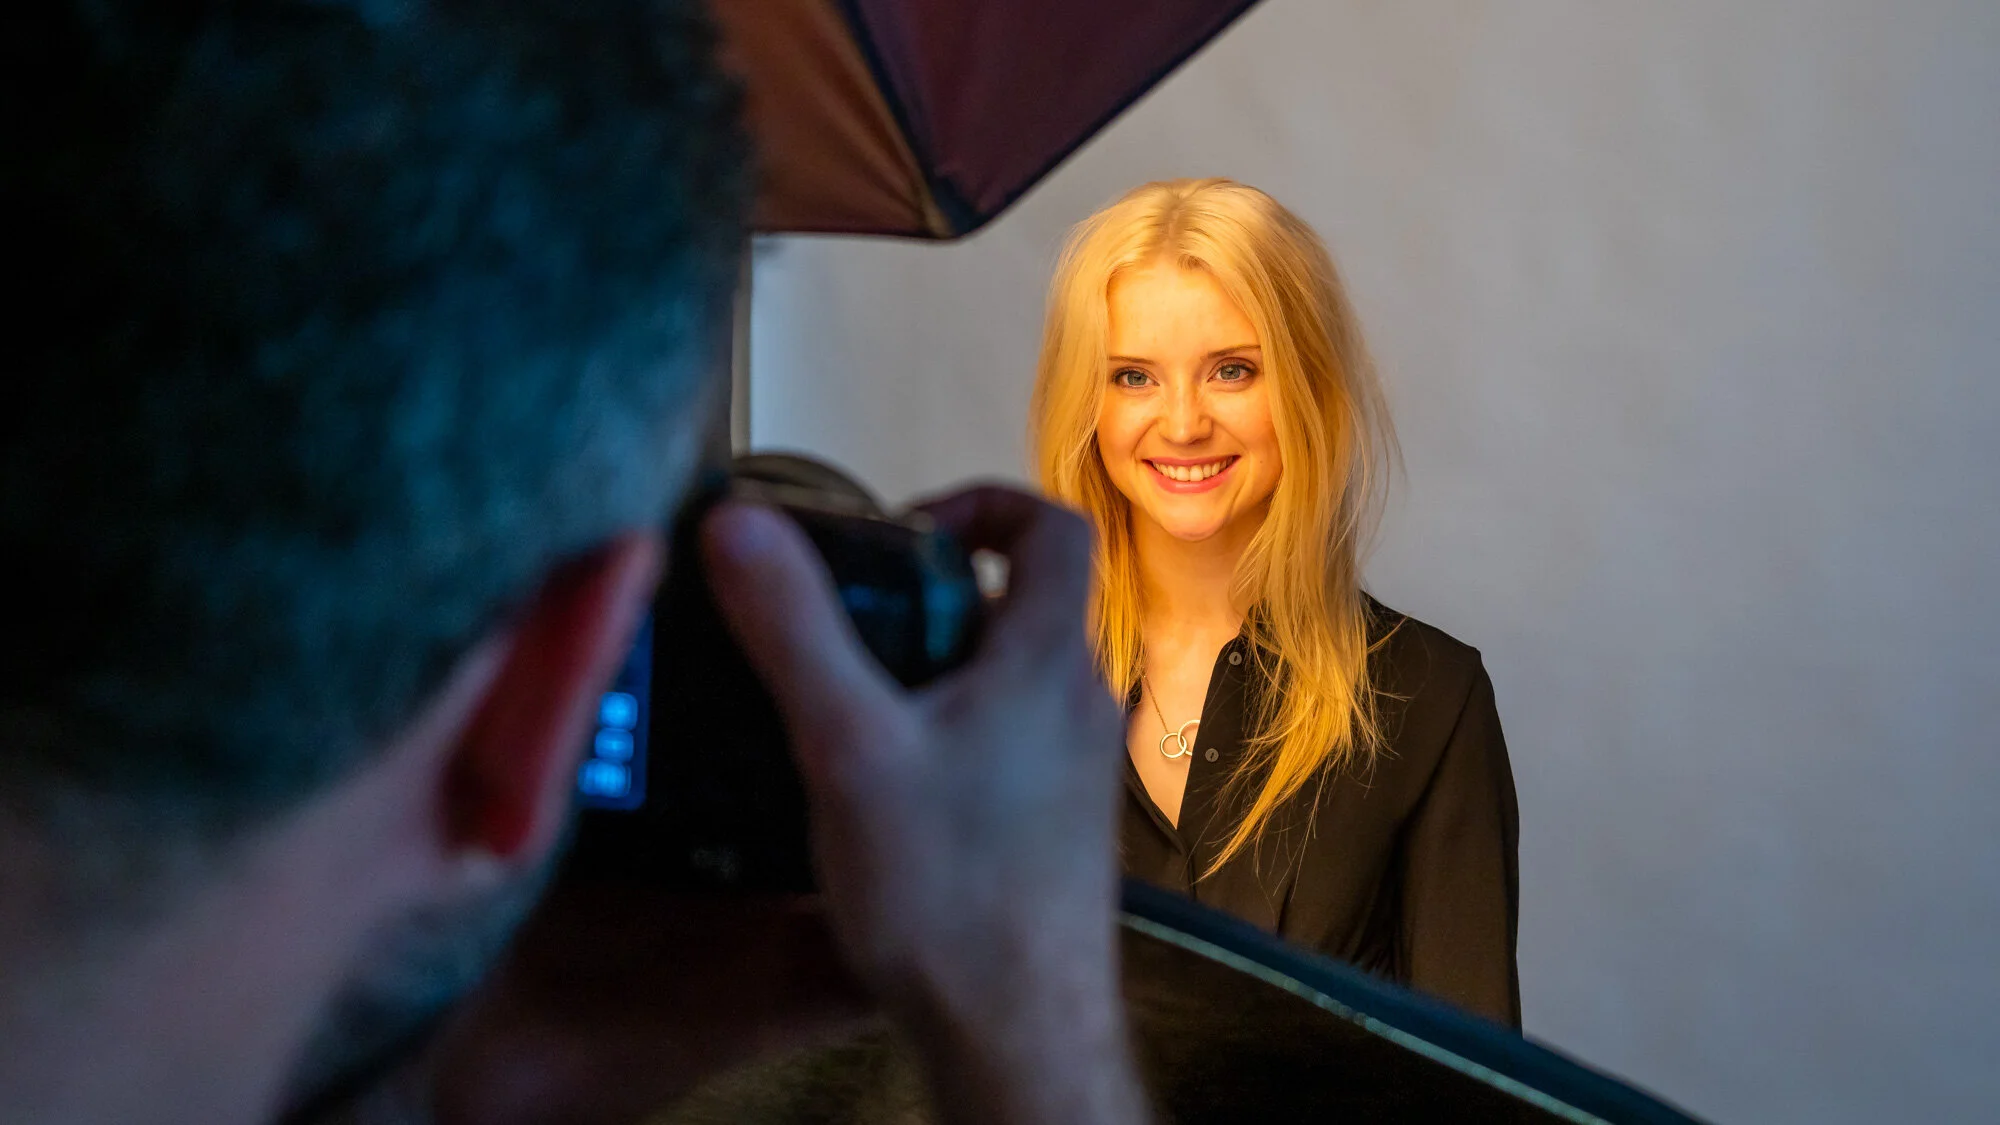
Through the course, you’ll be taught how to set up your own professional studio with limited space, equipment and budget. Learn various lighting set-ups with a variety of equipment to create beautiful portraits that can be made even in a home studio.
This course will show you what equipment to buy, and teach you how to use the flash lighting equipment you may already have properly, to get stunning visual results that will compete with any high-end portraiture.
It will save you time by giving you structured, professional learning with accurate knowledge that will tell you everything you need to know to start your studio lighting career.
Expensive equipment, big studios and professional models will not get you good shots. Your knowledge of the control of studio lighting, coupled with your creativity, will do that. This course will give you that knowledge without using unrealistic resources and ensure you take great portraits.
Take your photography further or start to earn money through studio portraits.
Buying Options
SINGLE COURSE
no subscription
£97/$131
One off payment
✔️Lifetime access.
✔️Learn at your own pace.
BEST VALUE
TSOP MEMBERSHIP
unsubscribe anytime
£16/$22
/month
✔️Unlimited access to all courses, including this one.
✔️1000s of videos, worksheets, lighting set-ups, Presets, RAW files and more.
✔️Live webinars with industry pros.
✔️Join our community of like-minded learners.
✔️Monthly Assignments and Competitions.
✔️Exclusive discounts on photography brands and services.
✔️ Critiques of student’s Work.
➕ much more.
Full 30-day money back guarantee
We offer a no-risk solution here at The School of Photography - If you don’t learn anything, we will give you your money back! We offer this because we don’t show, we teach! And we’ve been teaching photography, with 5-star reviews, since 2002.
All of this experience goes into creating our courses. We know that our courses will make you excellent photographers just like they have done for 1000’s of others. Terms apply.
What you will learn
Correct camera settings for studio lighting
What a flash sync is
The effects of various studio lighting equipment
Recommended equipment for a starting studio
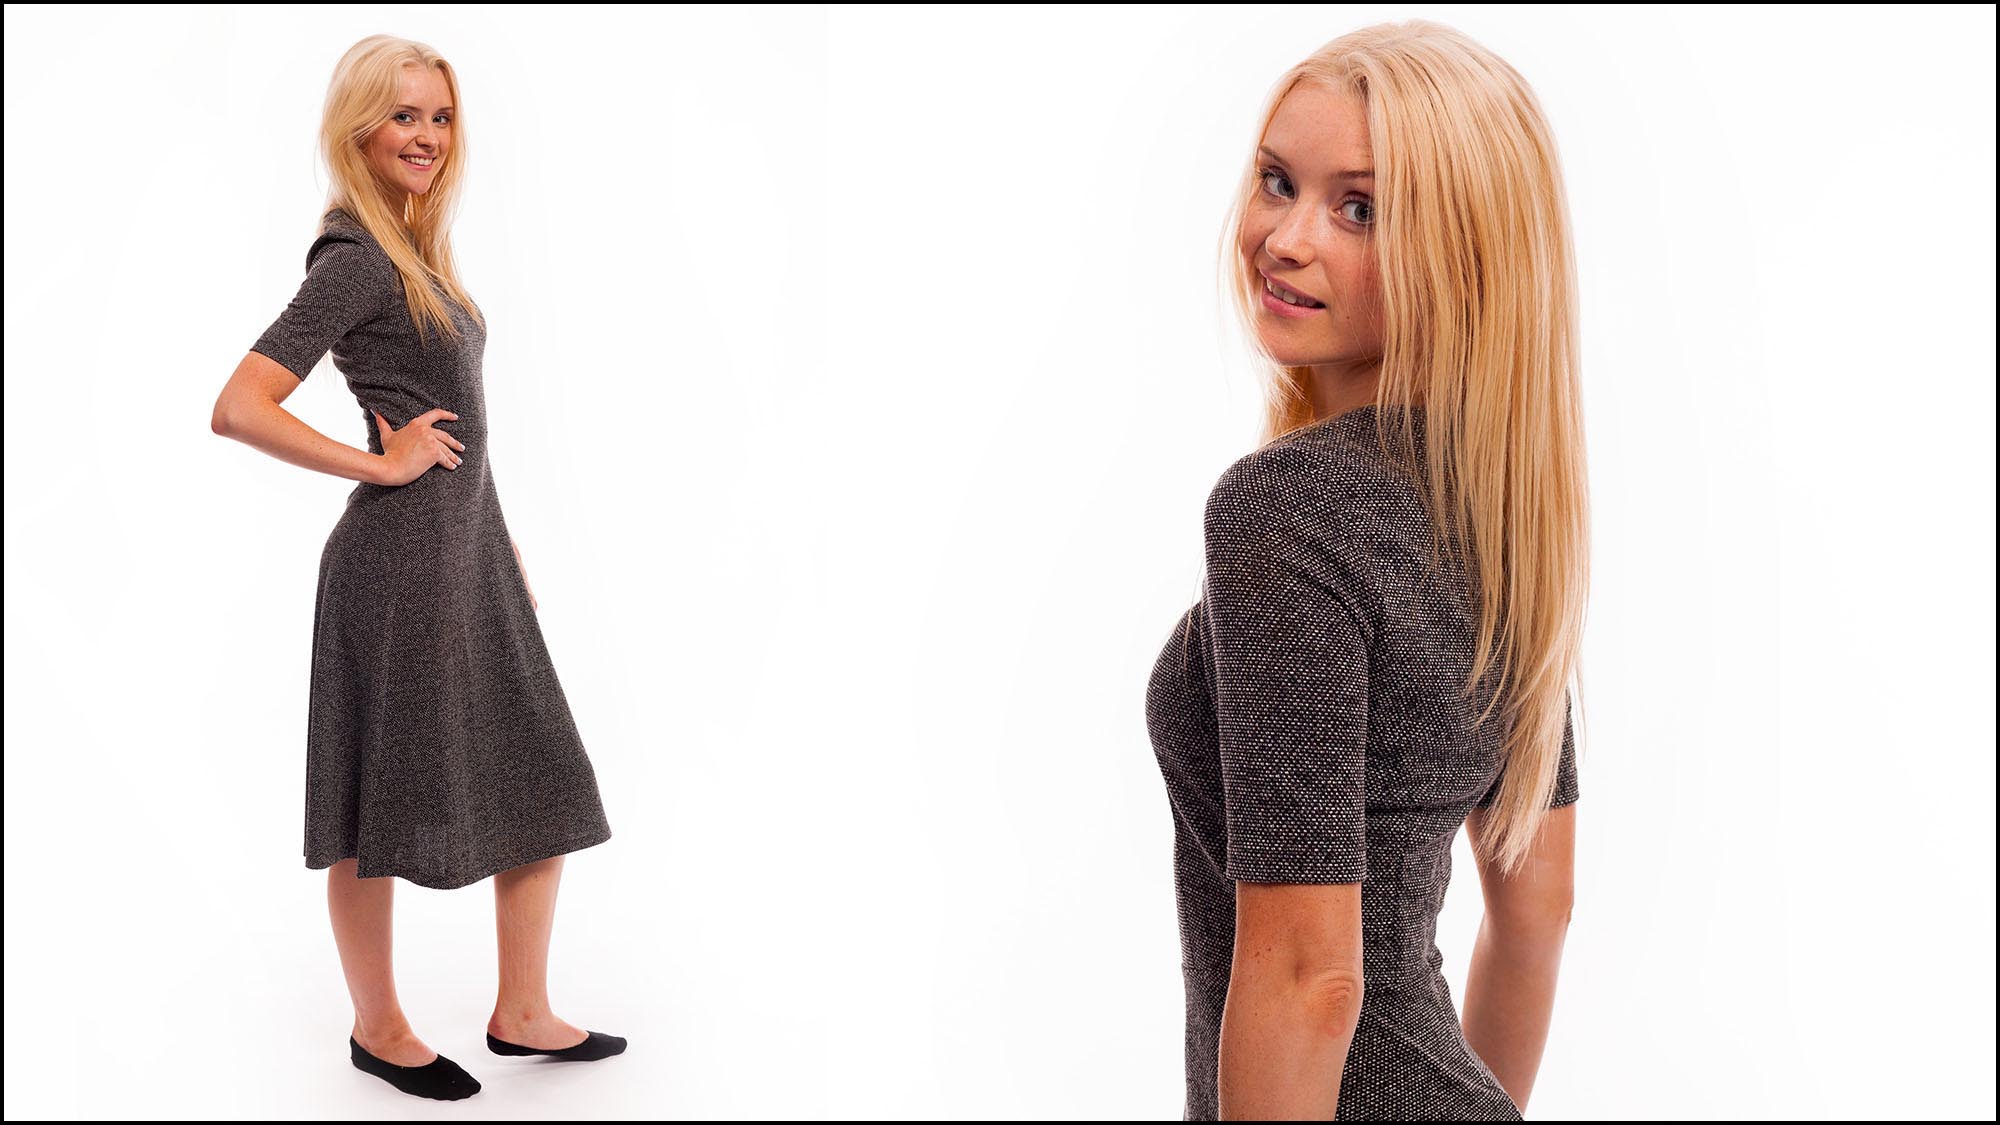
Types of backgrounds & background support systems
Lenses and focal lengths for portraiture
Setting up a studio
In-depth look at flash heads
Syncing cameras to flash heads
Using radio triggers and sync cords
Using a light meter
Controlling and balancing stops of light
How to take exposure readings correctly
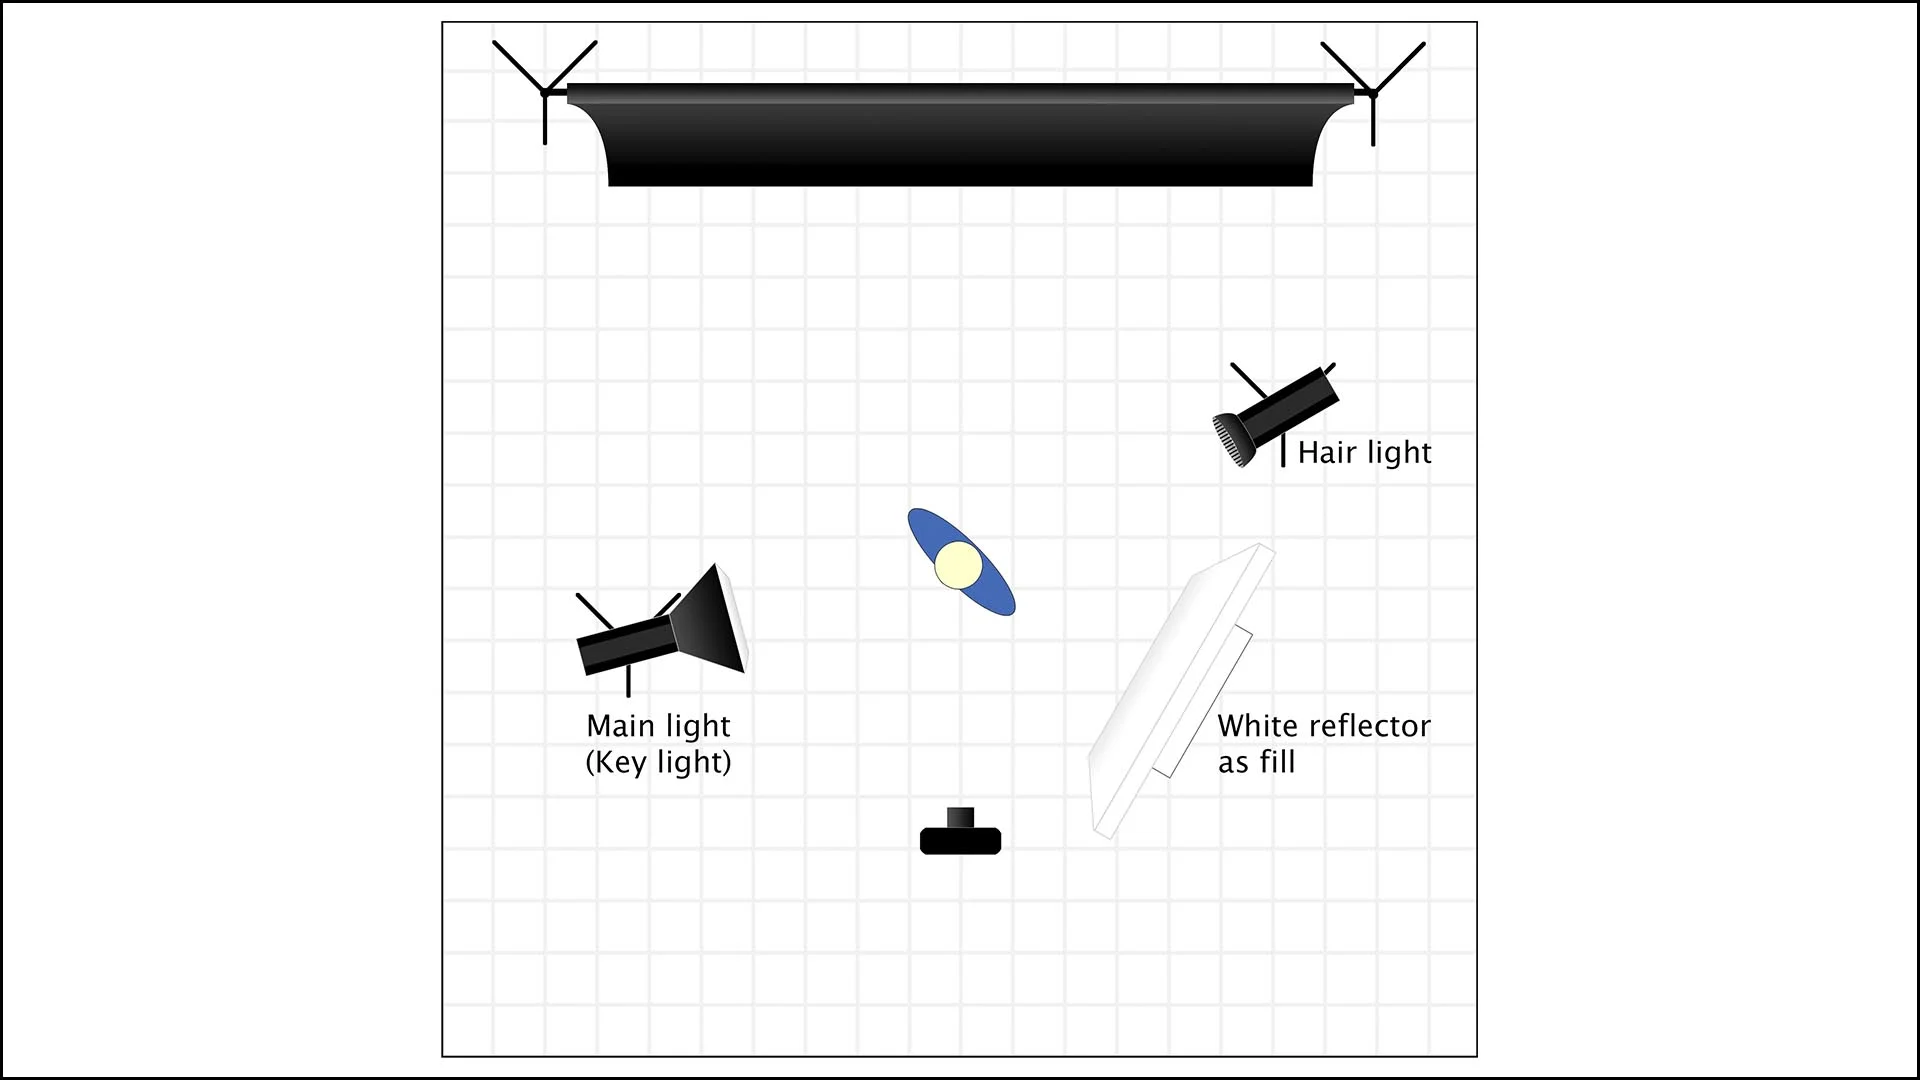
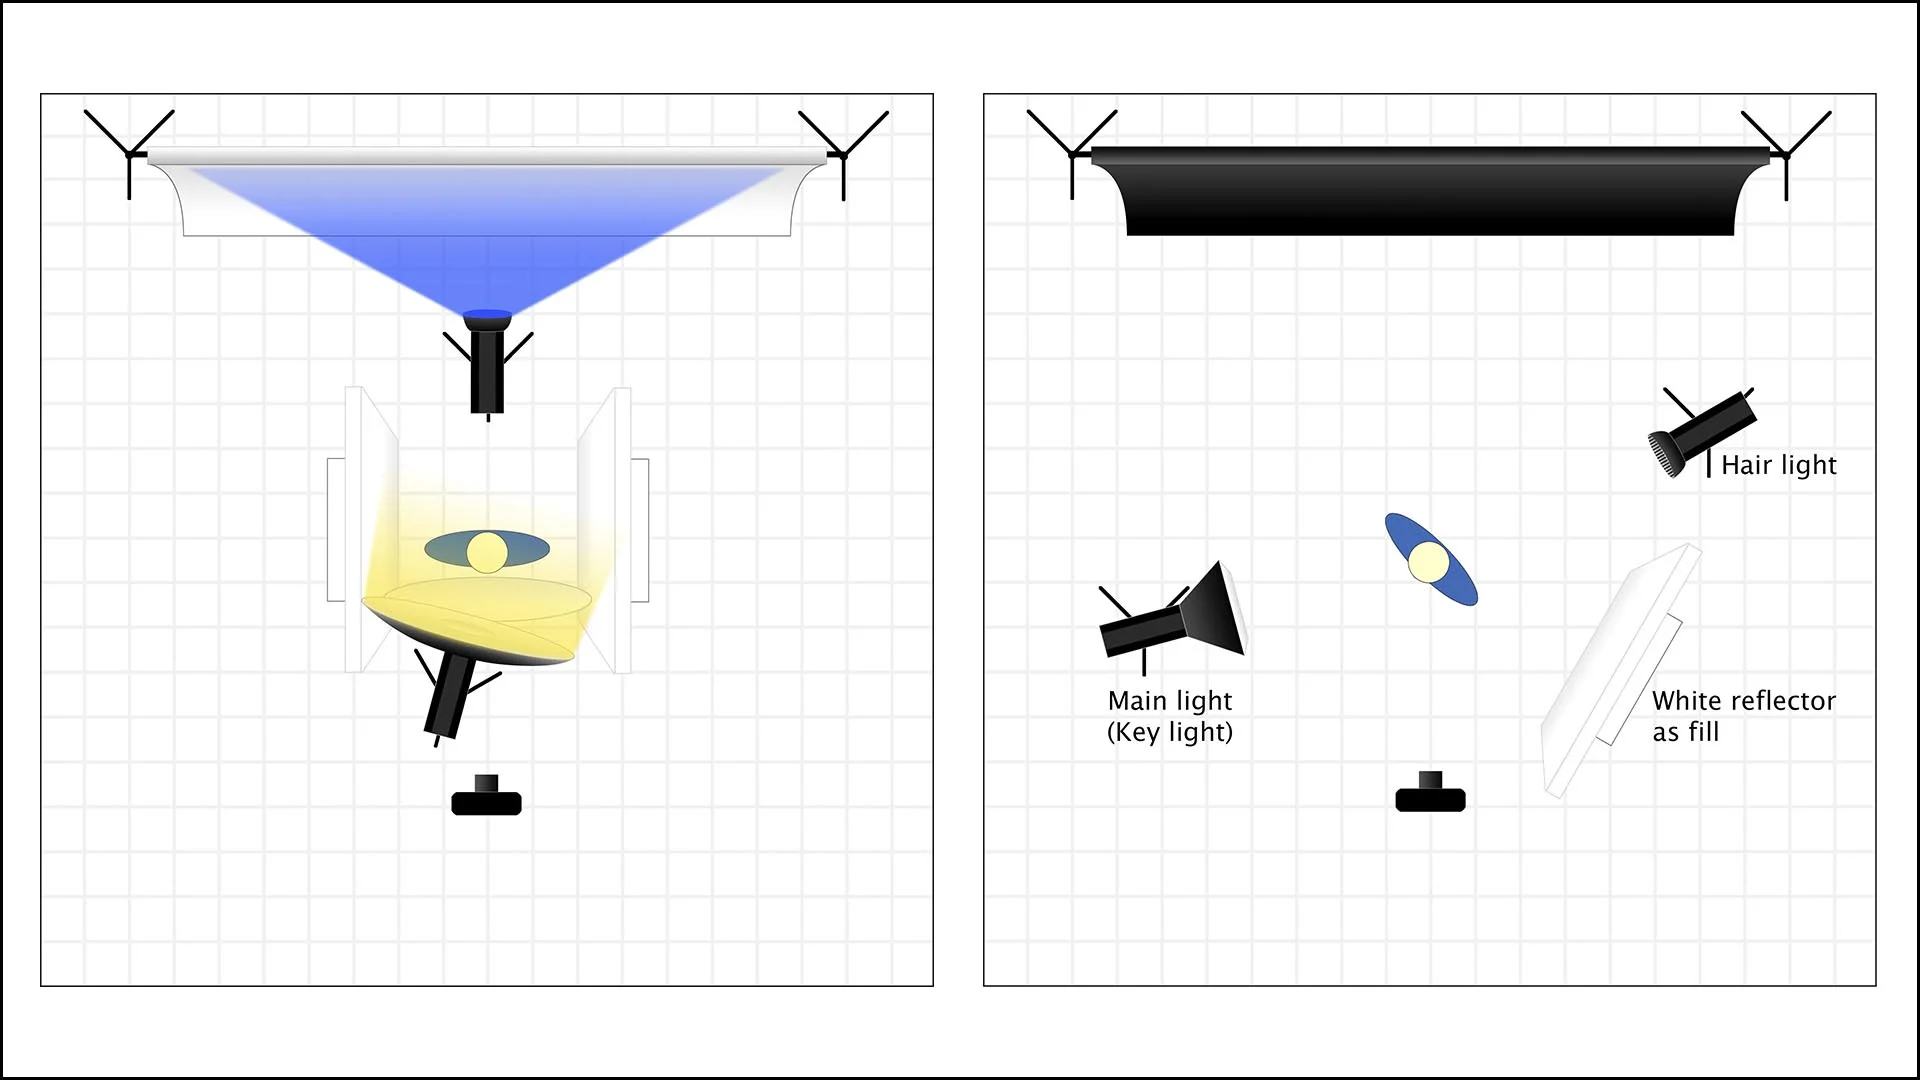
Controlling one light
How to control stray light
Using reflected light
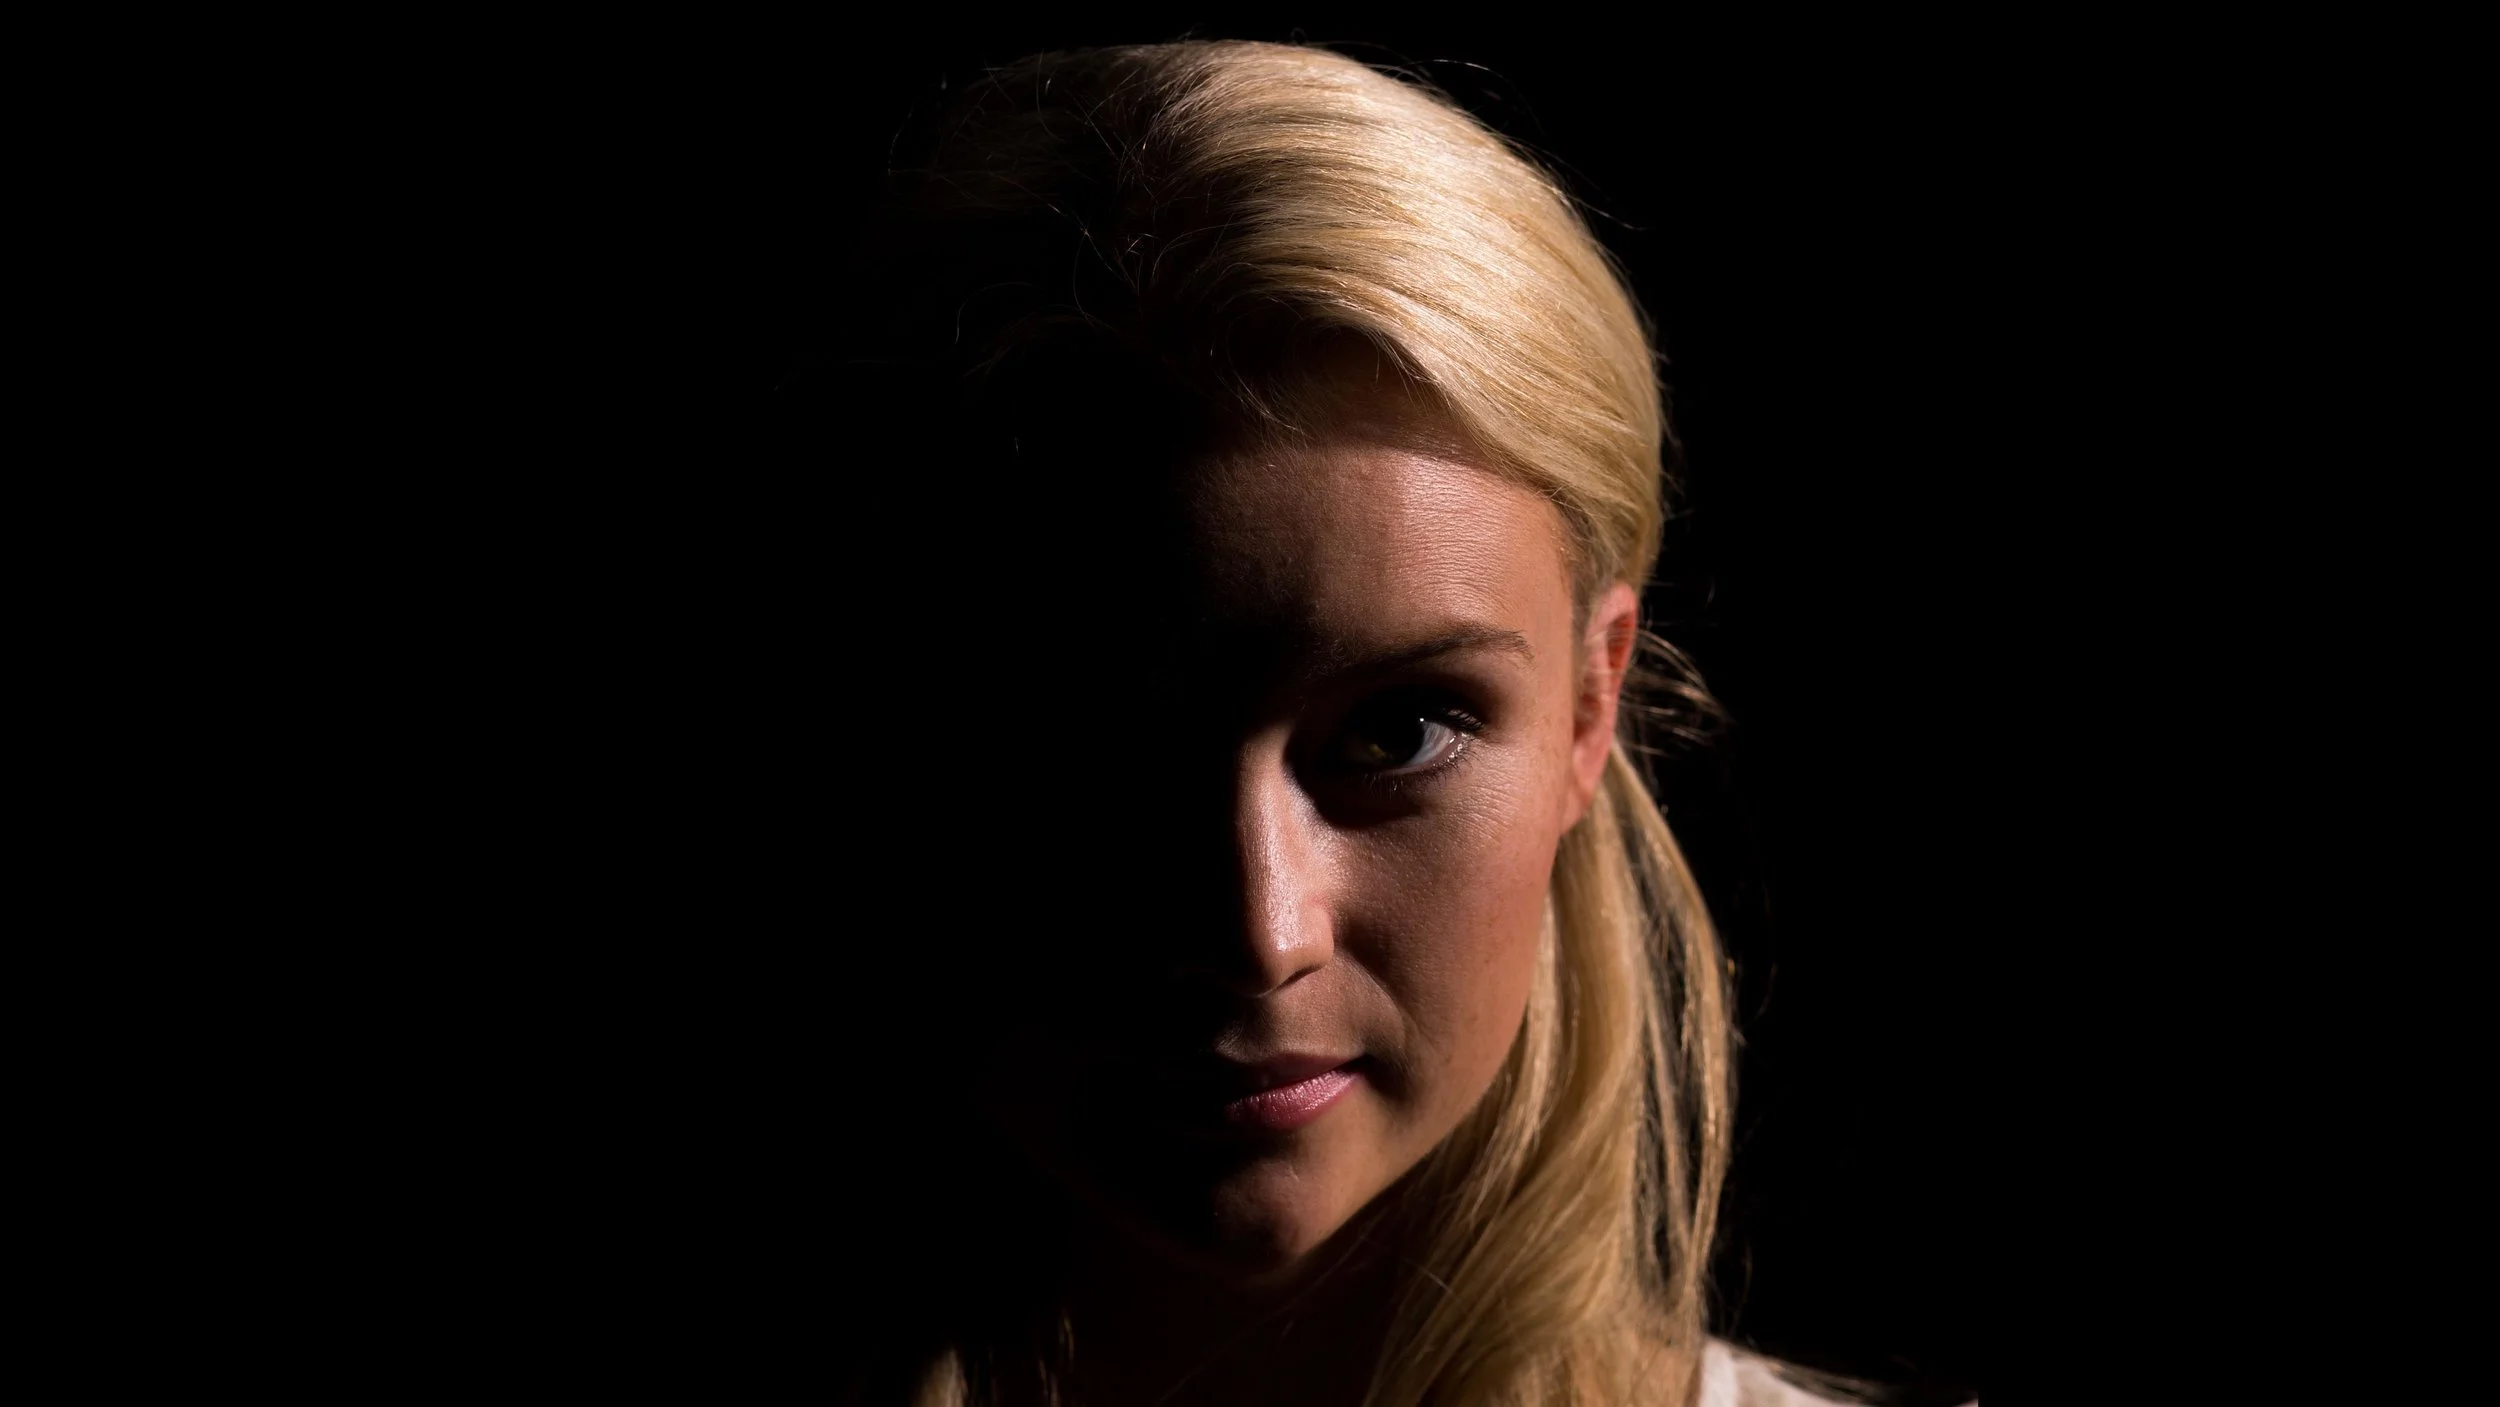
Creating hard light
Creating soft light
Creating Low and High Key effects
Using white, gold and silver reflected light
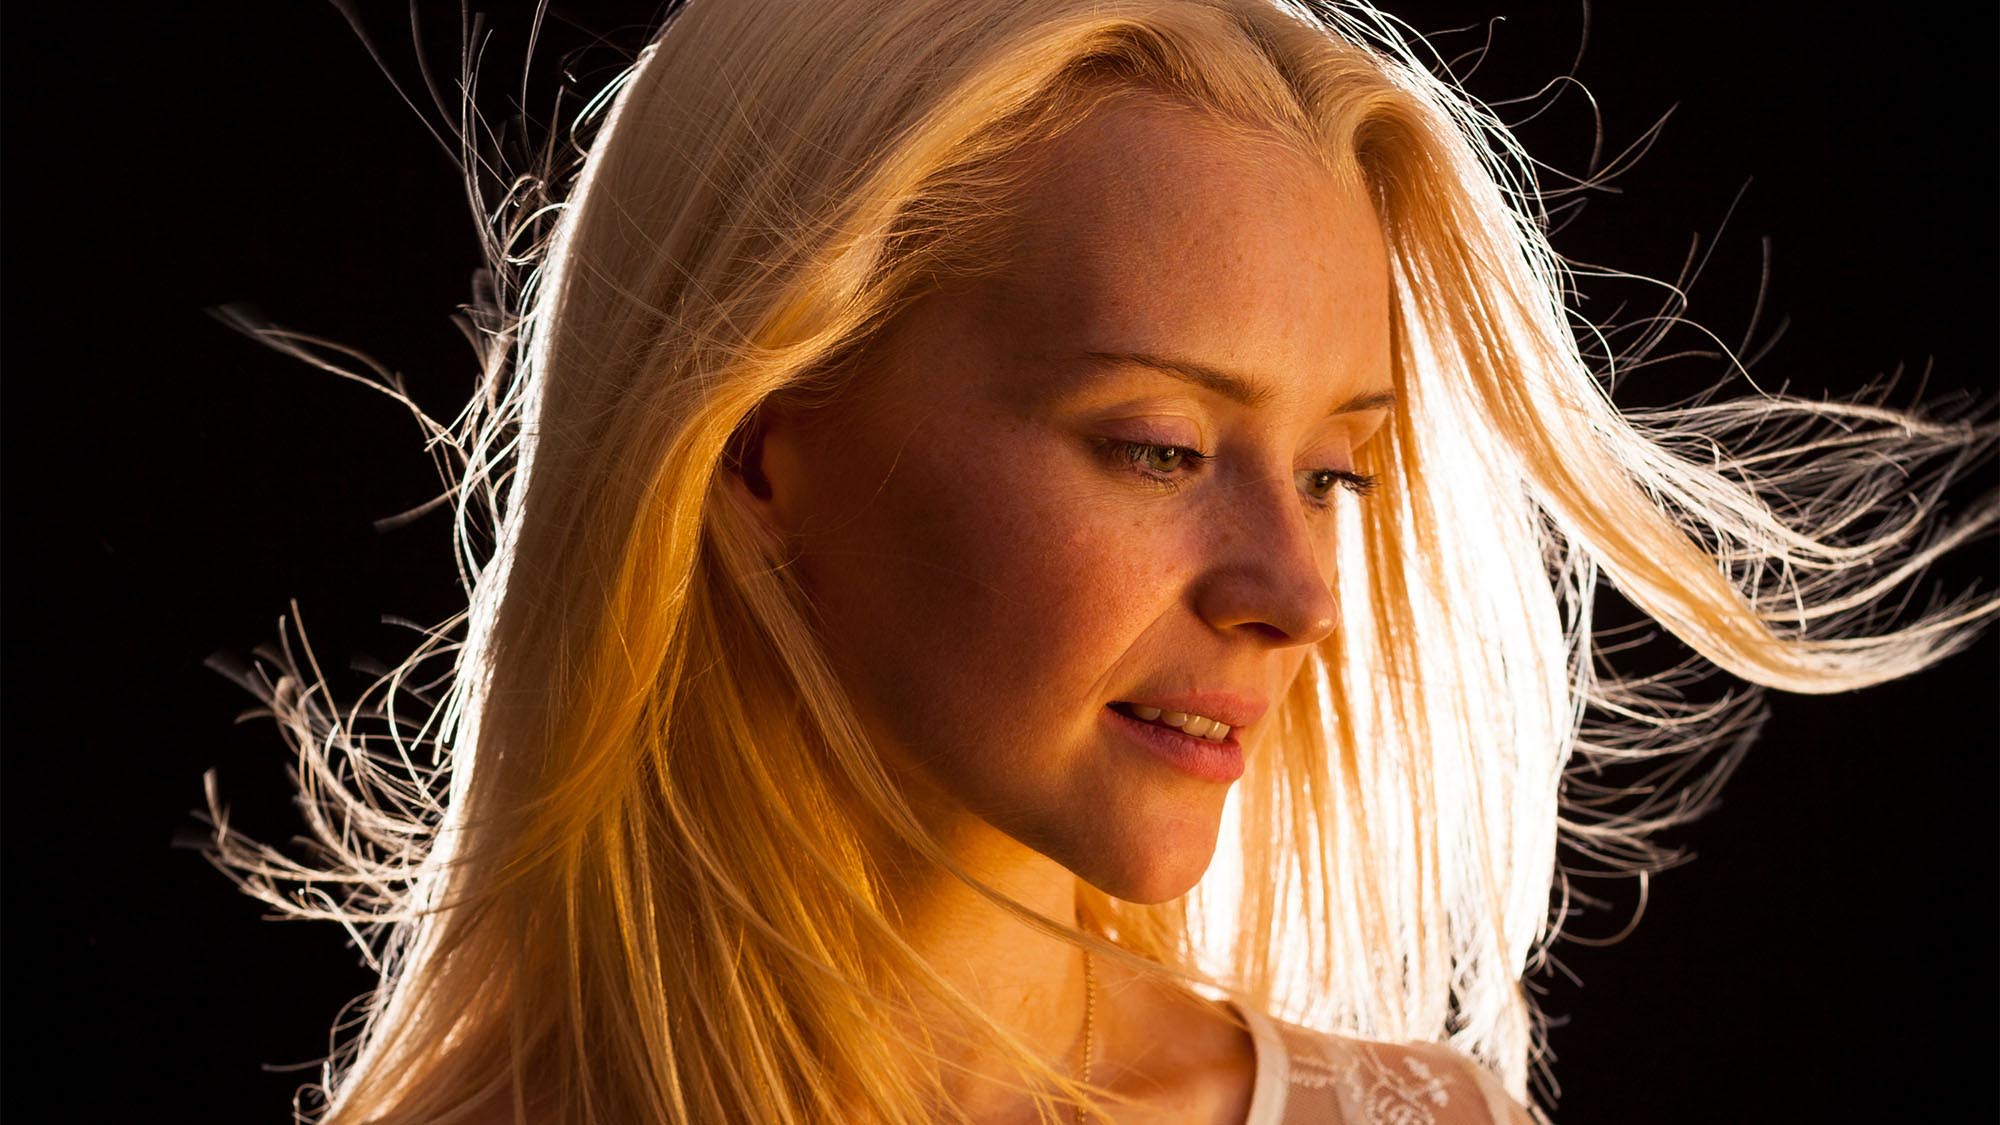
Creating and controlling rim lighting
Creating diffused light
Using fill lights
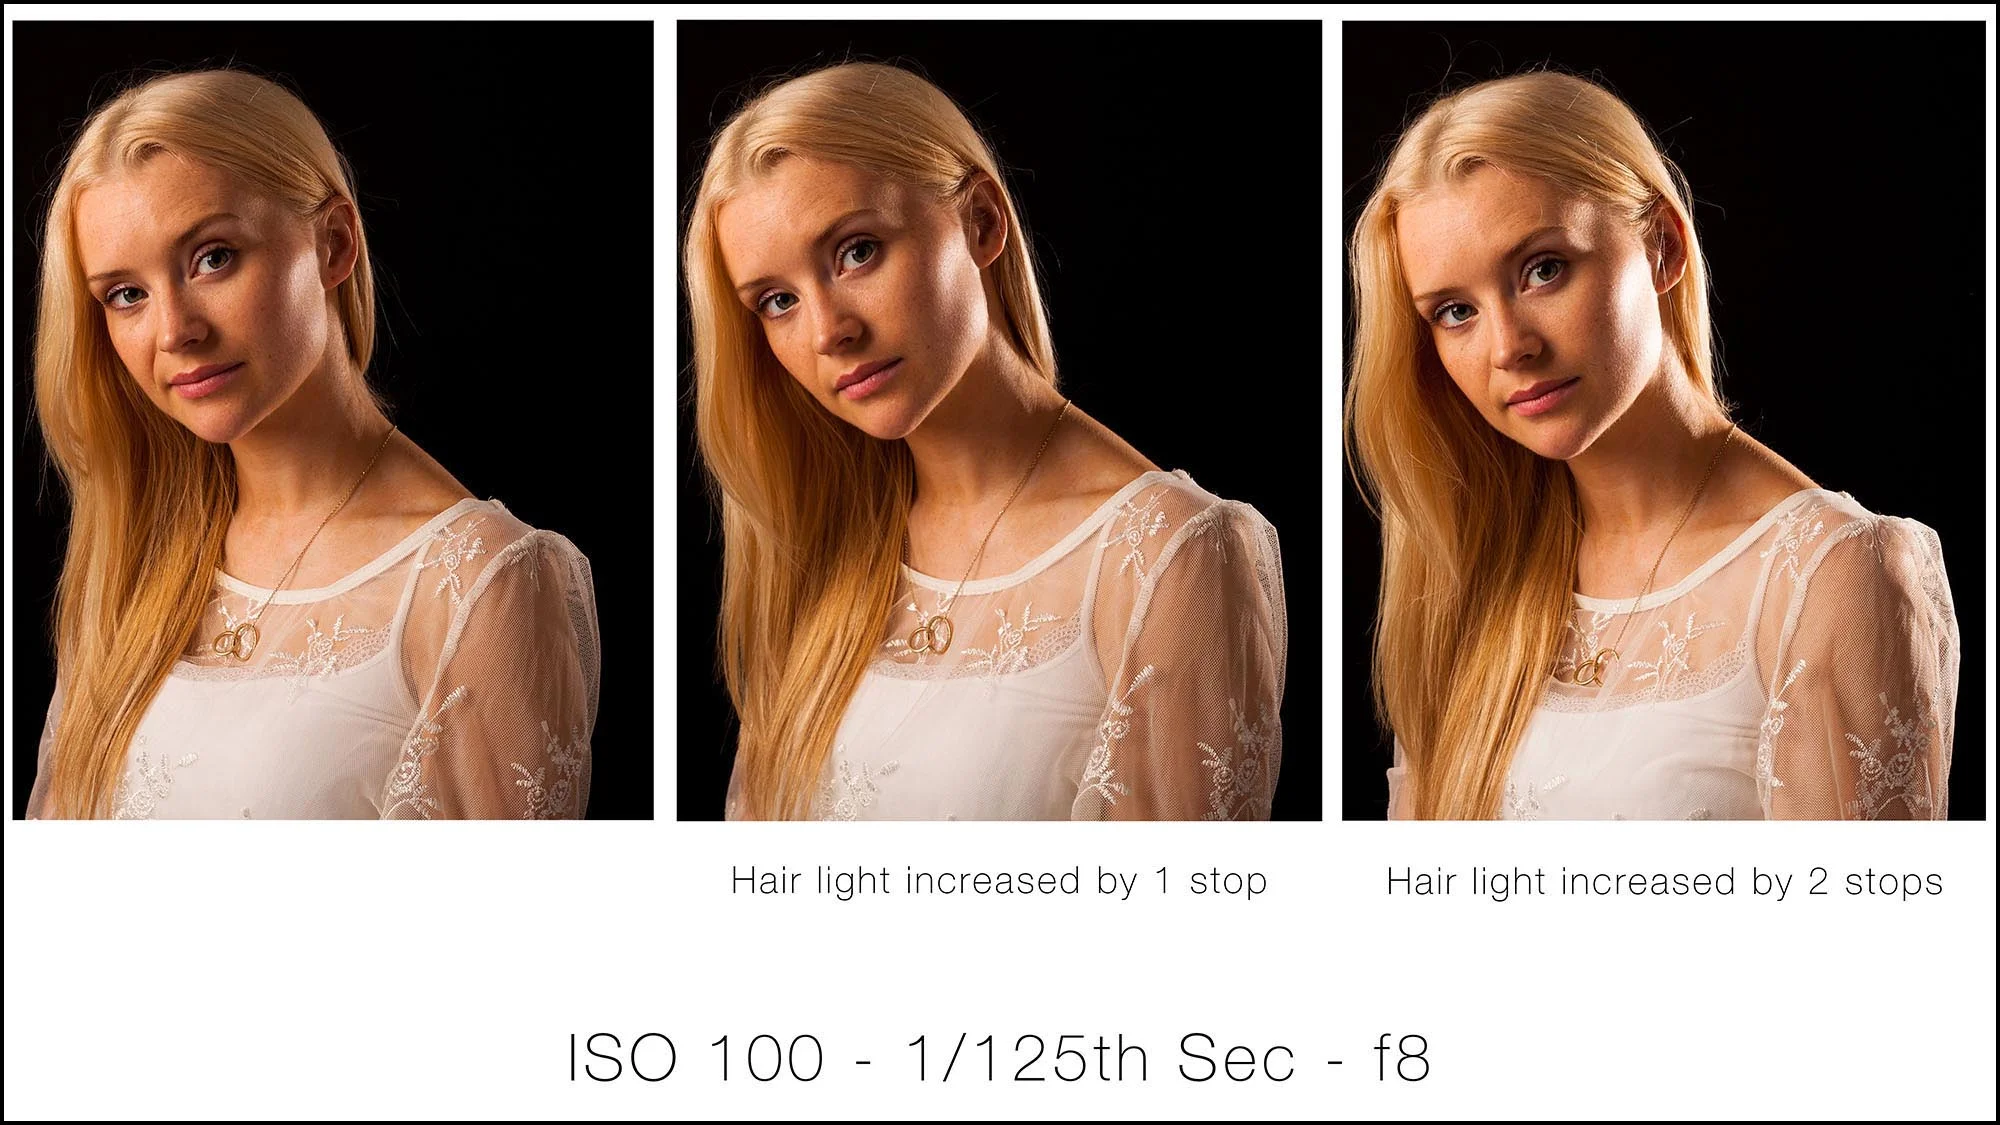
Using hair lights
Using master and slave flashes
Using ND filters for studio portraiture
Using background lights
How to balance background & foreground exposures
Creating crisp white backgrounds
Using a beauty dish
Creating multiple lighting set-ups
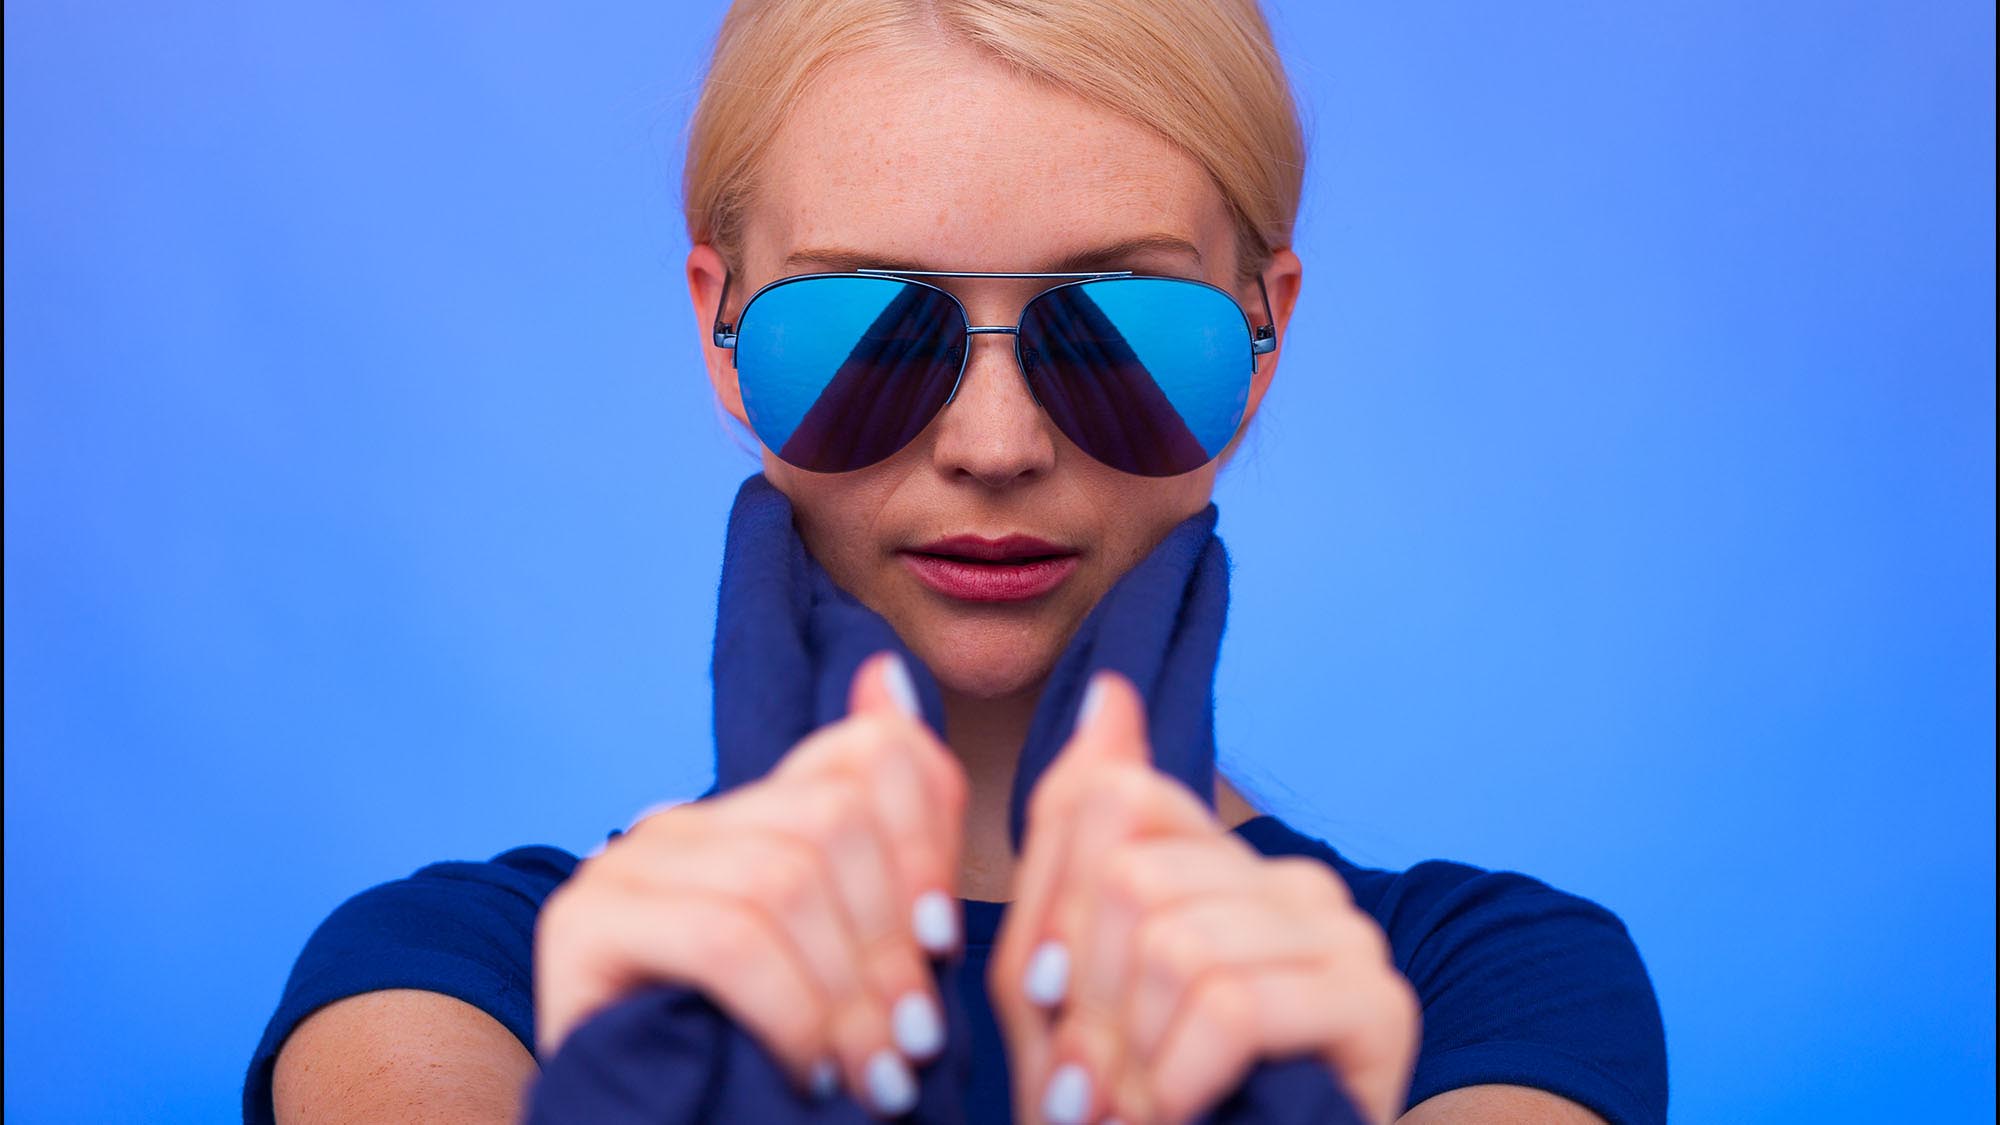
Using coloured gels
✭✭✭✭✭
I’ve completed TSOP studio lighting course which I really enjoyed, its well-structured, easy to follow and well communicated, the PDF are a great support for future reference.
Mick Dempsey - UK
Course Content

Lesson 1
Introduction to studio lighting
An introduction to studio lighting, why you use it and the basic principles behind this type of photography.

Lesson 2
Setting up your camera
You have to work fully manual in a studio so here we look at how to set up your camera for optimum results in the studio. We’ll look at shutter speeds, flash sync speeds, ISO, white balance and apertures.

Lesson 3
Equipment
Here I’ll show you various pieces of studio equipment and the effects they create. We’ll look at different types of backgrounds and background support systems, and you’ll get a recommended equipment list for a starting studio.
Lesson 4
Setting up the studio
To make this course more relevant to the learning photographer, we’ll be setting a studio up, from scratch, in a small space. You’ll learn how to choose and set up a background, and we’ll be taking a more in-depth look at flash heads, their settings, and the way they work.
Lesson 5
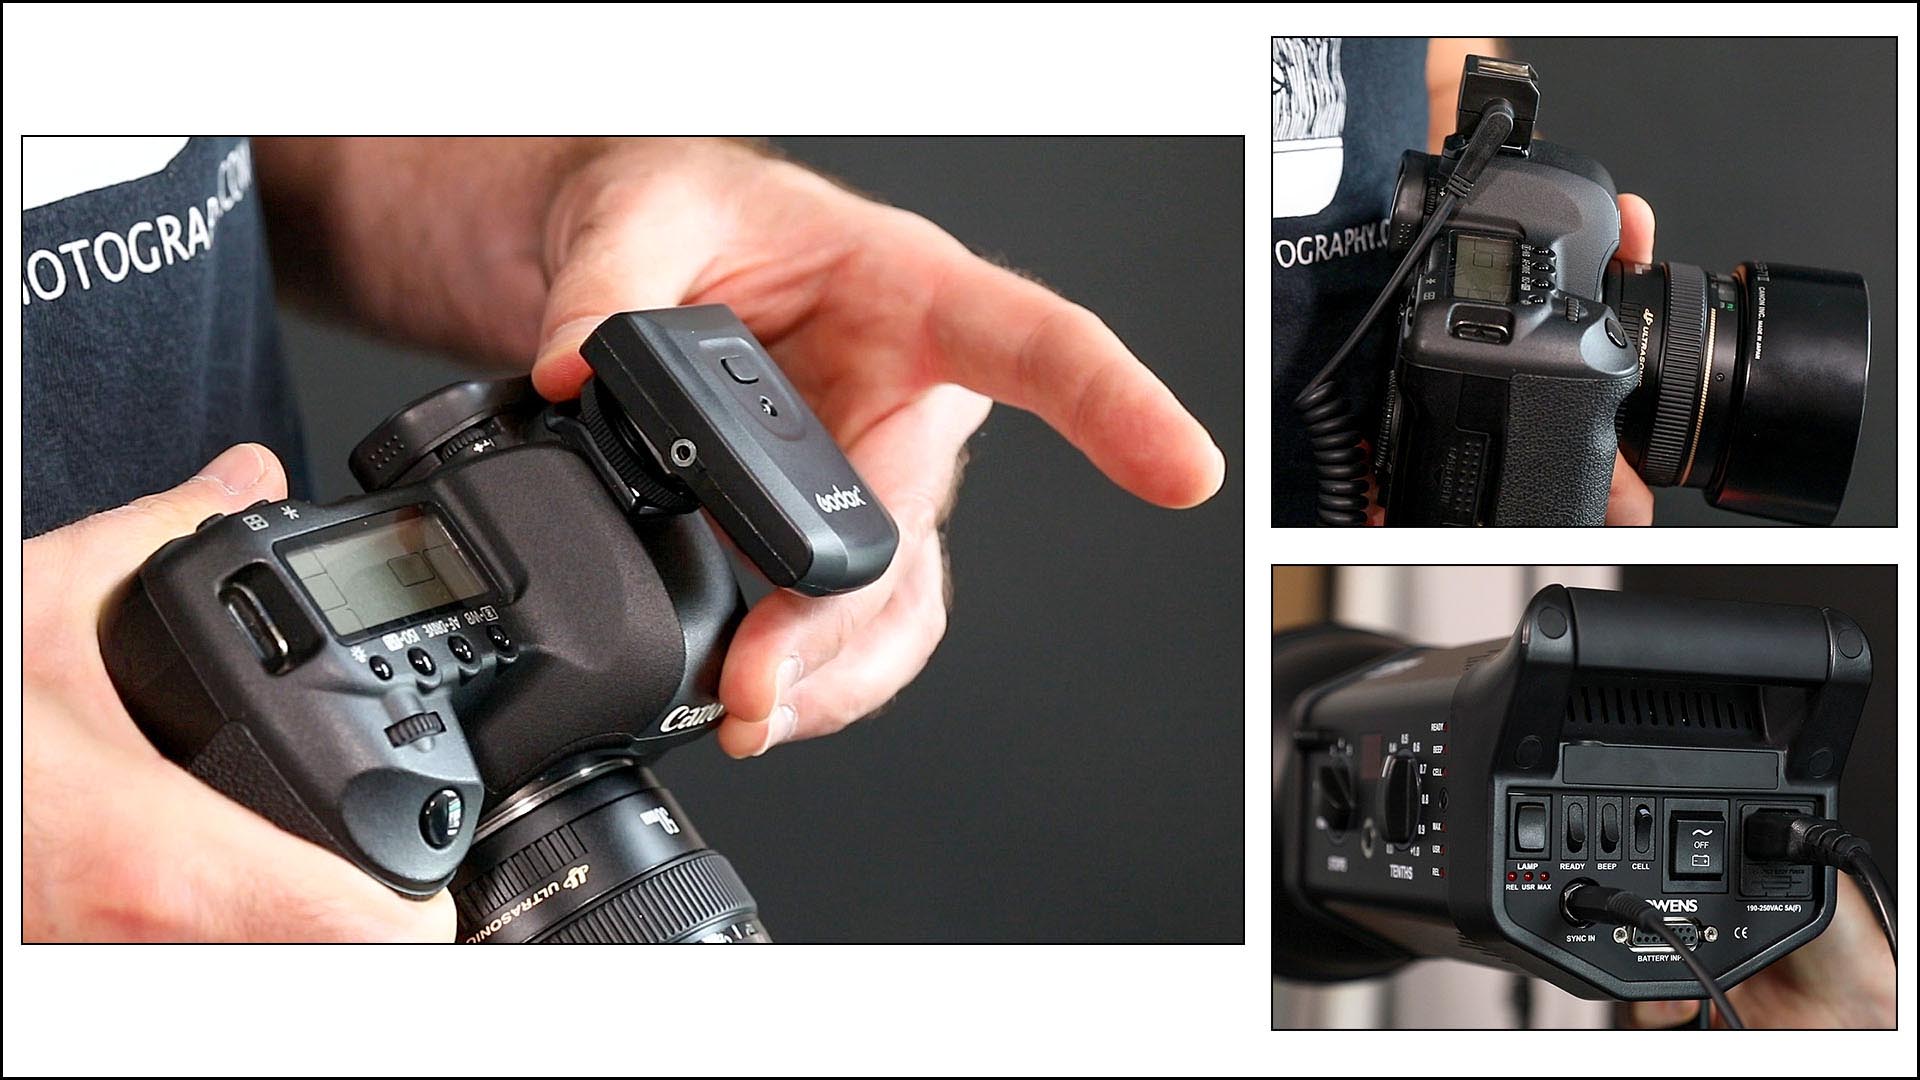
Connecting camera to flash heads
There are several ways to connect your camera to the flash heads. In this lesson you’ll be taught the pros and cons between remote triggers and sync cords, and how to use them.
Lesson 6
Taking meter readings, using one light, controlling light
Here’s where we get into the studio and start to take control of just one light. You’ll be taught how to use a light meter to take exposures manually and how to adjust the exposure using stops of light. You’ll learn how to create hard light and what’s called a low-key effect using black reflectors, and you’ll be given tasks to get you shooting with control in the studio.

Lesson 7
Using Reflected Light
In this lesson you’ll look at the many different ways you can use reflected light in the studio. We’ll look at tips around using reflectors when working alone and how to create variations of soft light using white, gold and silver reflectors.
Lesson 8
Creating and controlling rim lighting
Rim lighting is a technique used to create a rim of light around the model. Controlling rim lighting is a great technique to practice your control over hard, soft, direct and reflected light all at the same time. Here you’ll learn how to do this and be given tasks to put it into practice!

Lesson 9
Creating diffused light
Diffused light is a really soft light and in this lesson, we will look at how to use soft boxes to create this. You’ll be taught the pros of using soft boxes and how they are used to create great catch lights.
Lesson 10
Introducing fill and hair lights
Here we’ll look at introducing fill and hair lights. You’ll be shown how to measure and balance the power of multiple lights for varied effects and look at how to use master and slave flashes when using multiple lights.

Lesson 11
Even diffused light and using ND filters
In this lesson you’ll be taught how and why you would use ND filters in a studio. You’ll look at how to balance exposure via apertures, ND filters and the power of the light. We’ll also take the diffused lighting set up one step further to create an ultra-soft look.

Lesson 12
Using background lights
In this lesson we’ll start to add background lights. You’ll be taught various ways to create different effects using a background light and we’ll also look at a classic corporate portrait set up.
Lesson 13
Creating clean crisp white backgrounds
A common studio lighting effect is to create a pure white background. However, this effect is not as easy as it looks. Here you’ll be taught how to balance the exposure between background and foreground lights to create this look.

Lesson 14
Using a Beauty Dish
A beauty dish is used a lot in fashion or model portraiture. In this lesson we’ll look at the effects of beauty dishes and how you can mix this effect with reflectors to enhance subtle details in the face. We’ll also be looking at how to create a neutral grey background without having one!

Lesson 15
Multiple lighting set up
Once you’ve learnt how to control one light, you can control many. Here you’ll look at a multiple lighting set up where we balance 3 lights together to create stunning visual effects.
Lesson 16
Using coloured gels
In this lesson we’ll look at what coloured gels are and what they are used for. You’ll be taught techniques on how to use gels and a few simple props to easily change the colour and mood of your imagery.

Lesson 16
End and Recap
An end to the course. Here we’ll be recapping on all the great stuff you’ve learnt and how you can take this knowledge further.
Who is this course for?
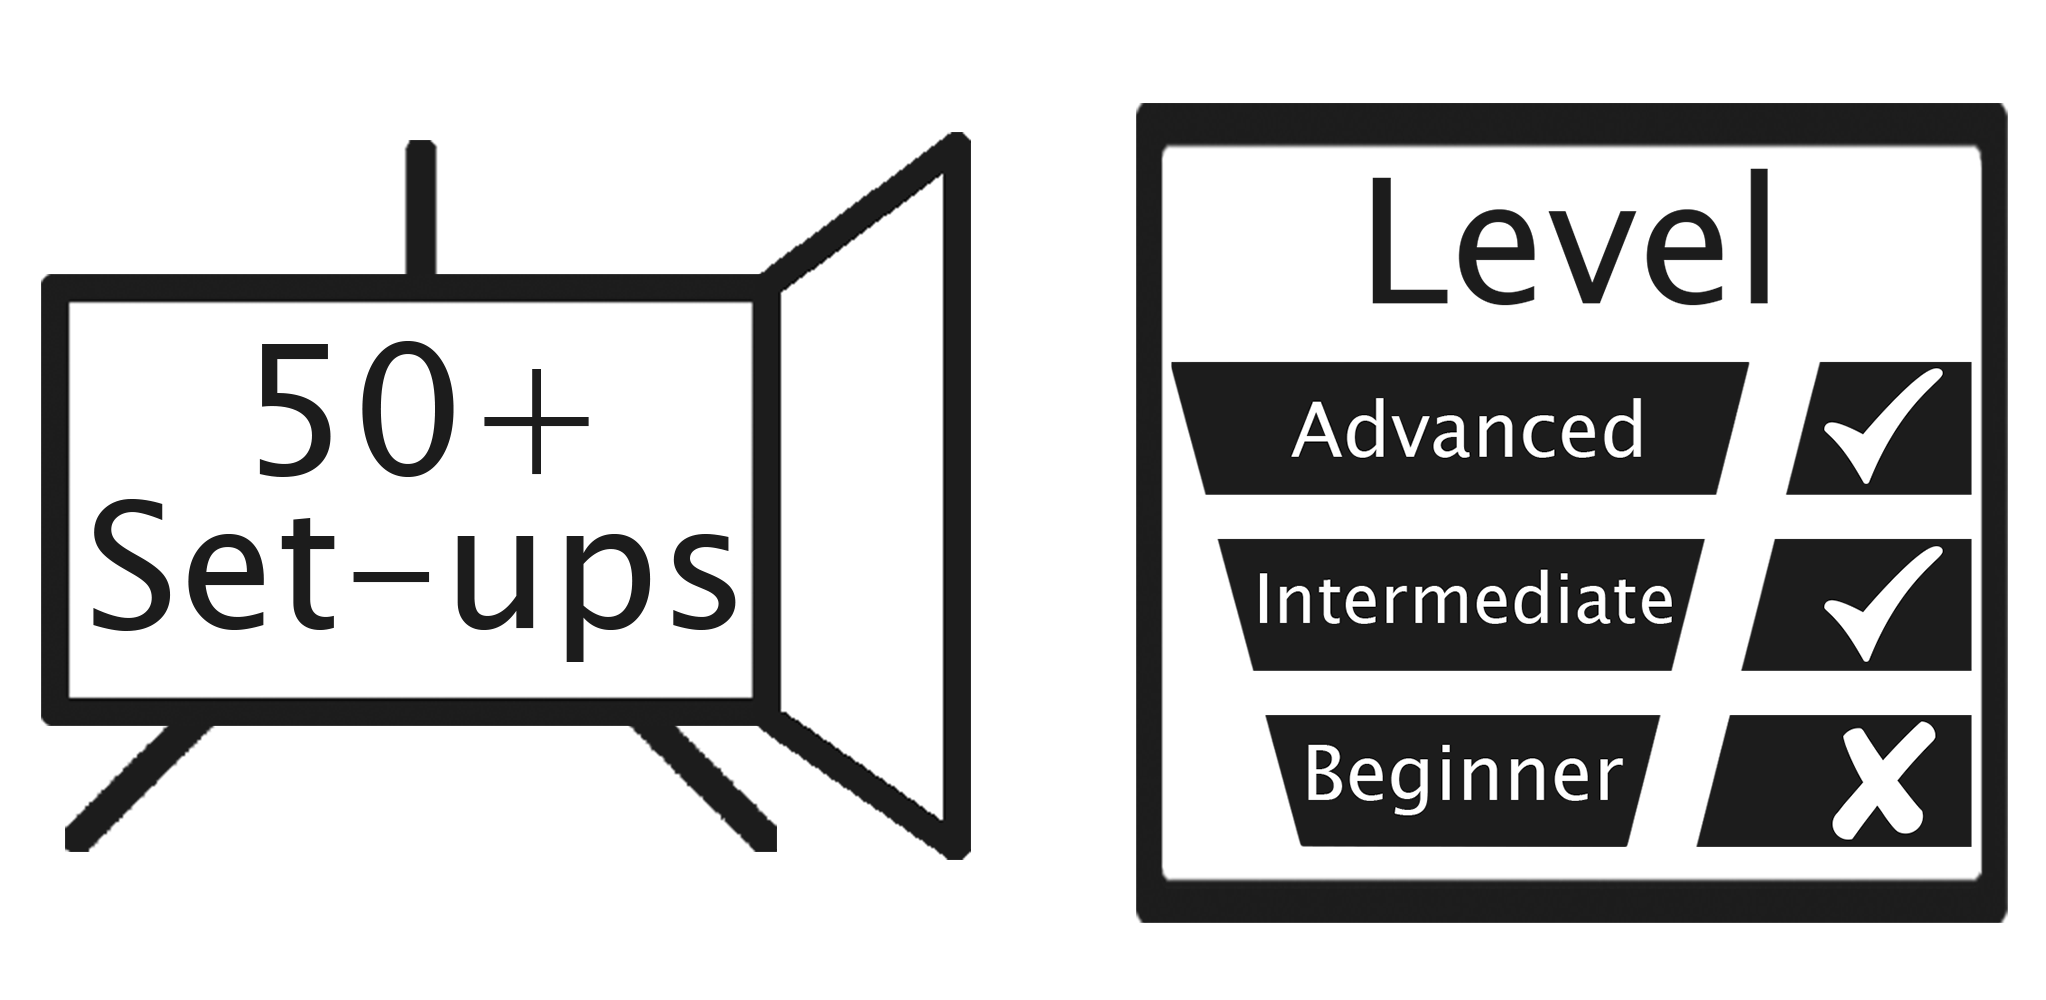
Intermediate photographers looking to progress their skills and start in the world of studio portraiture.
Photographers looking to earn extra income through family, children, corporate or other portraits.
People with limited budgets and space.
Photographers wanting to set up their own studio at home or in other spaces.
Photographers looking to learn how to use studio lighting equipment properly.
About your Tutor
Marc Newton is an educational speaker, author of the best seller Beginner Photography Book, teacher of photography and the founder of The School of Photography. He graduated with an honours degree in Photography in 2000 and over the years worked for many clients, turning his hand to many genres. He’s work has been exhibited around the UK and have had his work published in many national papers and magazines.
“Teaching Photography has been my passion for many years. I got my first paid photography job in 1997 whilst doing my photography degree, but in 2002 I decided to give teaching a go and I haven’t looked back since. I loved seeing the stunning imagery my students produced. I found the process of teaching filled me with a real sense of joy, and it still does today.
My success in teaching led me to become an Advanced skills Teacher and I started to train UK school teachers to deliver the Photography GCSE and A-Level curriculum. I wanted to take all of this teaching experience and offer it up to a wider audience, so in 2012 I started The School of Photography and now I teach this beautiful craft to people all over the world.”
View Marc’s exhibitions, awards and publication on his website here www.marcnewton.com/about
Our customers love us

Rated 'Excellent' on Trust Pilot, Facebook and Google
Frequently asked questions
-
The courses are priced in British Pounds. On checkout it will show the cost in British Pounds and will be converted into your currency when purchased. To get an accurate cost in your own currency click here to use a Currency Converter. NB. US dollars quoted are as close as possible and updated monthly.
-
Please see the ‘Buying Options’ section above.
-
On average, someone with a full-time job will complete the course in 1 to 2 months. But you can study at your own pace in your own time, with access to all lessons and resources.
-
You can stream our courses on any internet-connected device: phones, tablets, laptops or desktops (PC or Mac).
-
You can download any course assets like worksheets, RAW files, Lightroom presets, and Photoshop actions. Video lessons are stream-only, allowing unlimited online viewing.
-
Yes! When you complete the course, you'll receive a certificate from The School of Photography.
-
Yes, it’s fully online and accessible anywhere in the world. We’re UK-based but have 10,000s of students globally.
-
You’ll need a camera with manual settings and a standard kit lens. DSLRs, mirrorless cameras, and some bridge cameras work fine. If your camera has a dial with “M” (for manual), it’s suitable. You will also need a flash (strobe) lighting kit and a background. We teach the specifics of what equipment to buy in the course so don’t worry about kitting yourself out just yet!
-
No, continuous lighting is not really suited to studio portraiture. This course is based around flash (sometimes called strobe) lighting.
-
This course is suited for intermediate photographers. It is not suited for anyone who hasn’t learnt about the basics of photography. In this case, take our Photography course first.
-
You have 30 days to explore the course. If it’s not right for you and our terms haven’t been breached, just contact us for a refund — no hard feelings.
Plus....

Personalised Support
If you have any questions on our courses, our experts are on hand providing online support to help you on your way.

Get Certified
On completion of all our all courses, you receive a certificate from The School of Photography proving your success!

Become part of our learning community
Join 1000’s of others on our Facebook Page and YouTube channel. Ask questions, complete assignments, share you’re your work and interact with other learners in our private members groups.
Loads of lighting set ups!
You’ll get a bank of downloadable lighting set ups that can be easily recreated in your studio to get professional looking portraits.
Why Choose TSOP?
1000’s of videos, worksheets, lighting set-ups, Lightroom presets, raw files and much more.
Critiques of student’s work.
Monthly assignments.
Exclusive members discounts on photography brands and services.
Live Q&A sessions with pro photographers.
Personalised support.
Learn in your own time at your own pace.
Click below to see why 1000s of others across the world choose us to teach them photography.

TRY BEFORE YOU BUY - FREE PHOTOGRAPHY TUTORIALS


This is real learning delivered by Professional Teachers!
I’ve been teaching photography since 2002, I’m a fully qualified UK teacher, an educational speaker, author, have a photography degree and a post-graduate degree in education. All of this experience goes into bringing you the best education money can buy.
If you want to build a photography career, or just have the ambition to create great photos, TSoP is a great place to start.